
Refacing our Cabinets: Difficulty Level, Price, and Overall Outcome
5 years ago we purchased our lake house in southeast Michigan as an estate sale purchase and we have never looked back. It was in desperate need of a makeover (hello beige!) and piece by piece, we cleaned, painted, styled, and brought it to life. However, the 1960’s kitchen with original cabinetry, brown laminate countertops, and asbestos-filled flooring seemed like the project that would always get kicked down the road. After all, kitchen renovations are EXTREMELY pricey, right? That was until we stumbled upon Front + Center and their DIY cabinet refacing options…

I had heard of people having their kitchen cabinets “refaced” and had always been told that the process costs upwards of 10k for an average-sized kitchen, which was WAY out of our budget for a project on our “second home.” What I didn’t realize, was that the majority of that cost was in labor and that Front + Center was bringing its DIY cabinet refacing supplies to market, aimed specifically at people like us who have a basic understanding of a few power tools and paint and are willing to put in a little elbow grease to get it done!
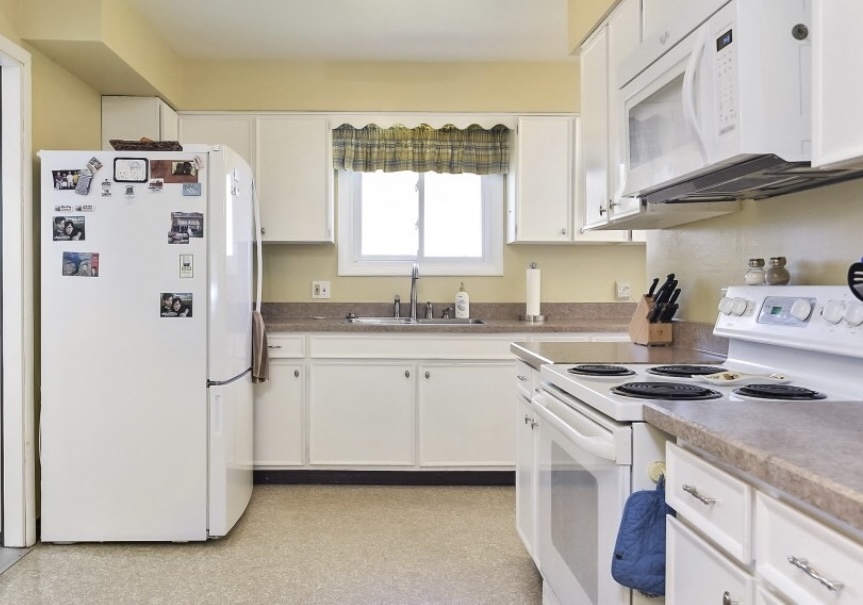
Before we get too deep here, let me show you what we were working with. The cabinet boxes were old, but still in really good shape. The layout of the kitchen (other than the oversized refrigerator that is awkwardly placed) worked for us, which meant that there was no need to rip out all of the cabinets. This is one of the main factors to consider when deciding if refacing is right for you; does your current layout work for you and your family? The second decision was whether to paint the cabinet boxes (hybrid refacing) or do a full reface. The full reface, which is offered by Front + Center is done using a 3M backed material to “skin” your old cabinets. I chose the painting option to save money and for the ease of installation. If your cabinet boxes are in really rough shape, you may choose to go with a full reface.
Step one was to order cabinet finish samples from Front + Center. You can order free samples here and they arrive in 7-10 business days. Be sure to pull the protective film off of each sample to see an accurate finish (coming from someone who did NOT)! We decided to take the plunge with a deep blue color called Deep Sea. It seemed like the perfect way to add color to the lake house and with plans for a white marble backsplash and countertops, I just couldn’t resist!
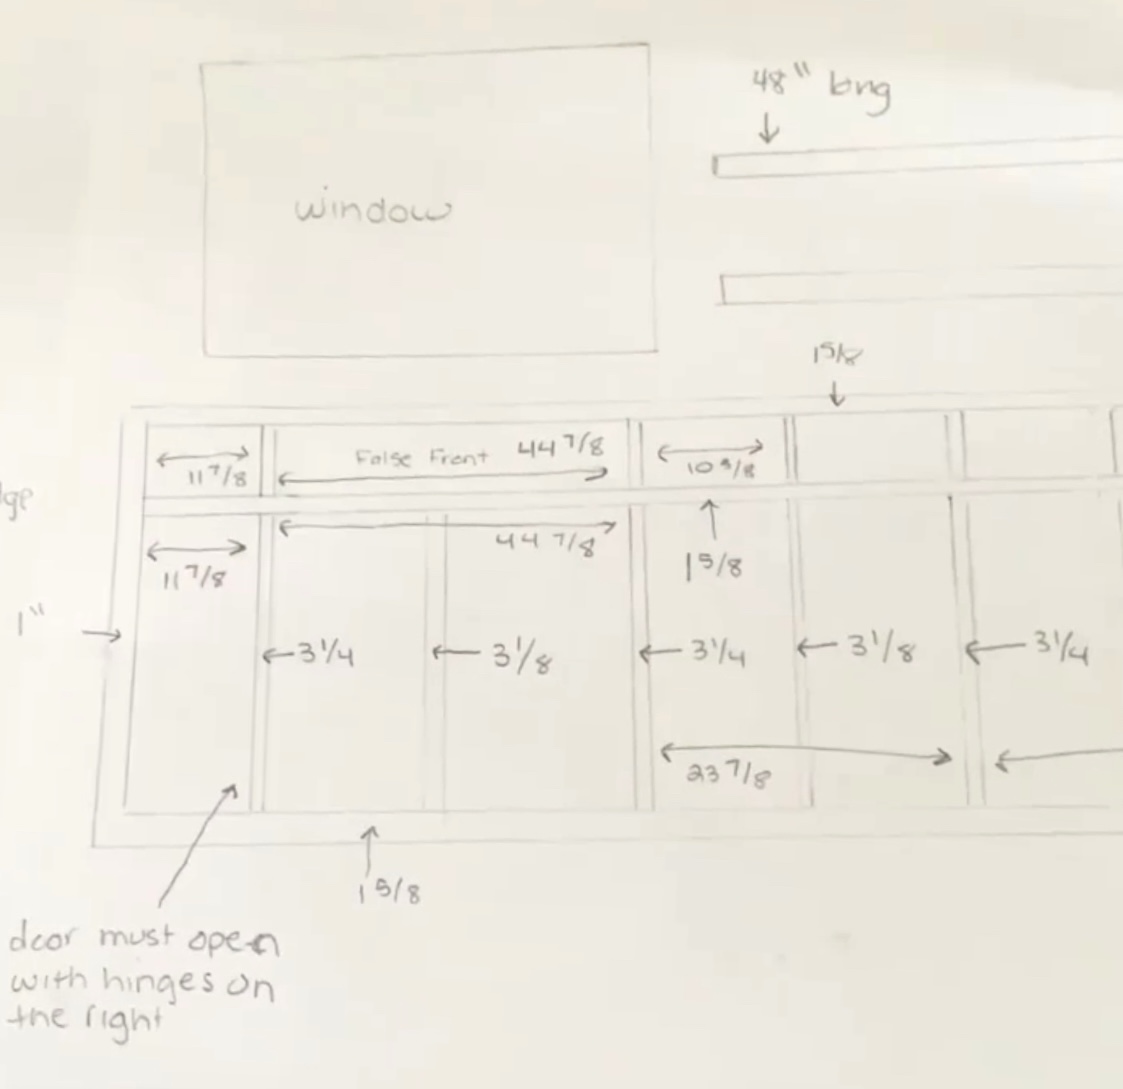
Once you have decided on a color, the next step is to measure. While this can seem intimidating at first, Front + Center has worked hard to make it DIY-friendly and even has an entire section of their website dedicated to walking you through the process! You can find the videos and measuring steps here! All I had to do was measure my openings and add .5″ to each side. Since the doors come pre-drilled for hinges, the hard part is done for you!
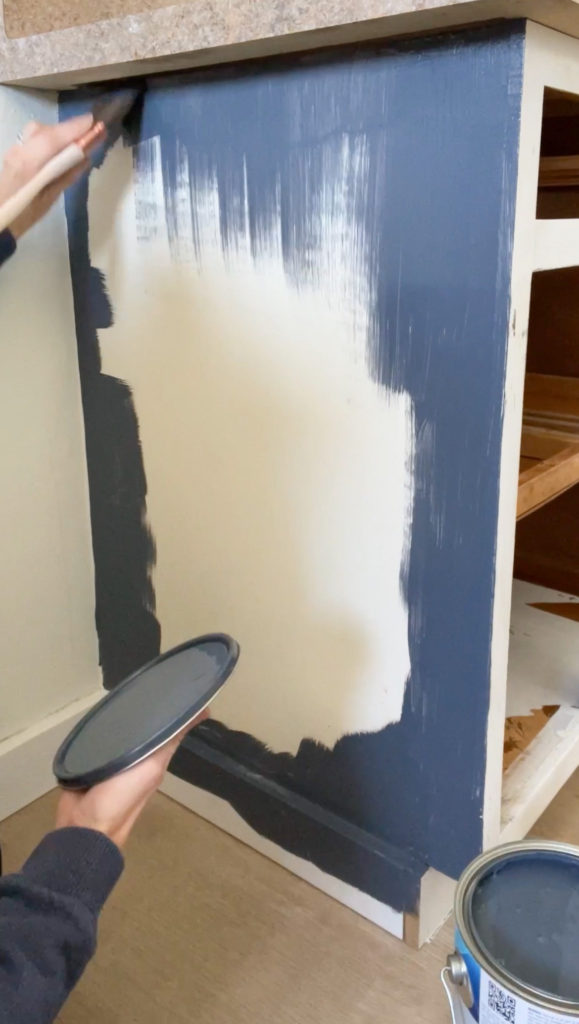
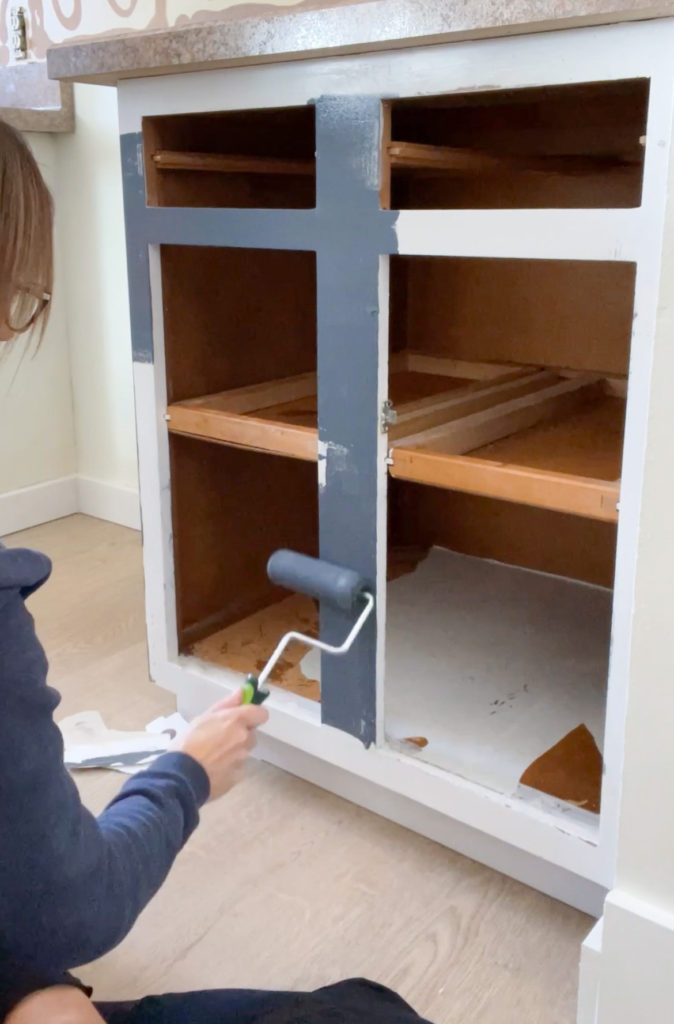
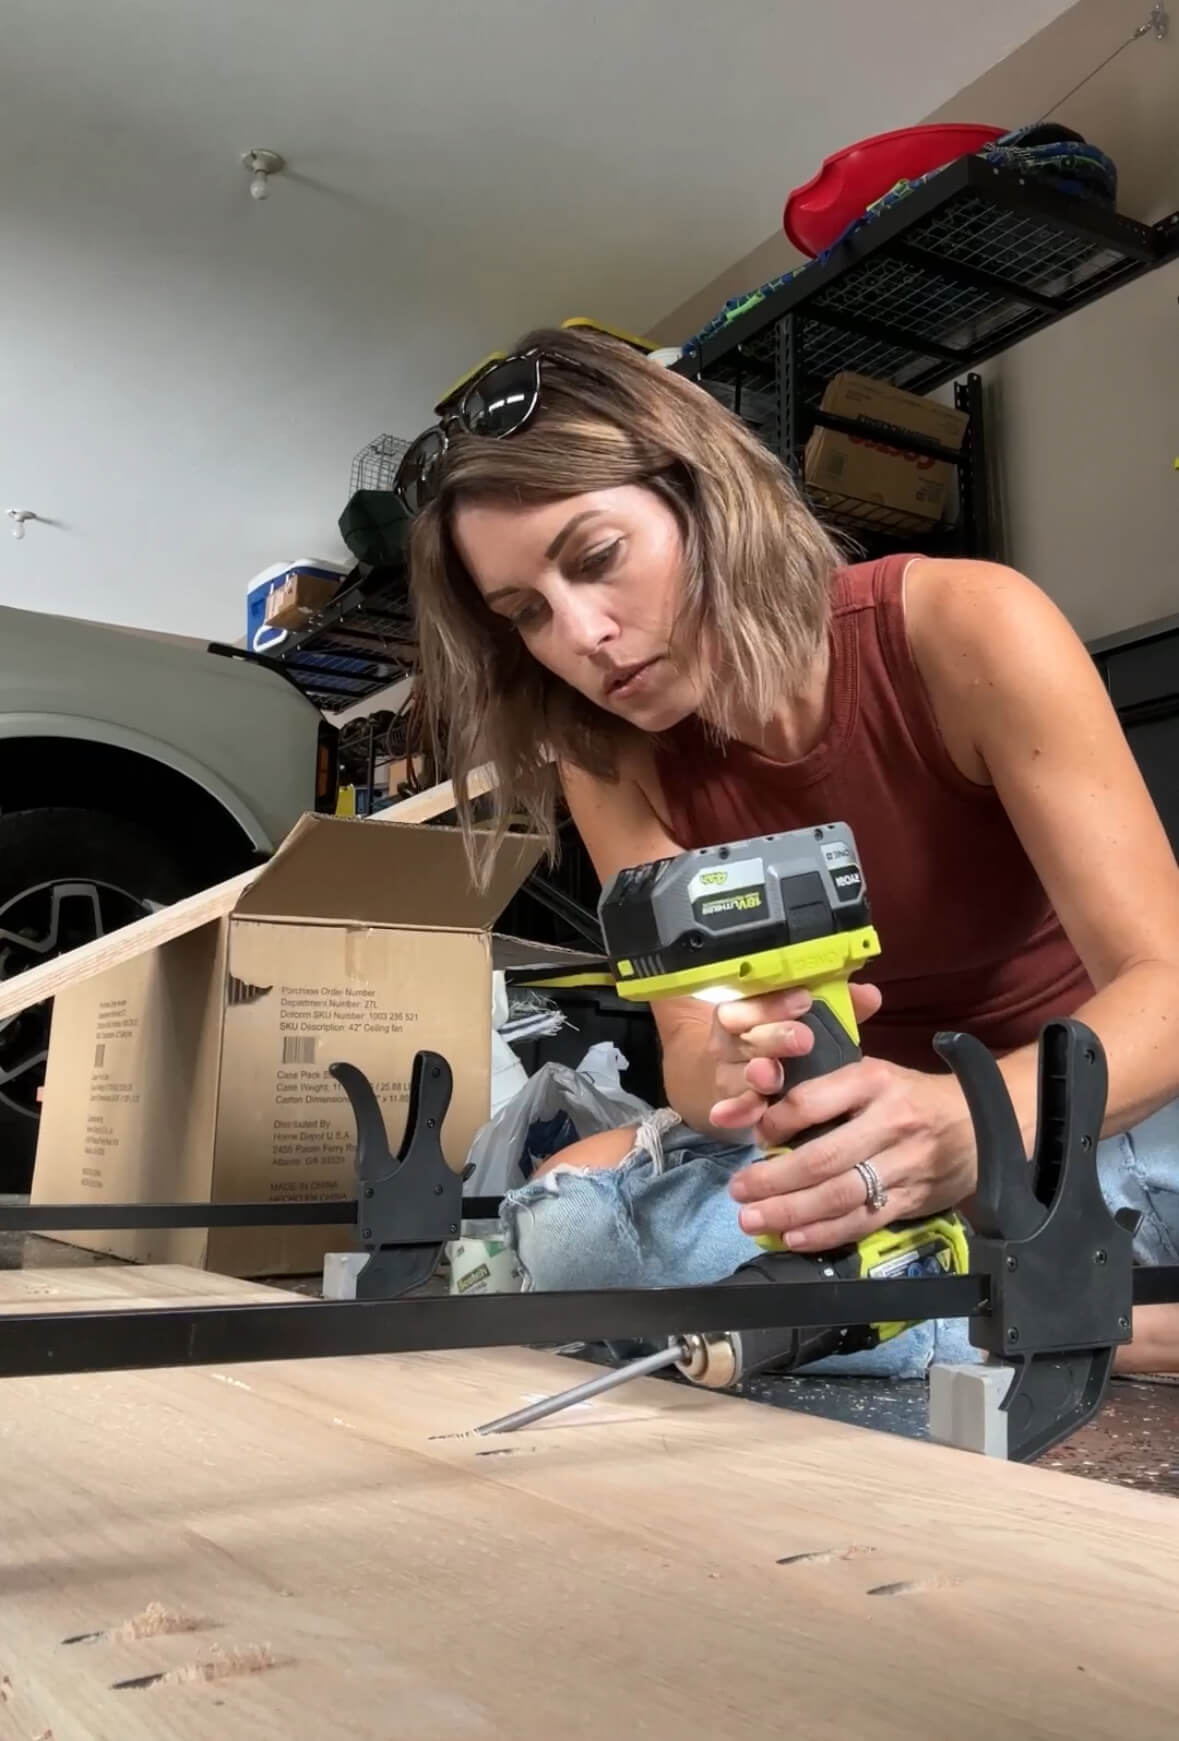
Once the cabinet faces had been measured you are able to choose from 4 different door styles and 8 colorways! The online ordering process is seamless and the cabinet refacing supplies will be shipped directly to your home in a few weeks. While waiting for the door and drawer fronts to arrive, I focused on prepping and painting the cabinet boxes! I removed the old door/drawer fronts and all hardware. Using wood filler, I patched old hardware holes, as well as any dents or dings. Next, I gave all of the cabinet boxes a light sanding to rough up the old finish and prep for paint. When it is time to choose your paint, simply take your Front + Center samples to your local paint store (I chose Sherwin Williams) and ask for a cabinet-grade paint. This will help to achieve a higher level of durability which is essential in a kitchen or bathroom! Trust me, it is worth the price!
My cabinet refacing supplies arrived just in time and they were packaged beautifully! Each door and drawer face is also coated with a clear plastic film, which allows for added protection during the installation process. We opted for a 1/2 inch overlay, which is highly recommended for DIY applications. This gave us a clean, modern look, without as much room for error as the full overlay option. When purchasing hinges, we chose the 1/2 overlay hinges with a soft close option. All you need is a rubber mallet to knock the hinges in place and a drill to install them on your boxes.
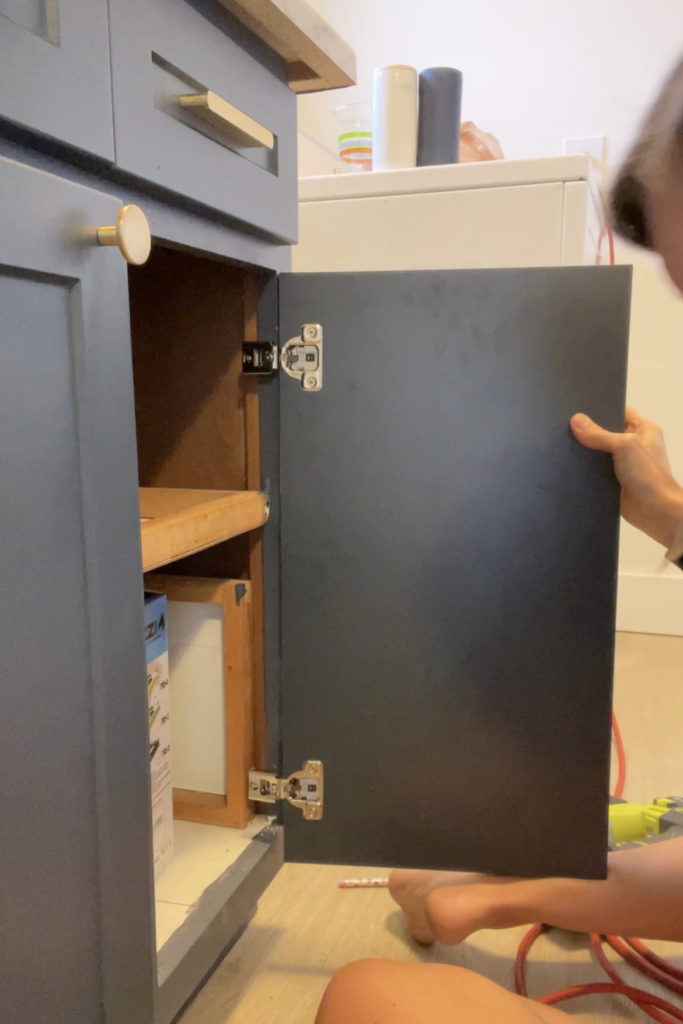
The final step was to add decorative hardware and remove the clear protective film from each door and drawer face! I used the Kreg Cabinet Hardware Jig to get the placement just right.
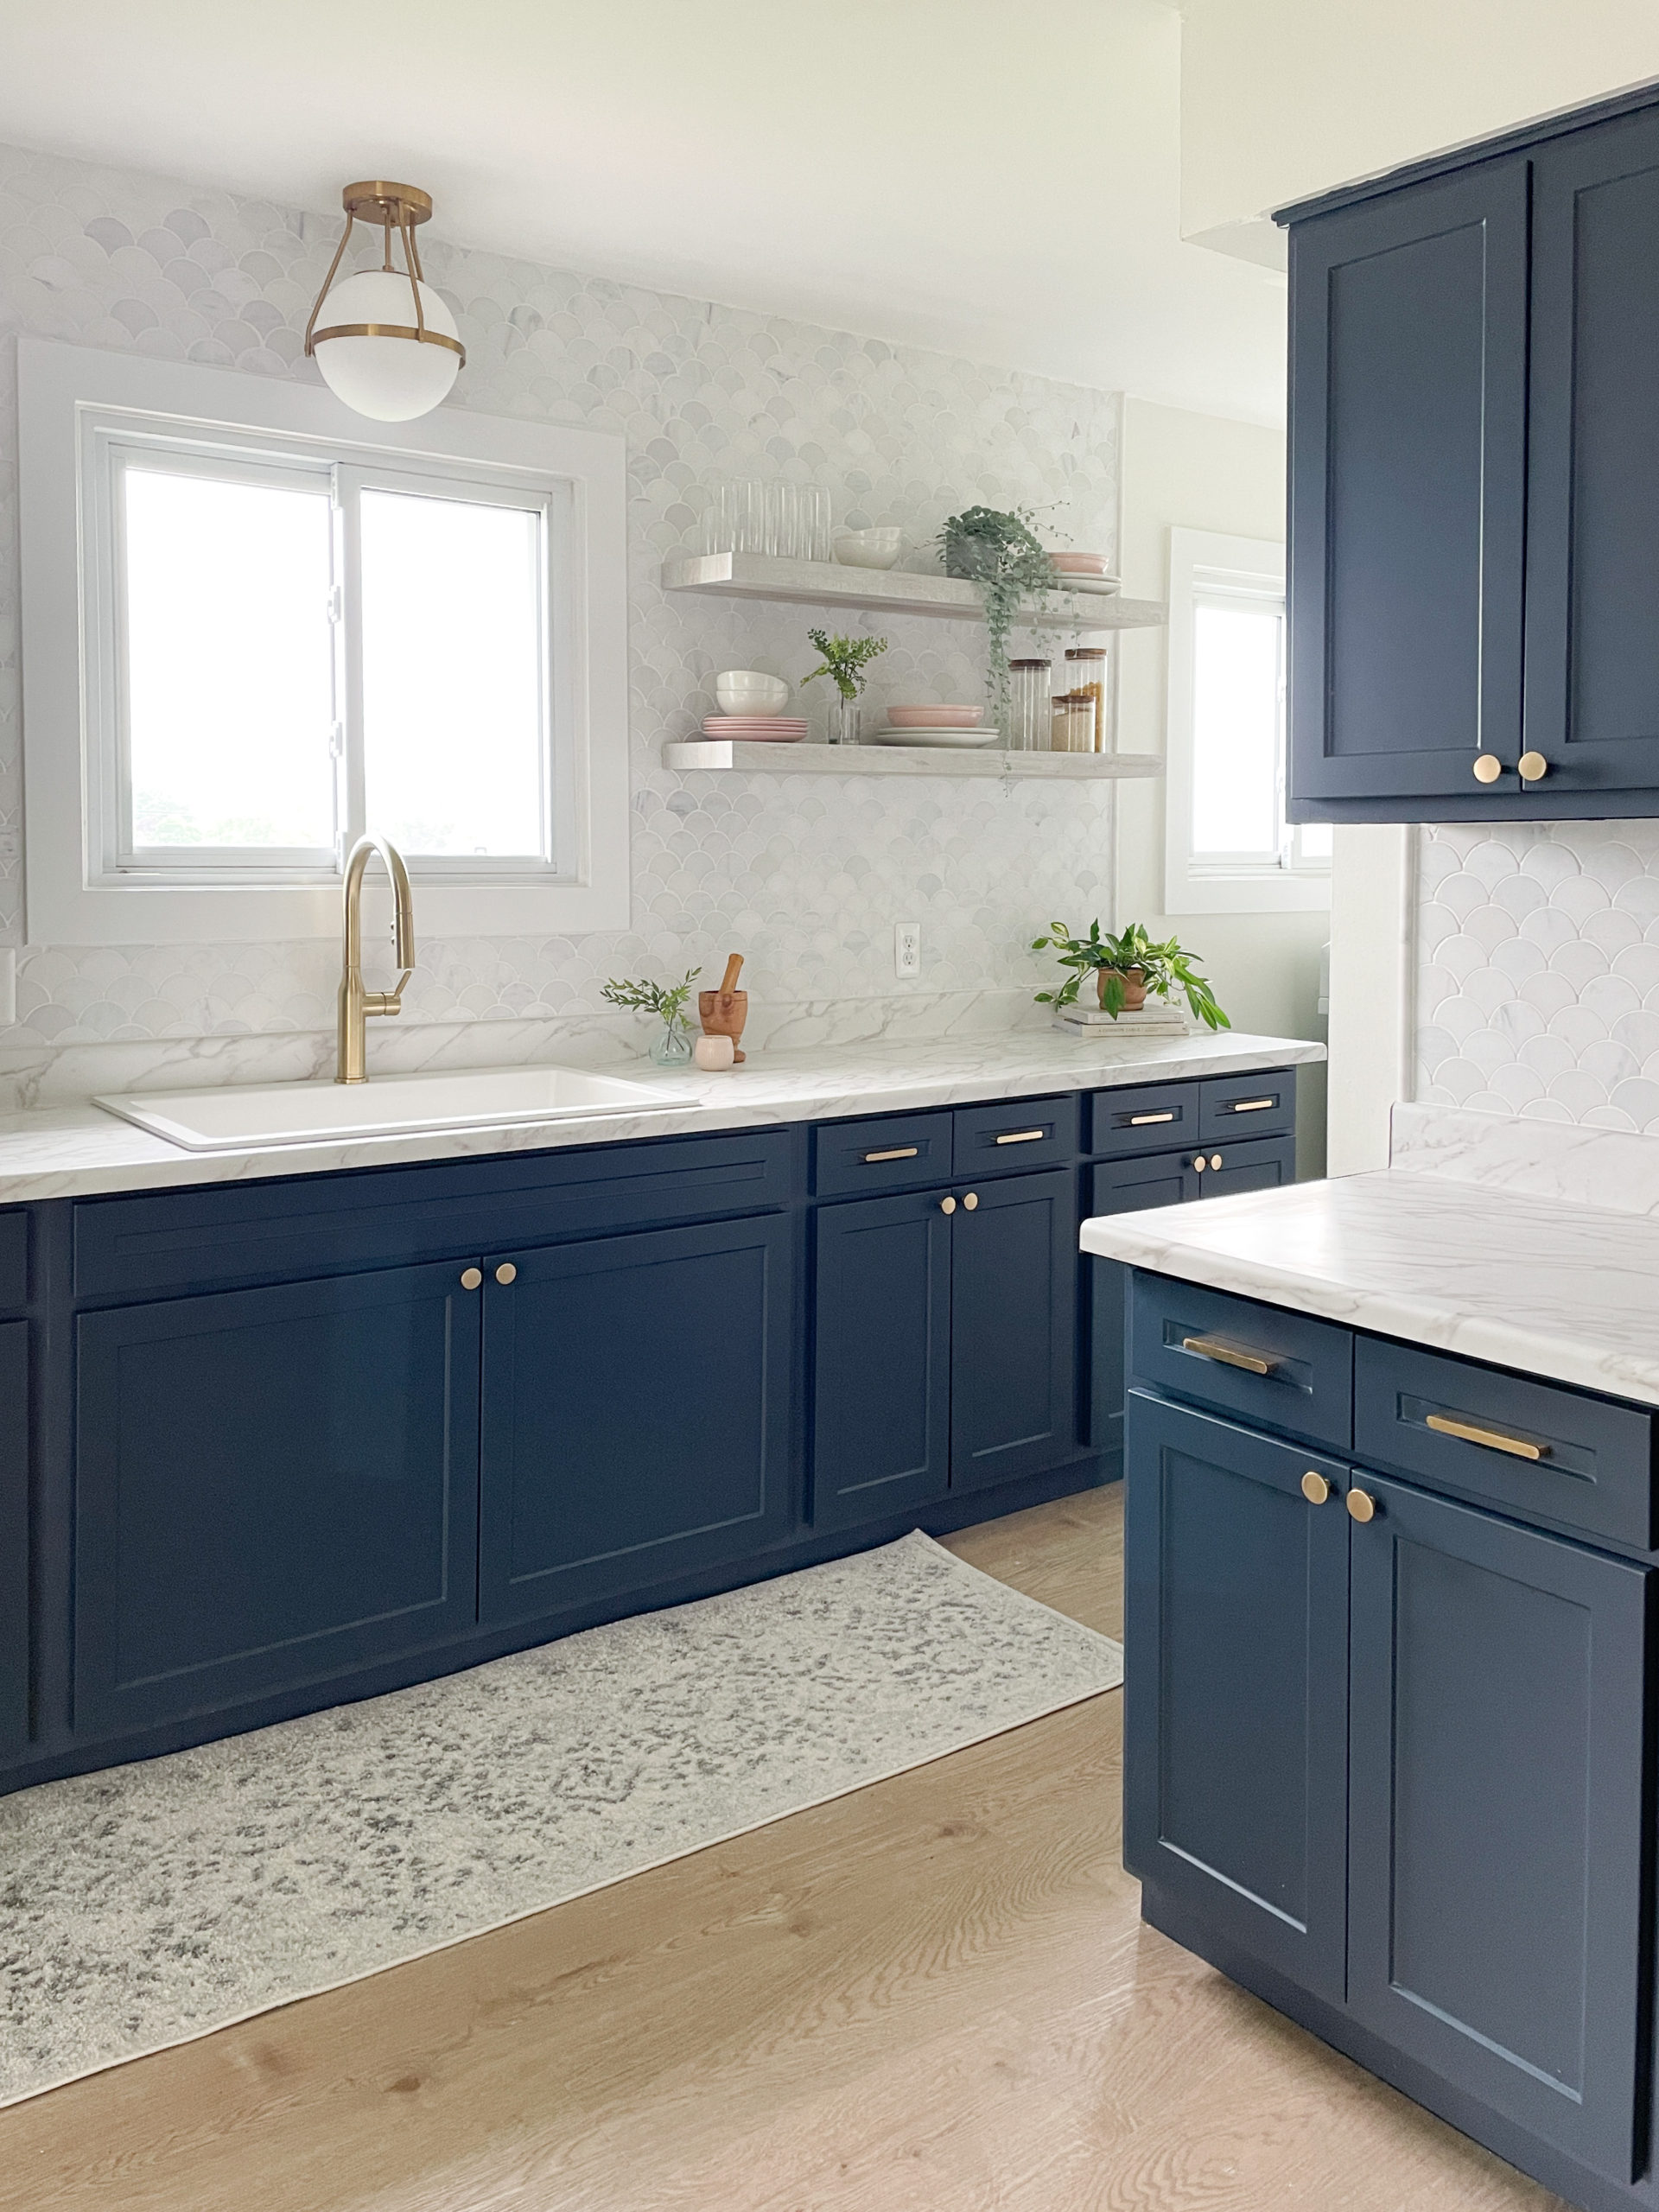
Final thoughts and pricing: I honestly wasn’t sure what to expect when we started this process. I have seen professionally refaced kitchens and I couldn’t imagine that mine would look just as good for less than 1/3 of the price. That’s right, 1/4 of the price! My 19 cabinet doors and 10 drawer fronts came to a grand total of $3100 INCLUDING tax and freight. The kitchen has been done for almost a month now and we are blown away by the quality and durability of the doors and drawer fronts. The entire process was seamless and the DIY install couldn’t have been easier. Our dream kitchen is a reality and we owe that to Front + Center! They have been kind enough to offer me a code to share with you for 20% off your order. Use the code LAKE20 at checkout.
XO Melissa


Thanks for your blog, nice to read. Do not stop.