Jump to Supply List
Do you have an outdated drop ceiling in your basement? Did you know there is a way to update it without breaking the bank? Not only can you upgrade your basement drop ceiling on a budget, but you can complete this easy DIY project in a single day! My new black drop ceiling was incredibly easy to complete, and it’s the ideal DIY for beginners.

What is a Drop Ceiling?
Even if you haven’t heard of a drop ceiling before, chances are you’ve probably seen one. For example, think of the last time you looked up at the ceiling while lying back in a dentist’s chair. That grid of squares or rectangles on the ceiling? That’s a drop ceiling.
A drop ceiling is a secondary ceiling that hangs below the main structural ceiling and can serve several purposes. It typically covers up plumbing, HVAC, and electrical structures. It can also be used to create better acoustics and ventilation or to hide any imperfections on the main ceiling.
Drop ceilings are also called false ceilings, suspended ceilings, or T-bar ceilings and are mostly found in stores or commercial buildings. That being said, I’m sure you’ve seen one in the basement of a house as well.
If you have a drop ceiling in your own home, likely in your basement, you know how awkward and unattractive they can look. Luckily, I’ve got an economical way to fix up that ceiling. And best of all, the installation process is super easy!
How to Tile Your Drop Ceiling
So let’s dive into how to transform that drop ceiling in your basement. Follow these steps and you will have the look you want in no time.
1. Select your Ceiling Tile
There are typically two sizes of ceiling tiles: a 2’ x 2’ square or a 2’ x 4’ rectangle (also known as a panel). Before you get started, look up at your ceiling grid and determine which size you need. Then you can pick your tile design!
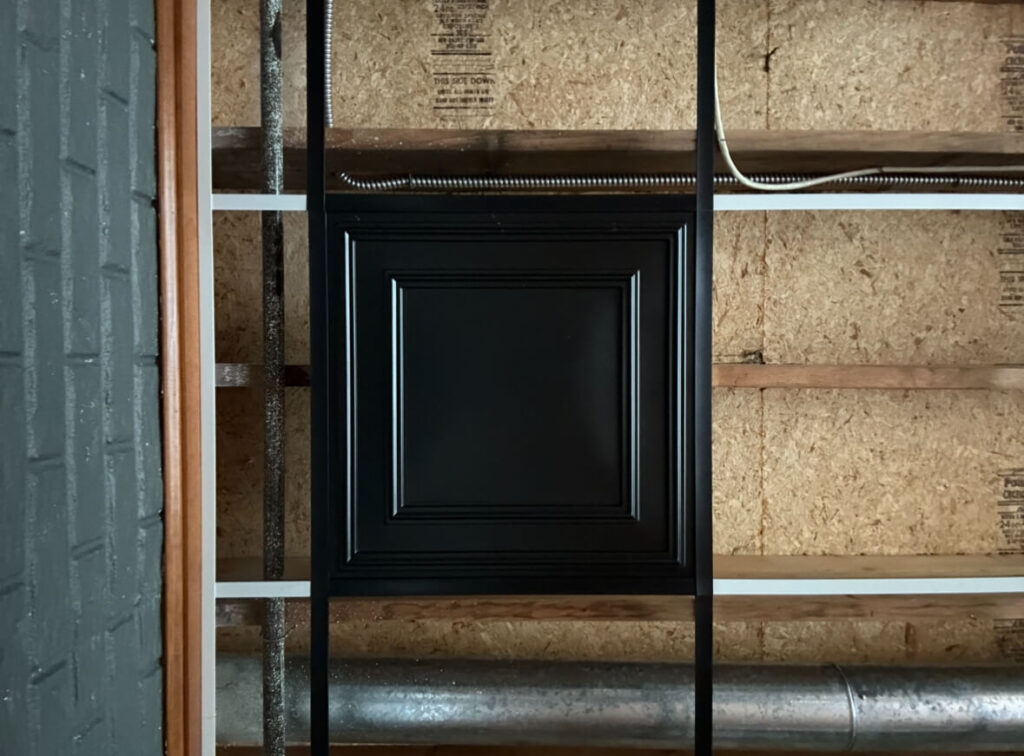
I stumbled upon Ceilume ceiling tiles while I was working on my basement, and I’m so glad I did! They were perfect for my basement drop ceiling with a variety of styles to choose from and helpful installation instructions. I used the Cambridge tile in black and loved it. While you’re shopping for tiles, make sure to pick up some EZ-On Grid Covers in a matching color to cover up your existing grid.
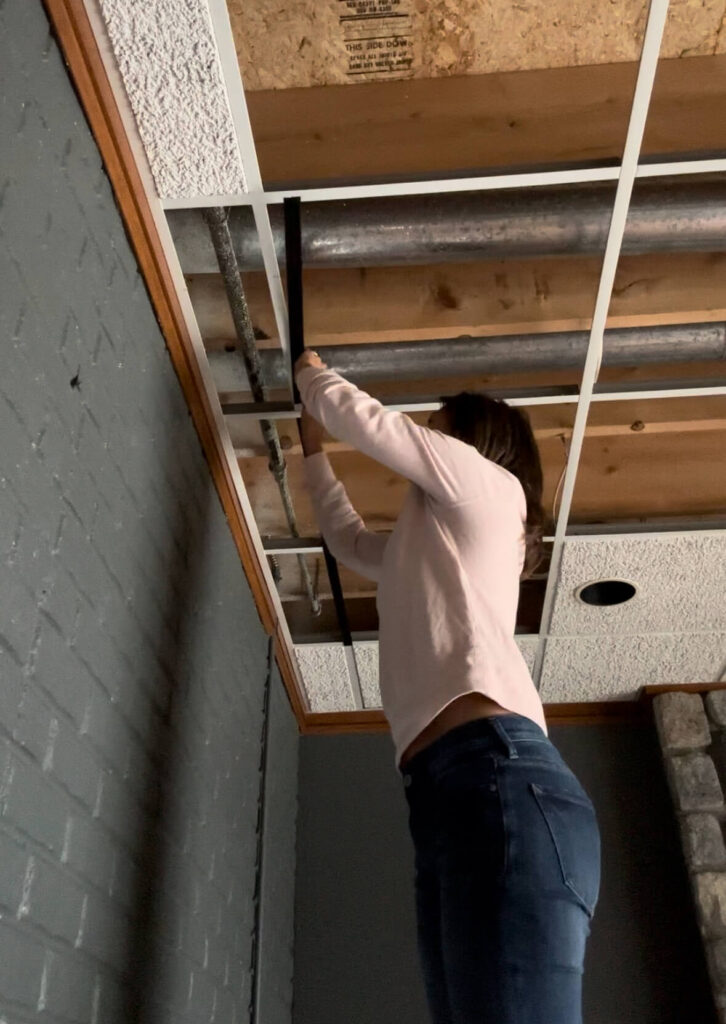
2. Clean Your Room and Ceiling Grid
When your ceiling tiles come out of the box they might have a slight static charge which will attract surrounding dust and debris, so make sure to vacuum well before you get started.
Next, clean your existing ceiling grid and wipe it down with a damp rag to get rid of any more static electricity.
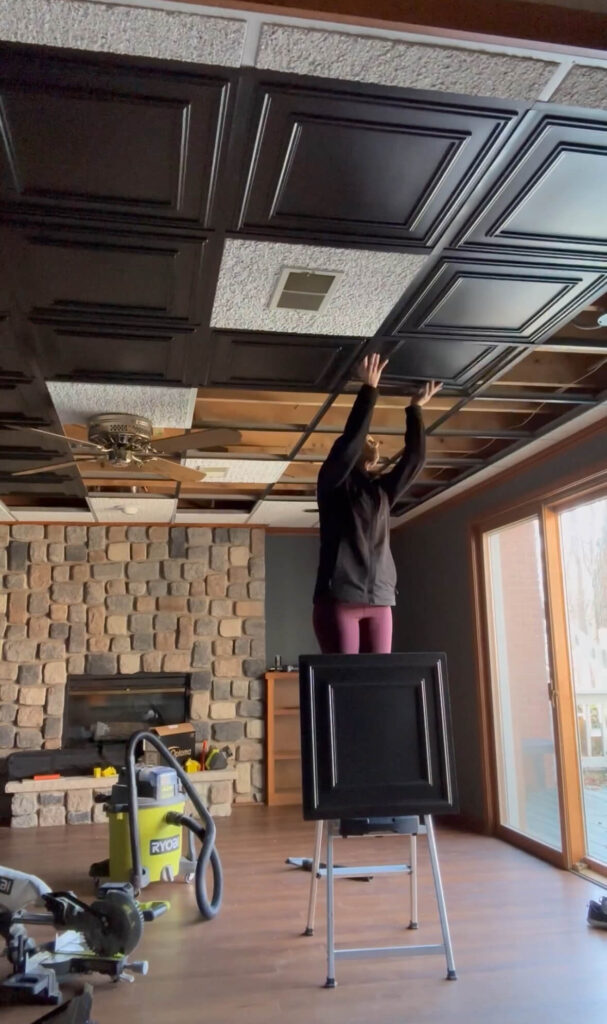
3. Add the Grid Covers and Pop in the Ceiling Tiles
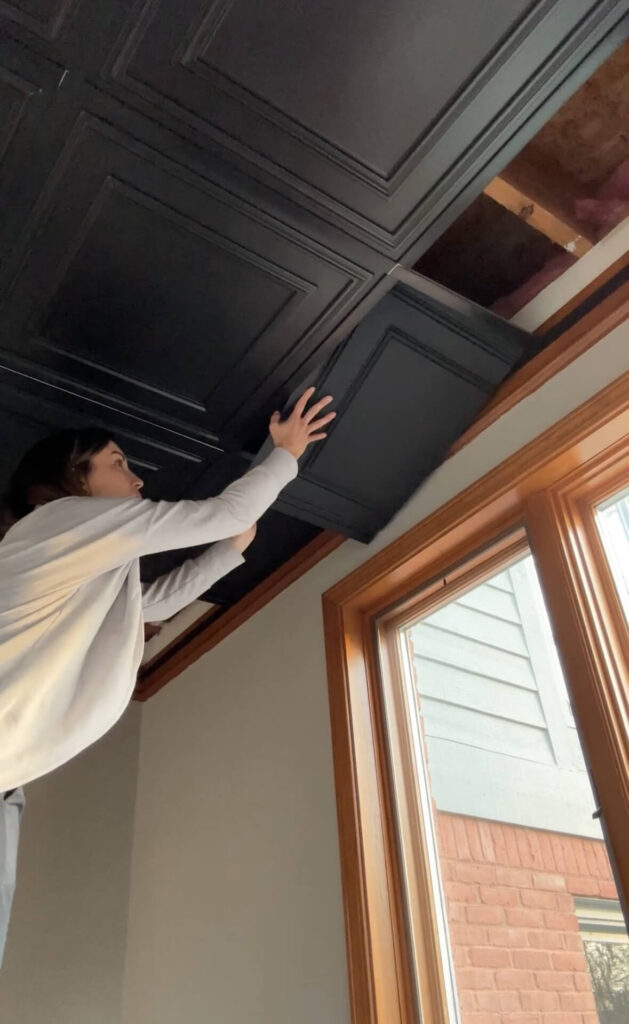
Now that your space is prepped, it’s time for installation! You can slide on your grid covers before or after you pop in the ceiling tiles. I liked attaching the grid covers first and then adding the tiles afterward. Next, simply pop in the ceiling tiles.
Start with the grid squares in the middle of the ceiling and work your way out to the edges near the sidewalls. You’ll notice that the grid spaces near the perimeter of the ceiling are not full-sized and will require less-than-full-sized tiles. It’s an extra step, but nothing too tricky.
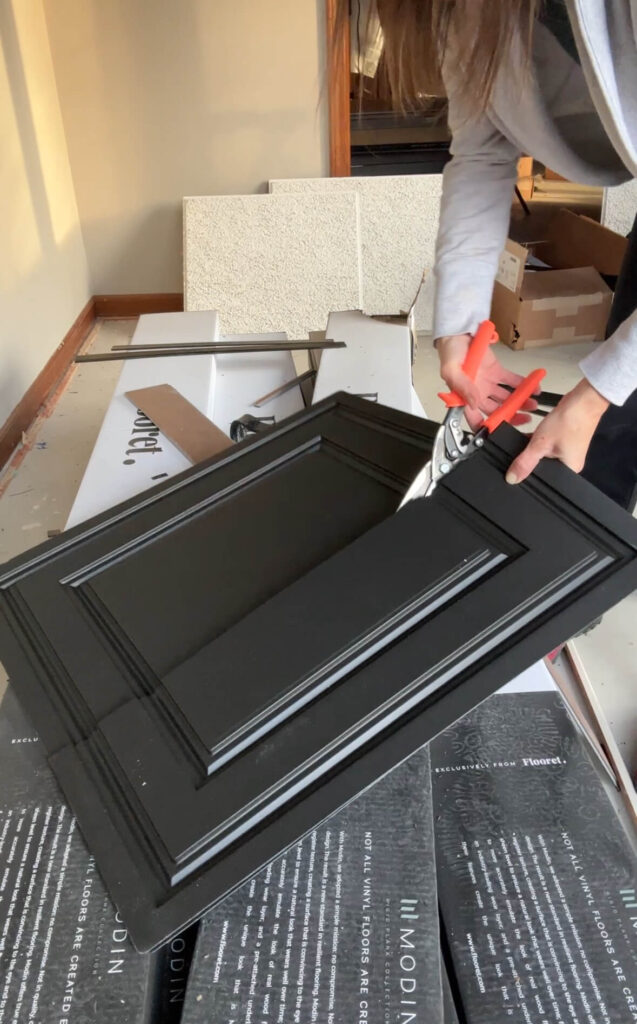
Measure the partial grid square so you know how much to trim off the tile piece. You can also use your old tiles as a pattern. This is what I did and it made measuring easy! Using your measurements, draw a cut line with a pencil. I used a ruler when I drew my line to make sure my cut would be straight and accurate. I used these heavy-duty scissors to cut my tile and they worked great.
Once your tile piece is cut to the correct measurement, go ahead and pop that into your grid. And there you have it! You just transformed your old and tired drop ceiling into a major feature!

Products Needed for a Basement Drop Ceiling
Are you ready to transform the drop ceiling in your basement into something more styled and modern? I’ve linked all the products you’ll need for this project below so you can get going on this fantastic project!

Basement Drop Ceiling Tile Upgrade
This basement drop ceiling project was great for so many reasons! It was cost-effective, easy to install, completed in one day, and made such a difference in the overall look of the room.
If you’re getting going on your DIY journey and not sure where to begin, check out these other great DIY projects:
I hope you enjoy your drop ceiling tile upgrade, and make sure to tag me on Instagram with your finished project. I would love to see it!