Jump to Supply List
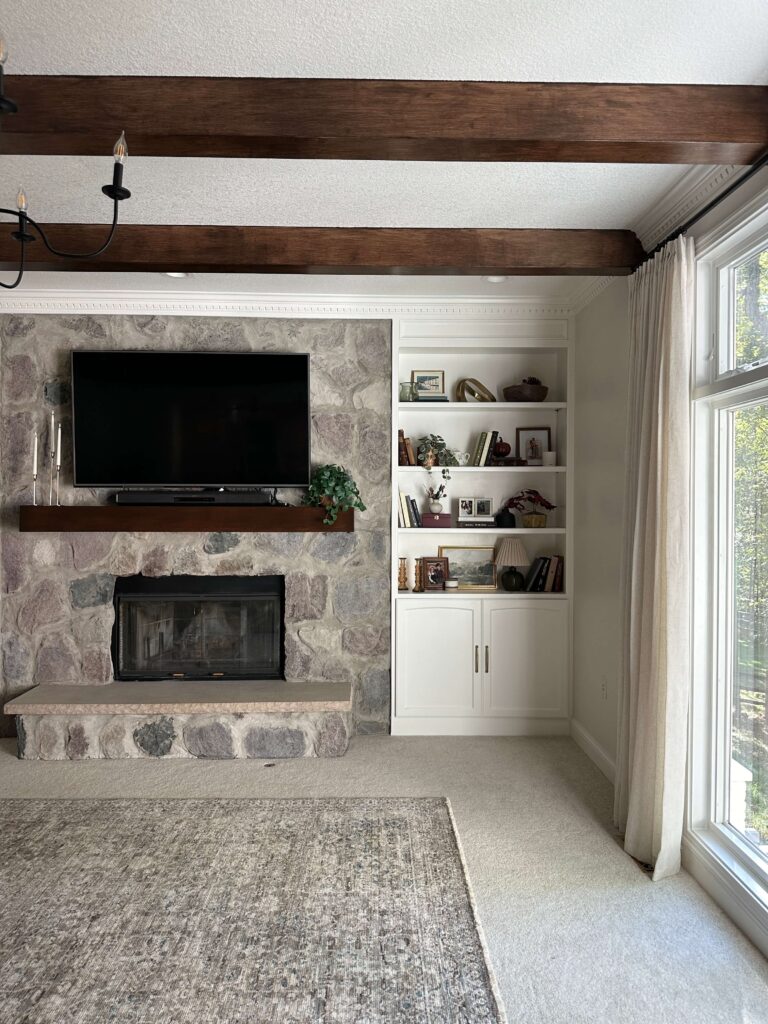
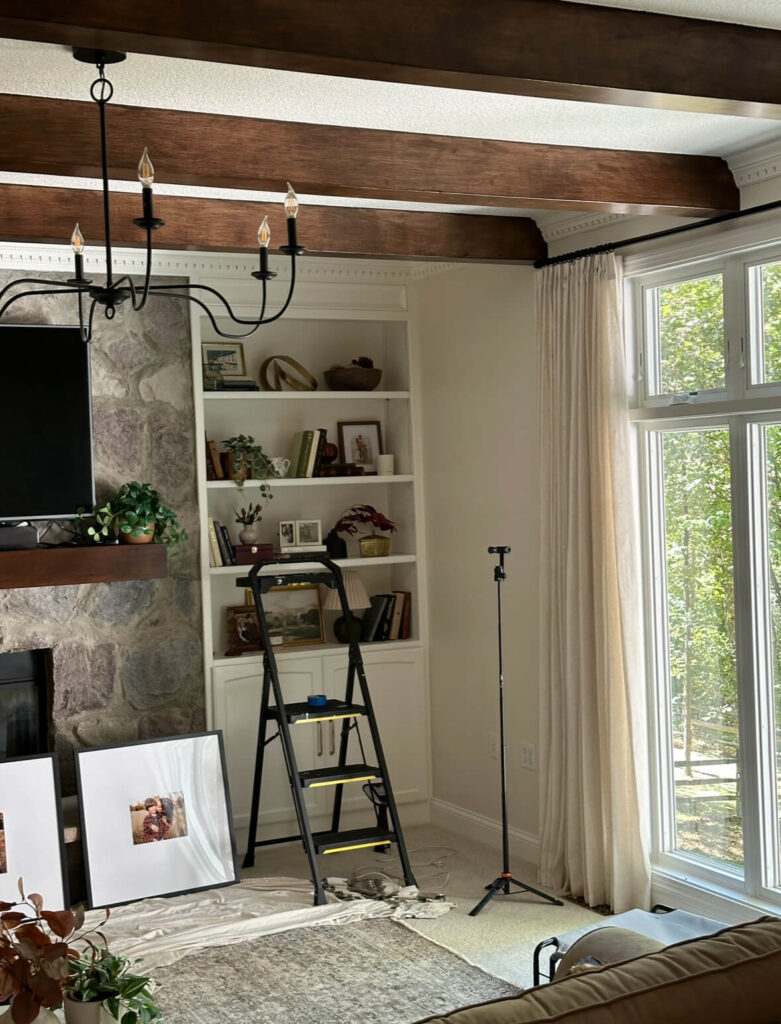
For years I’ve seen people share their faux wood doors and faux wood furniture paint, but I never believed it would actually work for me. After finally trying this technique out myself, I can confidently say I’m a big fan of faux wood paint now! If you’ve been curious about how to get that perfect wooden look with paint, check out how I transformed my ceiling beams with painted faux wood!
Painted Faux Wood
I have these amazing beams on the ceiling of my living room that were in desperate need of an update. The beams were originally wood but a while ago I painted them Behr Smokestack (a warm taupe-gray color).
Looking back, I realized I made a big mistake! Wooden beams are so beautiful and add lots of dimension to your room. So I decided it was time to return my wood beams back to their wooden glory. Why Use Faux Wood Paint?
First off, let’s talk about faux wood or the “wood look” that I’m sure you’ve seen before. If you want something in your home to look like wood you have a couple of options. One option is to buy or make the item out of real wood. Another option is to use the faux wood paint technique to achieve the same wood look.
The faux wood paint option is becoming more and more popular because it’s a cost-effective and time-saving way to get the overall look you want. I used the faux wood paint technique for my wooden beams and loved it. I also loved that I didn’t have to strip the existing paint! The existing Behr Smokestack worked perfectly as a base coat, but more on that later.
How to Paint Faux Wood
Do you have something in your home you want to give the “faux wood” treatment? Here are step-by-step instructions for how I painted my faux wood beams.
1. Prep the Beams
Before I started on this project, I noticed that there were some pretty big gaps between the beams and the ceiling. Right away I knew I needed to fill those gaps before I went any further on this project. First I stuffed some backer rods into the gap and then filled the remaining seams with caulk. I let that dry completely before I moved on to taping.
When prepping these beams, I forgot to tape them as part of the prep and then had to tape them the next day before I started painting. As I was getting ready to paint I realized I needed to protect my ceiling, especially because I had to dry brush over the stain in a sort of uncontrolled way. Dark Walnut gel stain accidentally smudged on a white ceiling? Not a good look.
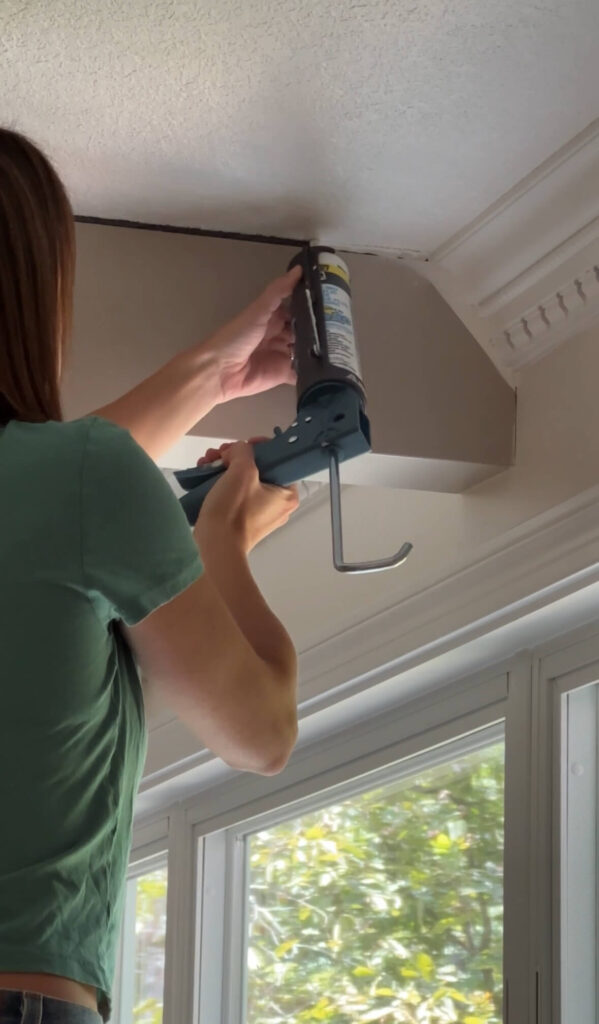
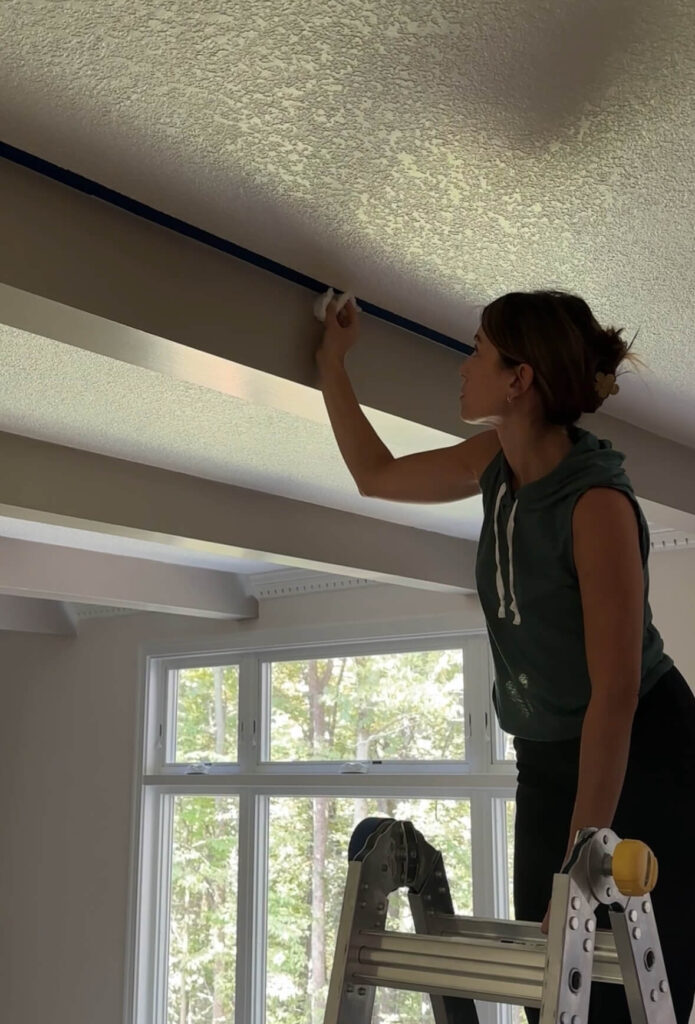
Whether your beams are already painted or still need the perfect base coat, you don’t want to skip this step! Use painter’s tape where the beams meet the ceiling to keep the stain from ending up where it shouldn’t.
Quick tip: The key to good, clean paint lines is to go over the painter’s tape edge with a wet rag to really seal it. This helps to make your paint lines nice and straight without excess bleeding.
2. Paint a Neutral Base Coat
Once I filled in the beam gaps and taped the ceiling, it was time to start painting. My beams were already painted in Behr Smokestack, which happens to be a great base color for the faux wood process!
I recommend having a neutral shade base color on whatever project you’re painting for a faux wood look. Choose a lighter or darker neutral base color depending on what faux wood tone you want. This base color is the tone that you will see through the gel stain when you dry brush it.
Paint that base coat, and allow it to completely dry before moving on to the next step.
3. Add Gel Stain
After the base coat is dry, it’s time to get that gorgeous faux wood look!
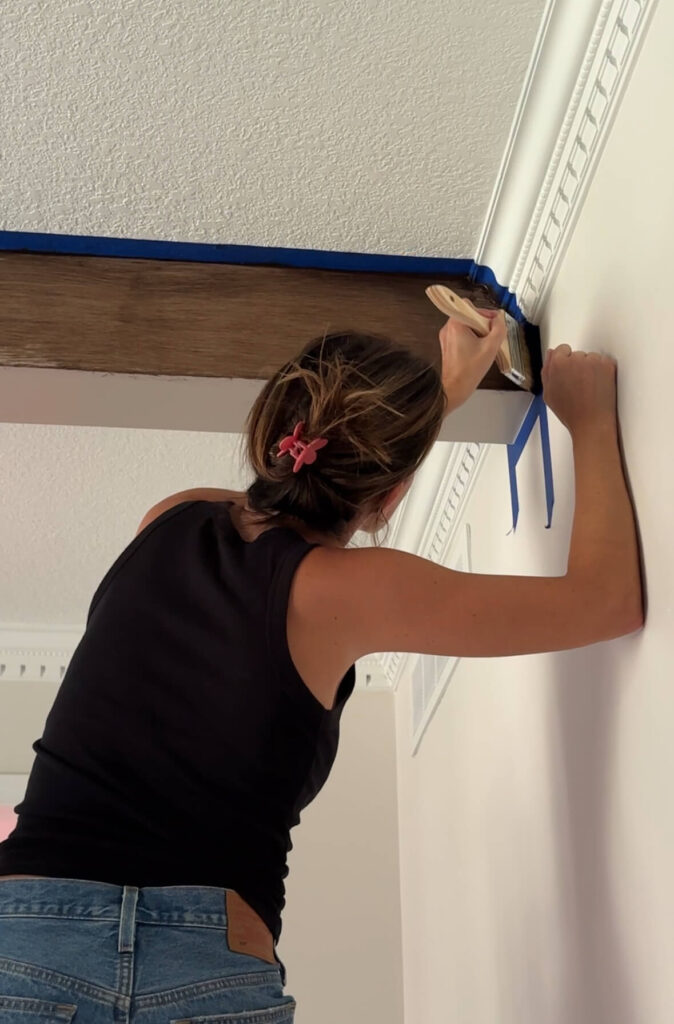
For my beams, I used this gel stain and I loved the look I got. Give the stain a good stir before you start applying it to your project. Then apply the stain with a foam brush or a lint-free rag. I wanted to keep the application super light, so I used a foam brush and applied it with a lighter hand.
Now, here’s where the faux wood magic happens! To achieve that wooden look, use a 4” dry chip brush and brush…and brush… and brush… until the stain has the look and texture that you like.
And just like that, you now have a wooden finish without breaking the bank!
Products Needed for a Faux Wood Paint Project
This DIY project doesn’t require a lot of materials. Here’s everything you’ll need for your faux wood paint project:
- 4” dry chip brush
- Backer rods (If you need to fill in a deep space like I did)
- Base coat paint (I used Behr Smokestack)
- Caulk
- Foam brush
- Gel stain (I used Varathane Dark Walnut gel stain )
- Lint-free rag
- Painter’s tape
Remember to choose a base coat and a gel stain that gives you the tone of wood you’re going for. Use a lighter base coat for a lighter wood look or a darker base coat for a darker wood look.
Faux Wood Paint
I love my ceiling beams now and I’m so glad I tried the faux wood paint technique! Overall, it wasn’t too big of a project. I just prepped my beams with caulk and painter’s tape, then brushed over the existing neutral color until I got the look I wanted.
So if you have a project that you want to give the faux wood treatment, do it! Just make sure your workspace is prepped, you have a nice neutral base coat of paint, and brush brush brush that gel stain!
Don’t have beams yet? Looking to build your own? The process is very similar to my DIY Fireplace Mantle Tutorial, which you can find on my blog.
Looking for more great paint DIY projects? Here are a few of my favorites:
When your project is all finished, be sure to tag me @lakeandlumber in the photos you share! I would love to see your DIY transformations.
