
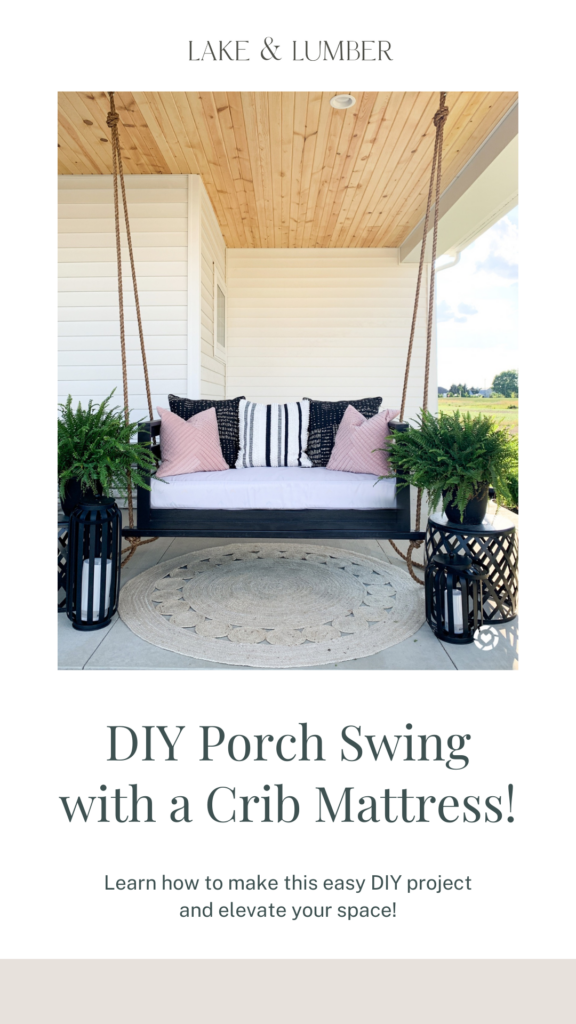
You deserve to live in a home you LOVE, and that takes some work…but don’t let that intimidate you! In the last four years, I’ve learned how to confidently use power tools and tackle home improvement projects with ease. And you can learn how too. So if you’re ready to start making your house a home, then a great place to start is with this DIY Porch Swing using a crib mattress.

I was inspired by @Plankandpillow back in June 2020, and I knew I really wanted to make one that felt like my own. Can we all just agree that sitting on your porch, swinging on something you made yourself is an amazing feeling? But…want to know the best part? This porch swing can be done in one weekend with minimal frustration (a major perk when it comes to DIY).
So let’s dive in on how to make it happen.
What You’ll Need for this DIY Porch Swing
I originally got my plan for this project from Plank and Pillow, and then did a few modifications to make it match what I was picturing in my head. I’ll walk you through those few changes throughout the post, in case you want to make them for your porch swing too.
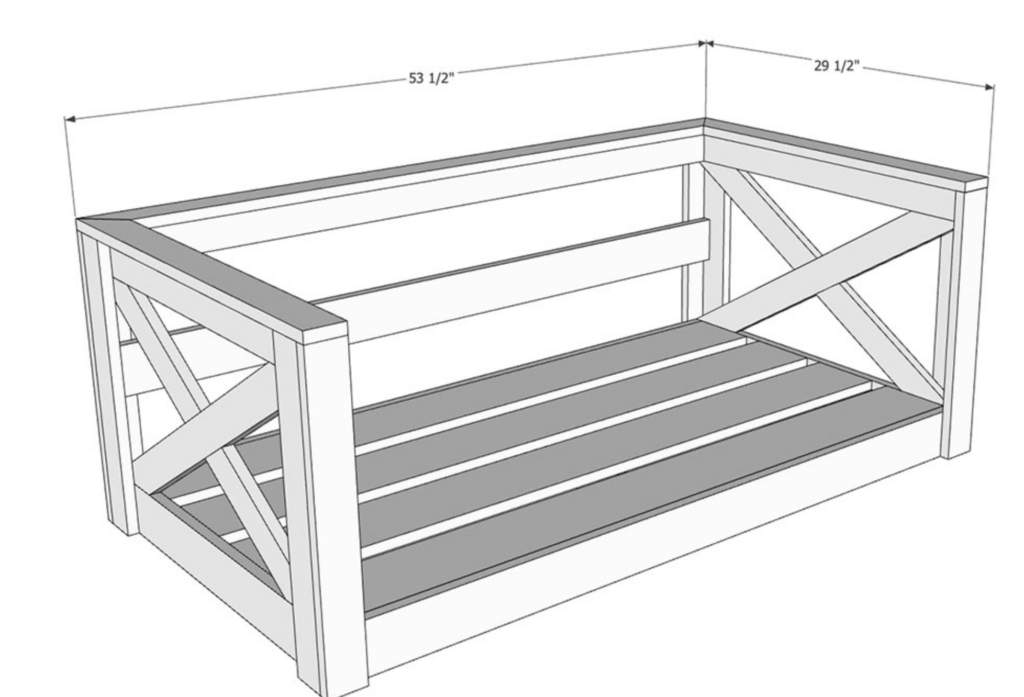
But to get started, I recommend getting this plan from Plank and Pillow. The nice thing about this swing is that it’s a little smaller than other swing plans. Since it’s made using a crib mattress this swing will still be a good fit for you even if you don’t have a huge porch.
Here’s what you’ll need to build your porch swing using a crib mattress:
- Plank and Pillow Crib Mattress Porch Swing Plan
- Kreg Pocket Hole Jig
- Tape Measure
- Wood Glue
- Wood Stain or SW Black Magic Paint (if you want it to match mine)
- Wood Filler
- Miter Saw or Circular Saw
- Sand Paper
- 18 Gauge Brad Nailer
- 6 pieces of 1″ x 3″ x 8′ select pine
- 2 pieces of 1″ x 2″ x 8′ select pine
- 4 pieces of 1″ x 6″ x 6′ select pine
- 3 pieces of 2″ x 4″ x 8′ framing lumber
One of the modifications that we made was adding 2x4s at the bottom for easy hanging. We did it this way because we didn’t want to use eye hooks.
On the bench plans we used, there was a farmhouse-style criss-cross. We preferred a cleaner, more modern horizontal rail.
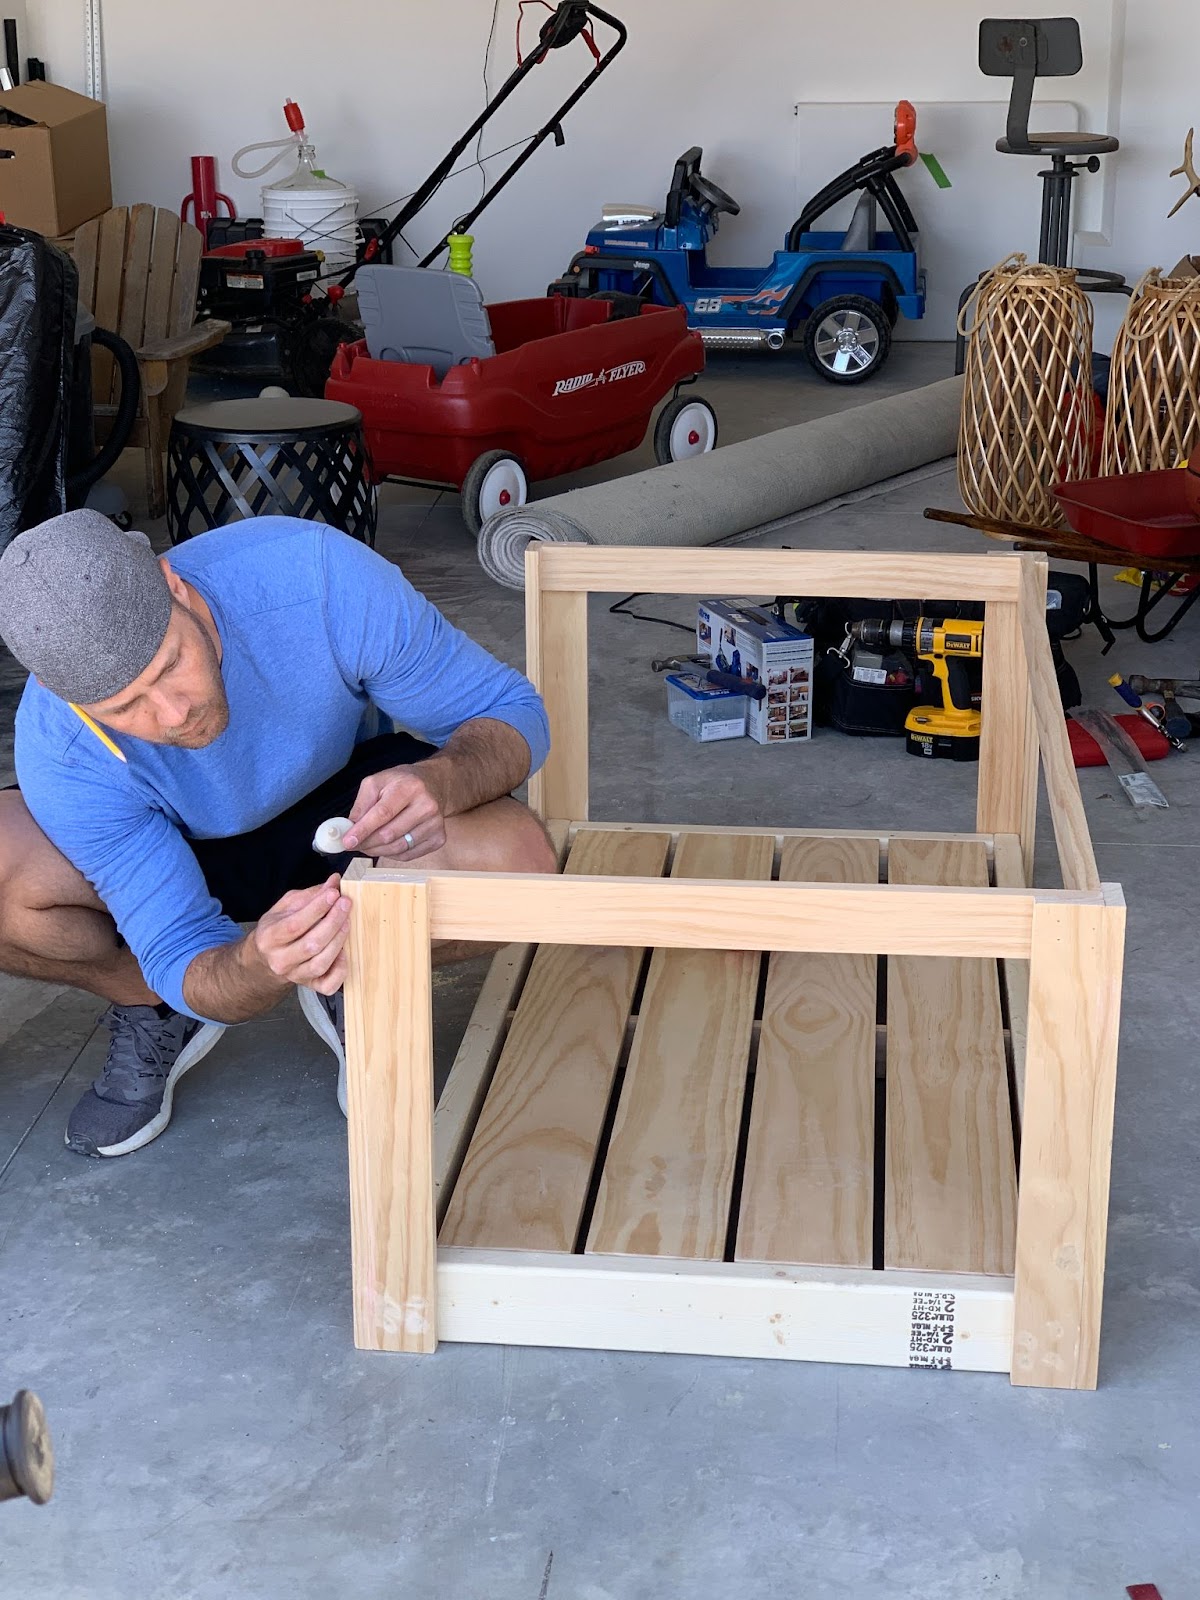
Building the Base of Your Crib Mattress DIY Porch Swing
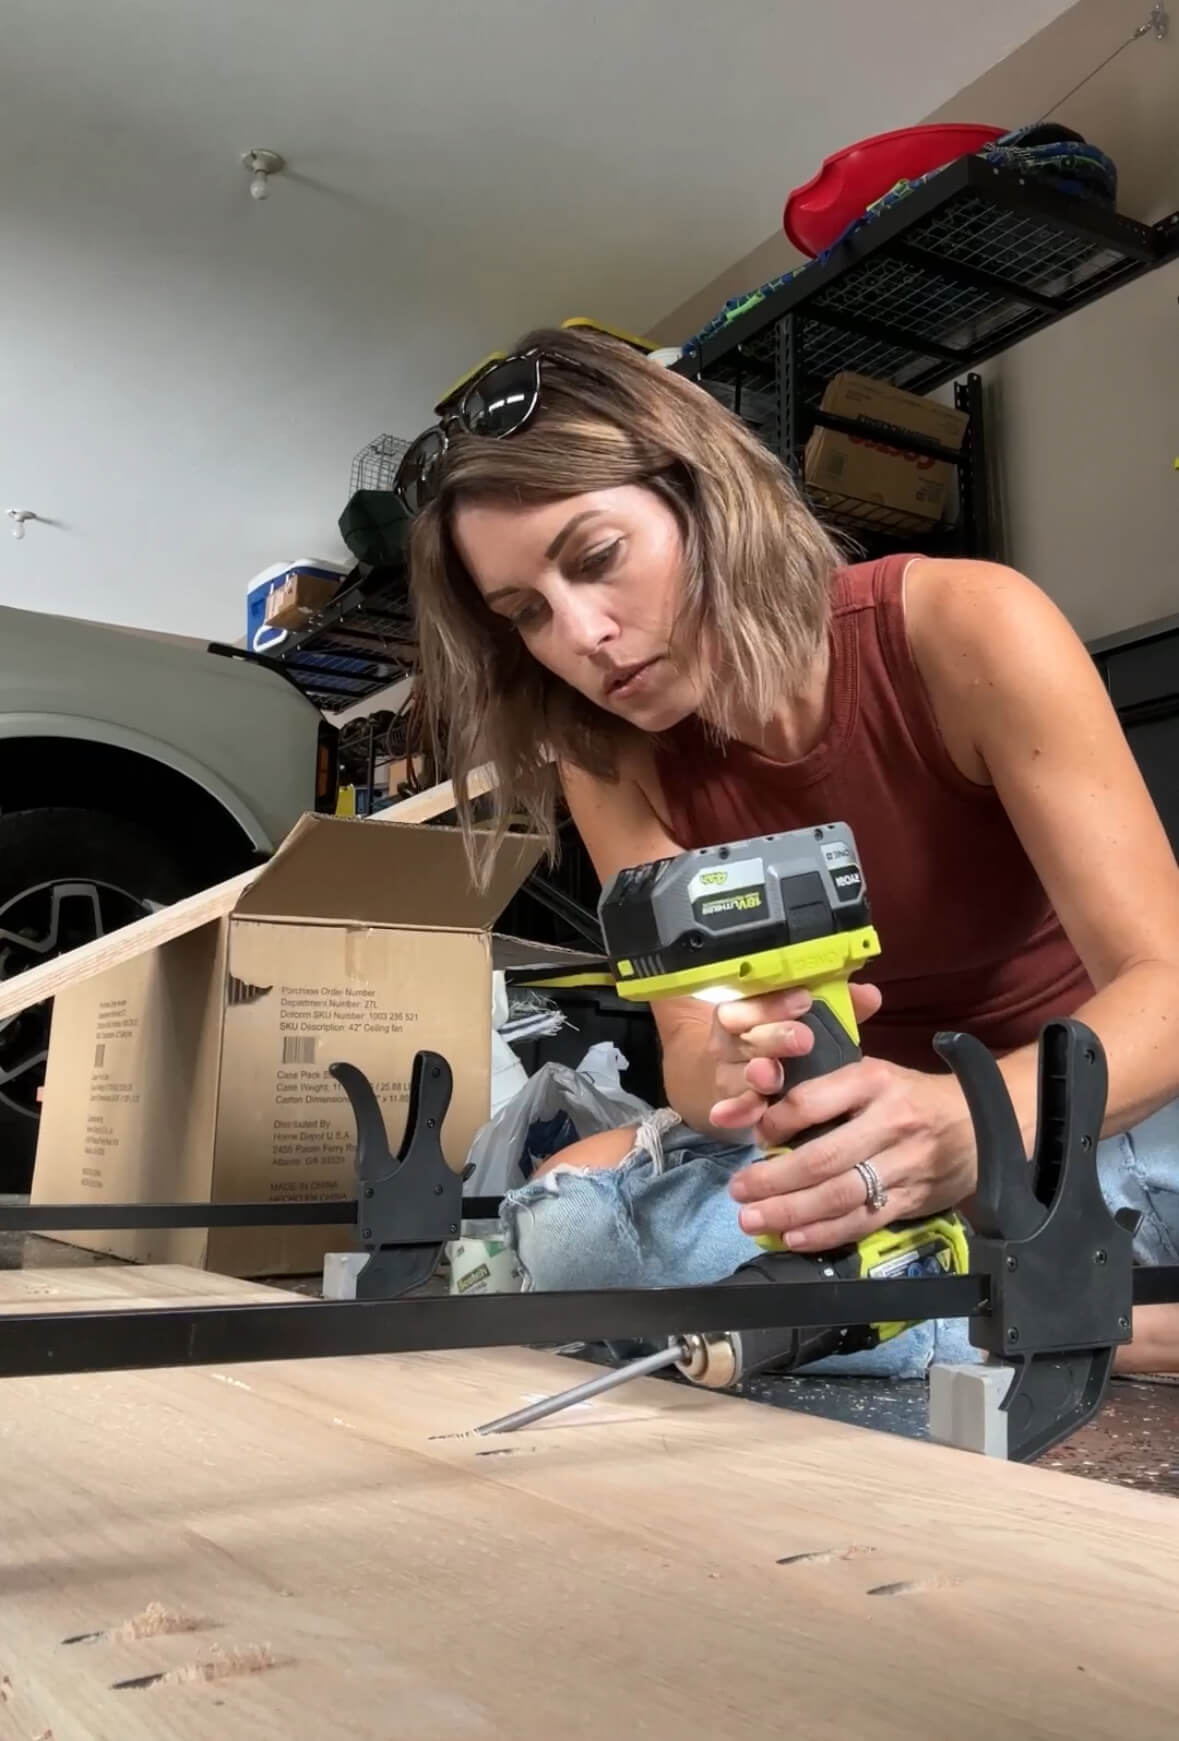
Start by building the base of your swing, where your crib mattress is going to sit. We opted to use 2x4s to make our base, which provided added support. The Kreg Pocket Hole Jig allowed us to screw the base together without unsightly screws. If you don’t know how to use a Kreg jig, you can check out the highlight reel on my Instagram.
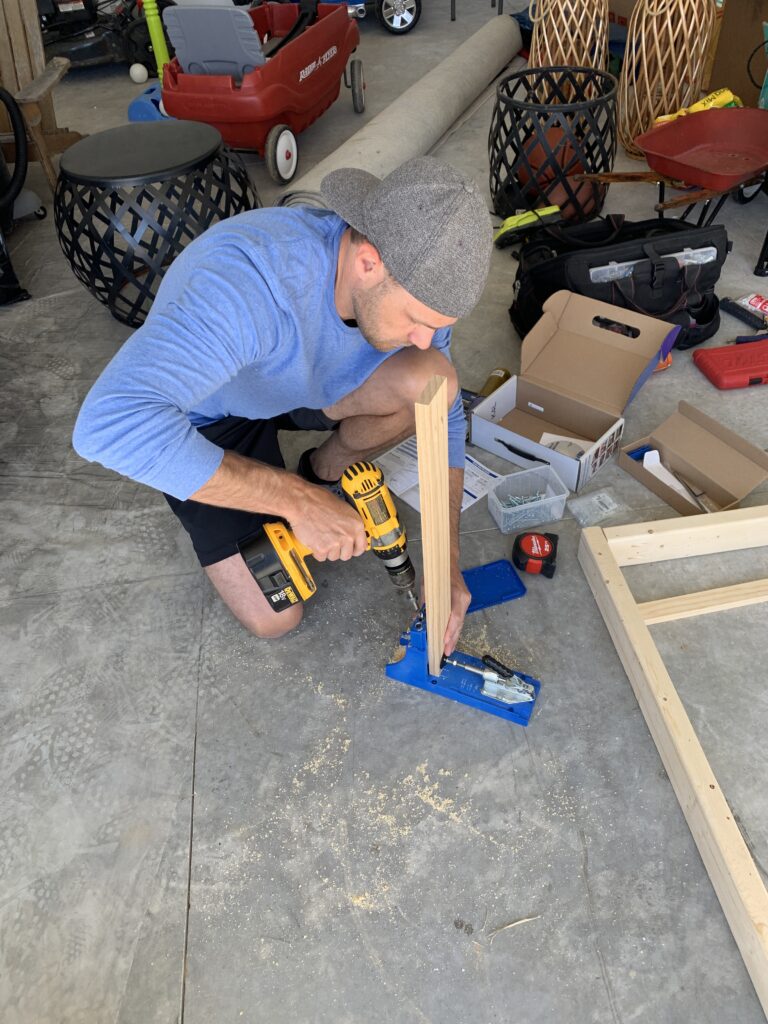
After making your base, add one support along each end using 1x2s. This will support the 1×6” boards that will create your seat. Then, use the 1×3 to create a middle support beam. We want our swing to be extra sturdy.
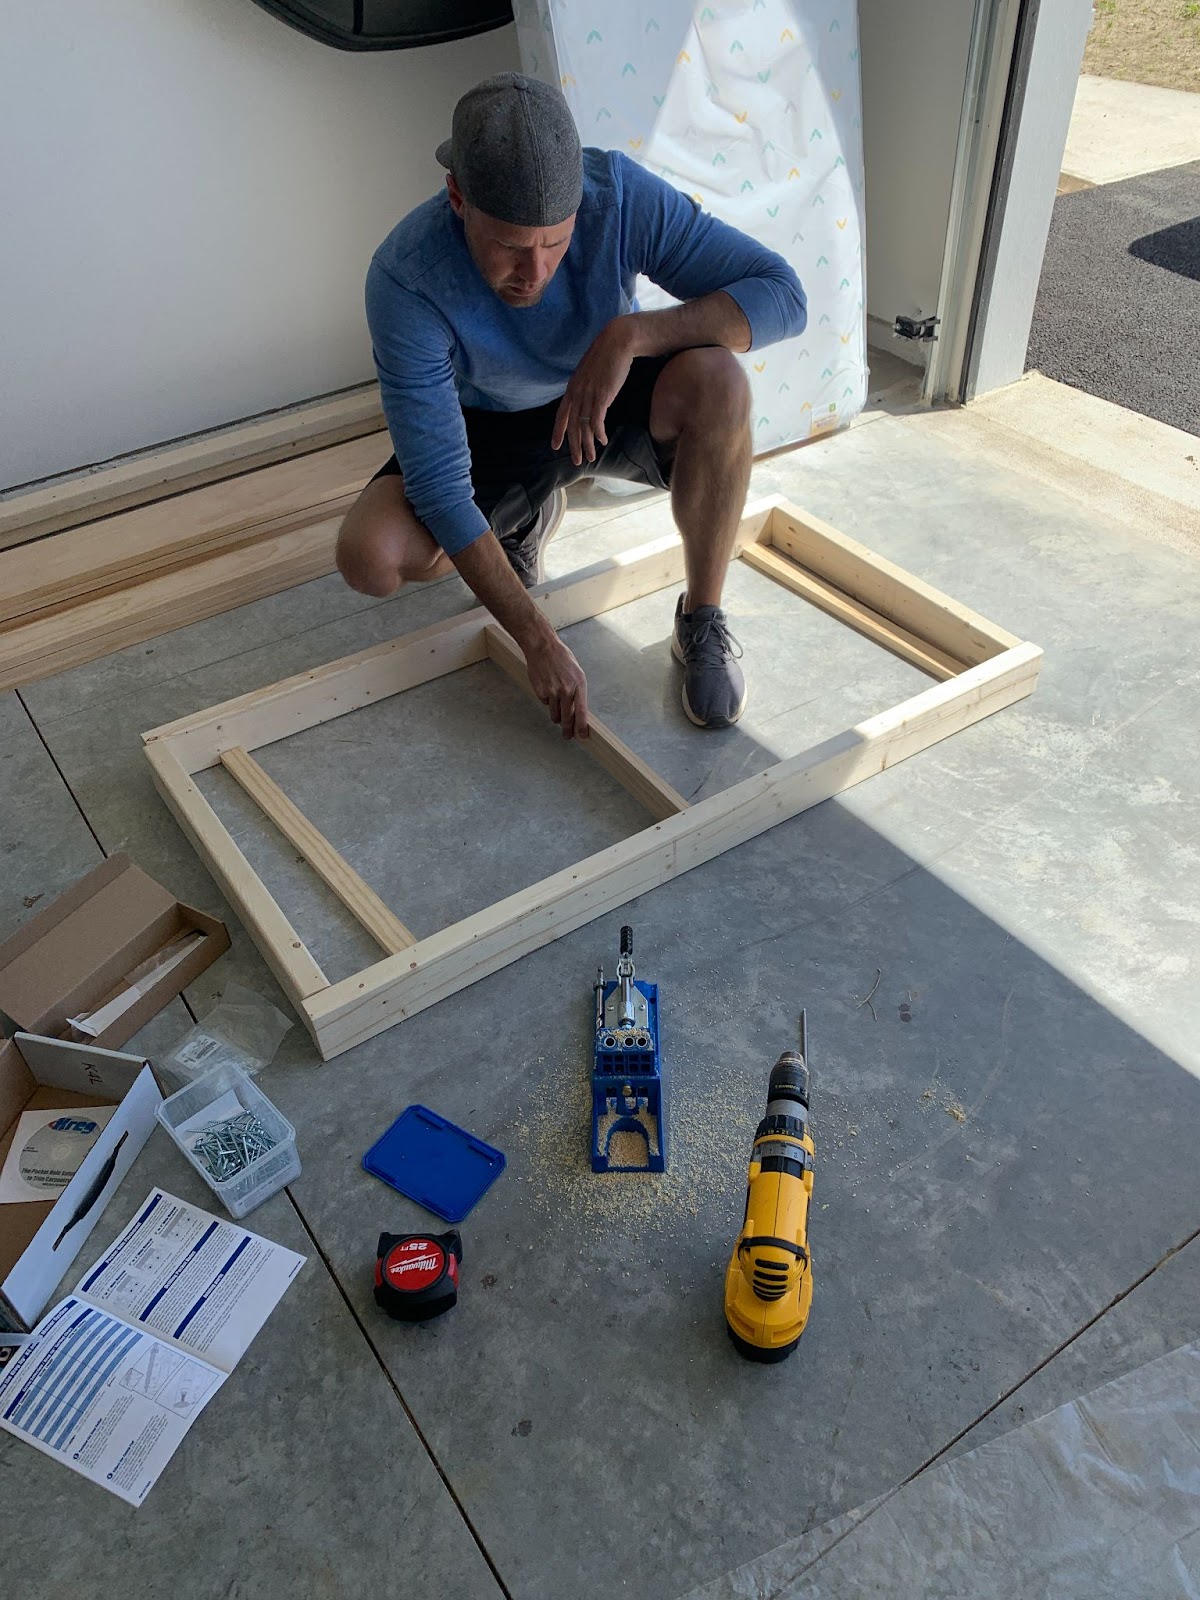
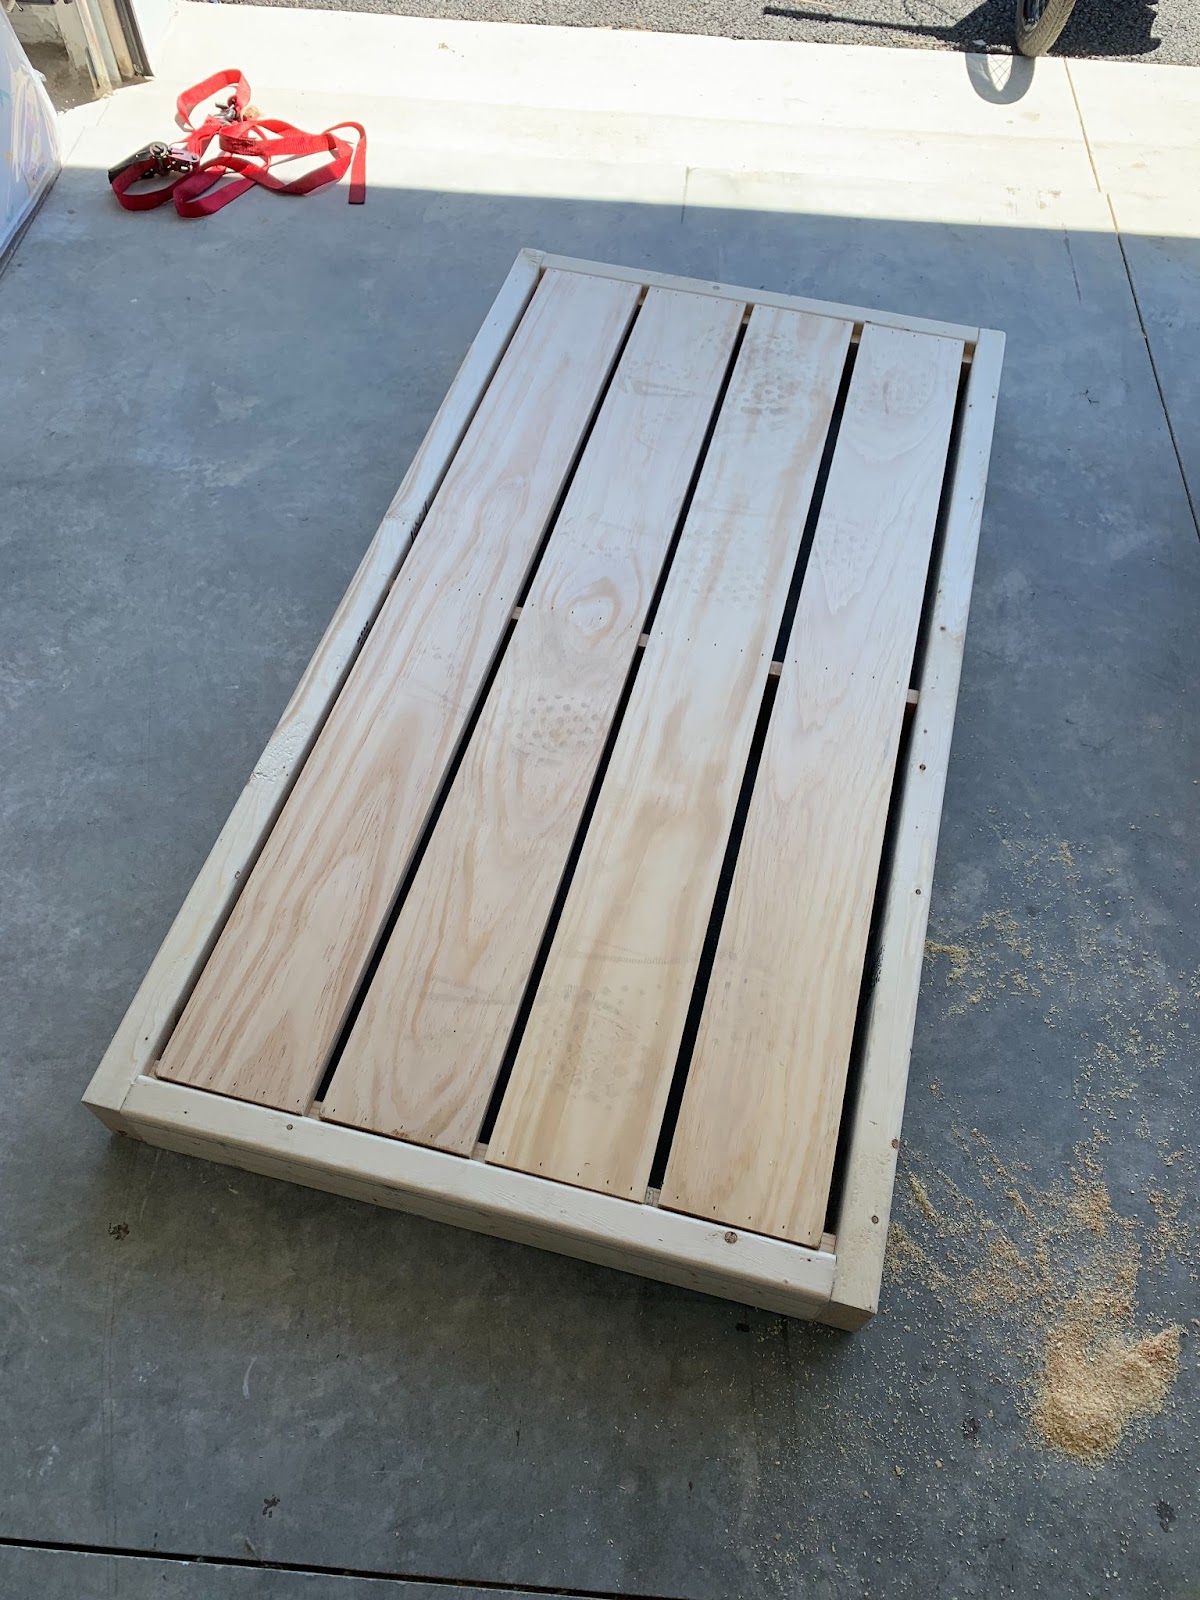
Now that you have your frame done, it’s time to add the planks on top where the crib mattress is going to sit. Cut your 1x6s to 50 ½ inches with your miter saw, that way they fit nicely into the rectangle frame you just made. Use wood glue and a nail gun to add them to the frame.
And voila, you’ve got your base for your porch swing!
How to Build the Back of Your DIY Porch Swing
After getting the base done, you can move on to building the sides and back of your swing. It’s easier than you might think! And you can put away the Kreg jig now because we are going to be using just the Brad nailer to complete this…

This 18g Brad nailer was the very first power tool I ever bought myself, and it was key to building confidence and tackling so many of my first projects. It’s definitely a must when it comes to DIY. Get your Brad nailer here.
After you have your Brad nailer, you’re going to need corner posts (4 in total) for each corner of your porch swing. To do this, you need to create 4 pieces that make an L shape when nailed together side by side (see picture below).
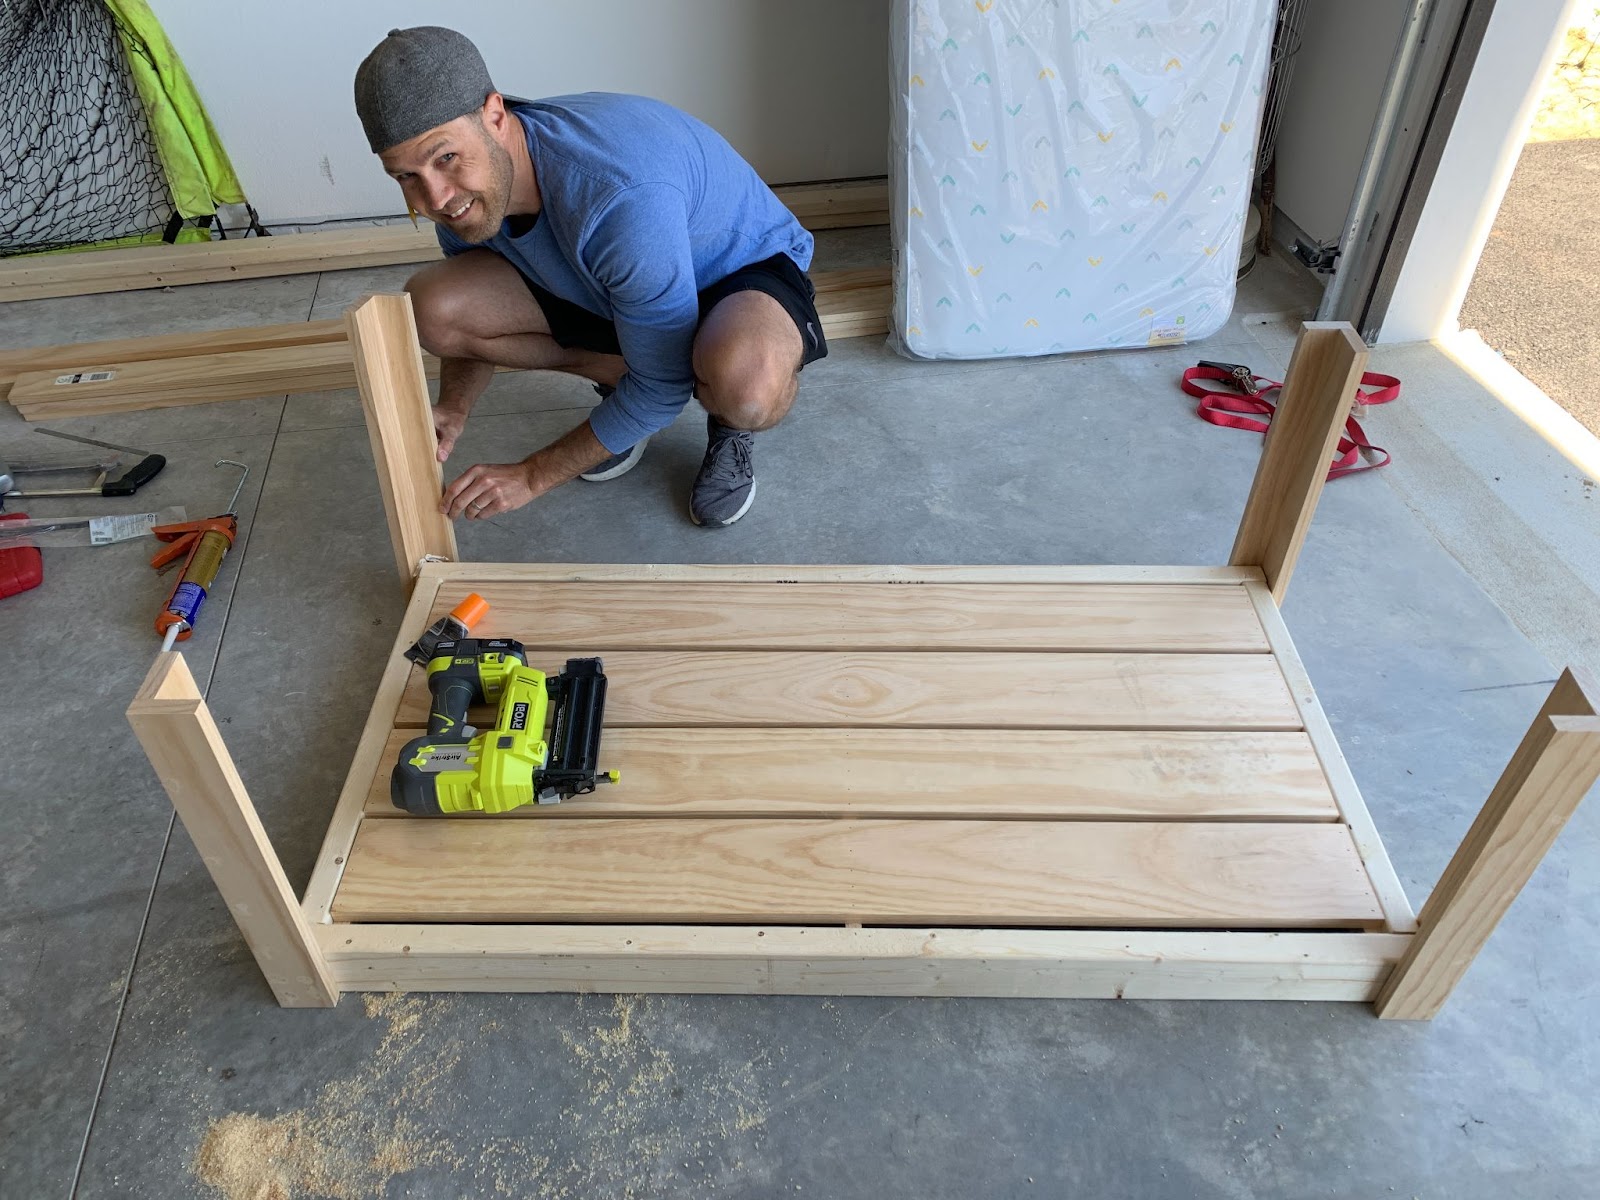
To make the corner pieces, cut 8 1x3s that are 20’’ long. Assemble all the pieces making sure they are even, and attach them using the nail gun to the base of your swing in each corner.
Then, you need to add the top rails. Use the 1x3s to cut 3 pieces: one that’s 50 ½ inches for the back and two that are 28 inches for the side. Use the nail gun to attach them to the swing.
Side Railings for your DIY Swing
Now, it’s time to add in the side railings. When it came to the side, I was looking for something a bit more modern and a bit less farmhouse. I decided to skip the X that was on the original plans and went with the clean, horizontal rails instead.
If you prefer the horizontal rails as well, then you need to cut 4 more pieces of 1x3s that are 28 inches long. Then, measure and space your boards evenly to make sure they are evenly spaced, and nail two more planks to each side of the swing.
To make horizontal rails on the back of the swing, you will cut a piece of 1×3 to 18 ½” long and place it vertically in the middle. You will then add a final 52” piece of 1×3” horizontally to support your back pillows.

Finally, we finished our swing by adding a ‘cap’ (using the 1×3’) to give a finished look and a few trim pieces along the bottom using the 1X2”.
After you finish making your swing, it’s time to paint or stain!
Painting Your Swing
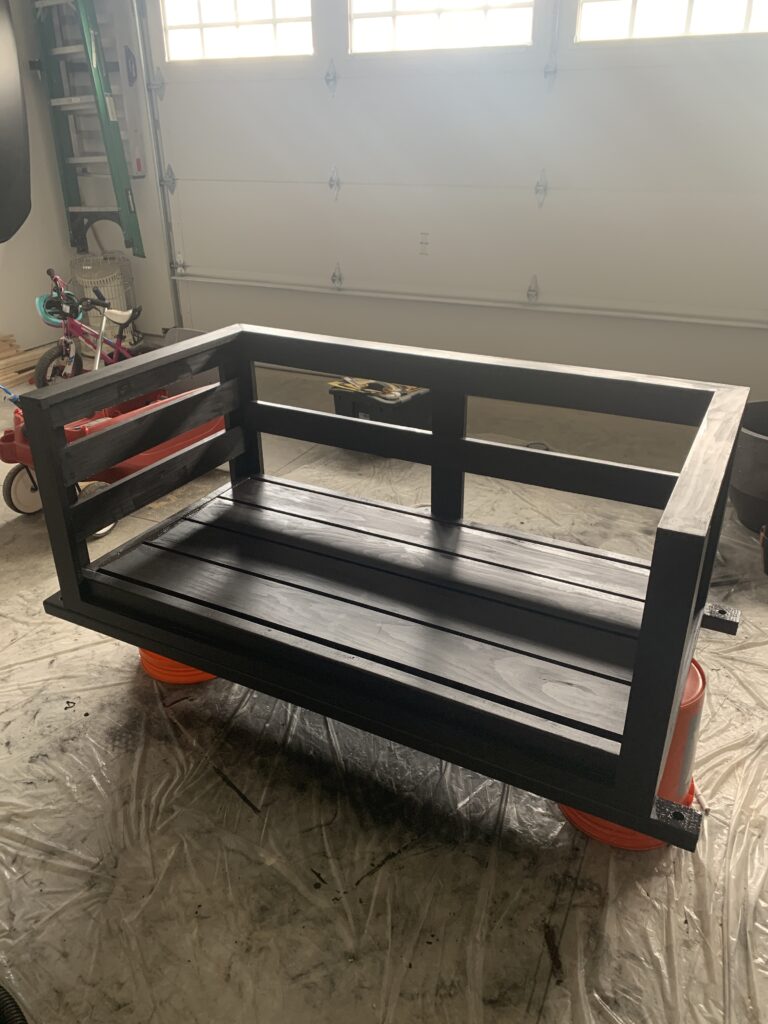
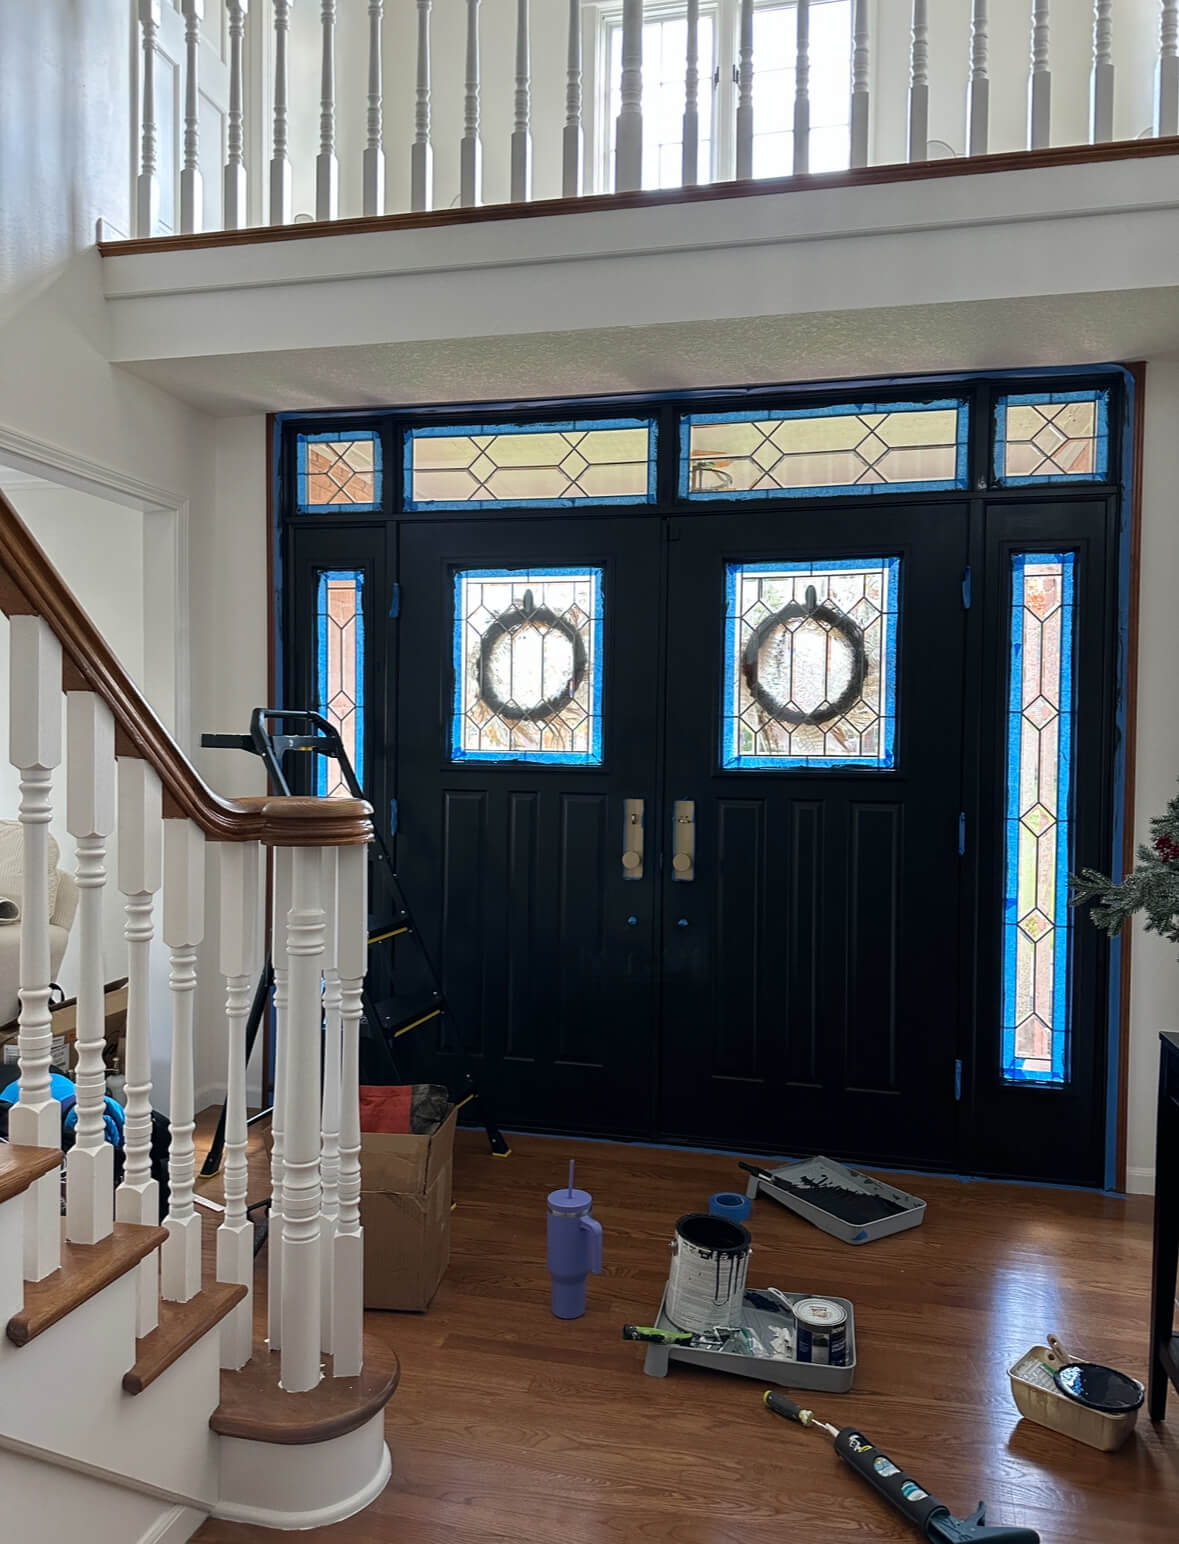
You’ve done all the hard work, now it’s time to sand and paint. I know there are a lot of die-hard “stain the wood” people out there, but we love the modern vibe of the black paint and it matches our front door, which I painted as well. I used SW Black Magic, and I couldn’t be happier. It did take about 3 coats to get it to look fully coated. So don’t give up after one coat, if it’s not looking the way you want.
How We Attached Rope to Our Swing
Instead of using the eye screws to the top of our swing, we decided to add 2x4s to the bottom on the front and back that have holes drilled into them to run the rope through.
When hanging our swing, we found that setting the swing on two Home Depot buckets (the orange ones most of us have sitting around) gave us the perfect height! Use the picture below to see what I mean.
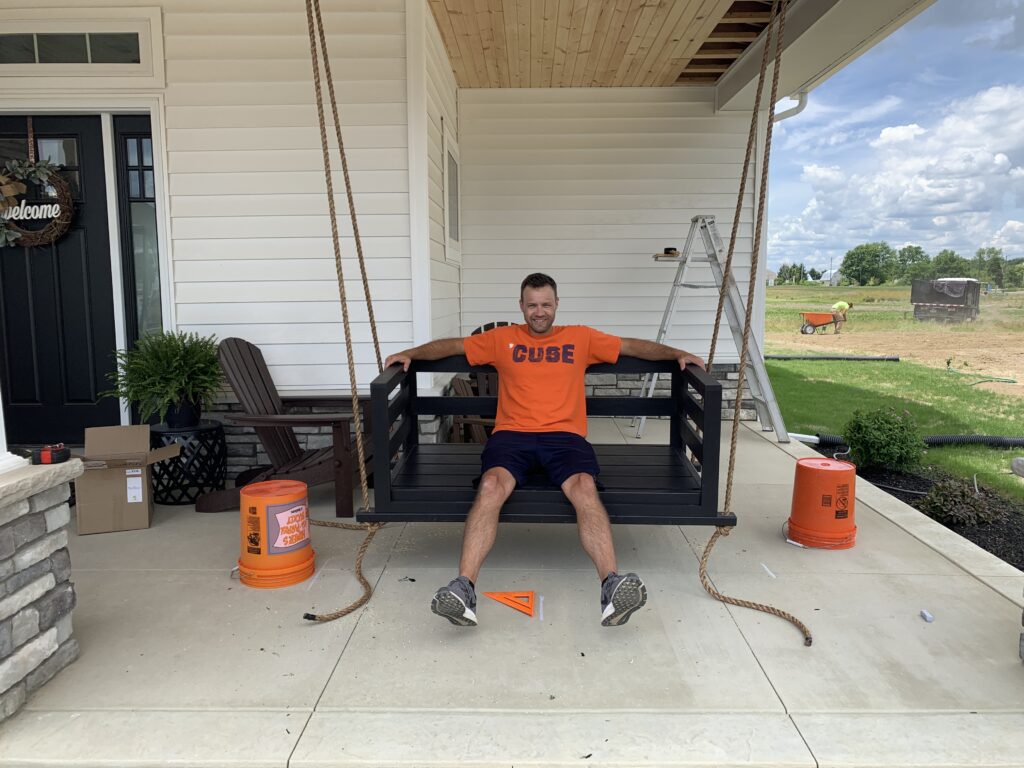
We also used rope to hang it instead of chains, but you can use the one you prefer.
Final Outcome: DIY Porch Swing Using a Crib Mattress
Now that your swing is completed, it’s time to hang it and add some decor! Just use some of your favorite sheets for the crib swing, and then add your favorite pillows.
See what I chose for mine here! Also, if you don’t have a crib mattress to use already, then here’s an inexpensive one I found on Amazon.
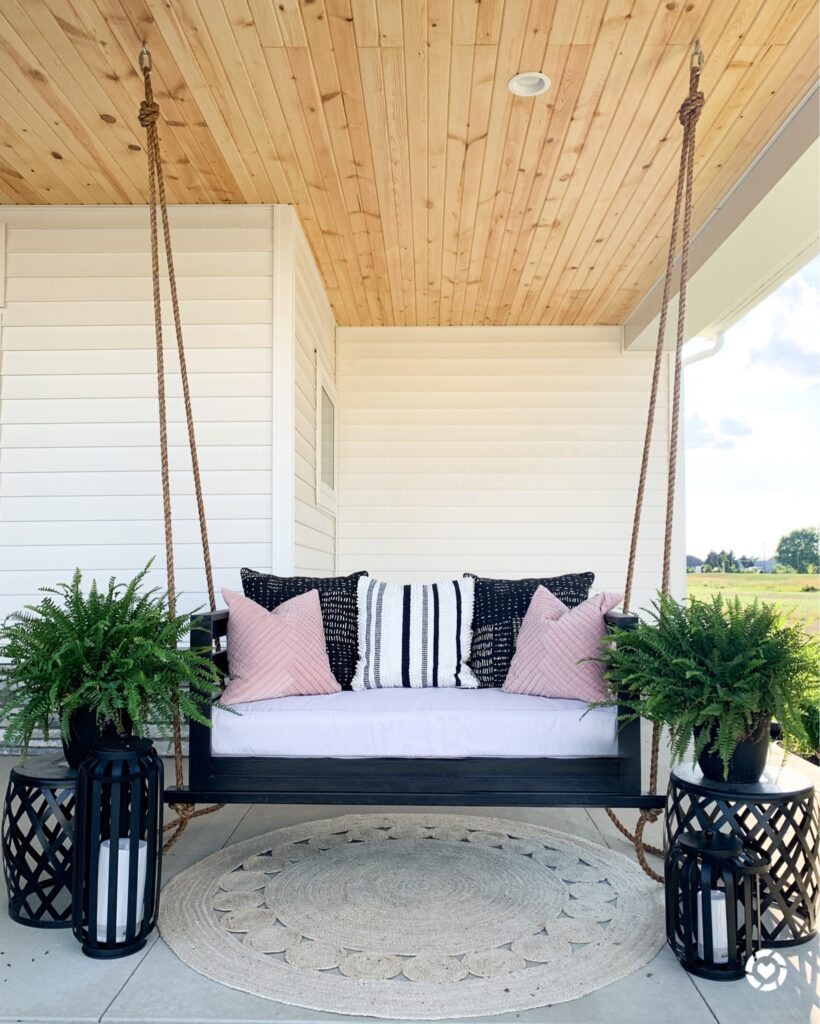
It looks amazing, what do you think?!
If you’re ready to start tackling DIY projects, I’m here to guide you through the process. I know using power tools can be overwhelming, but you can do it with just a little bit of guidance.
Head to my Instagram for all things DIY, and get all the tips and tricks you need to transform your house into a home that’s uniquely your own! I can’t wait to see what you create.


Start Your DIY Journey


Join our email list and get the behind the scenes scoop on our latest projects, new products and more.
Join the List
get inspired

COPYRIGHT 2024 Lake & lumber. ALL RIGHTS RESERVED. MADE BY BLAIR STAKY