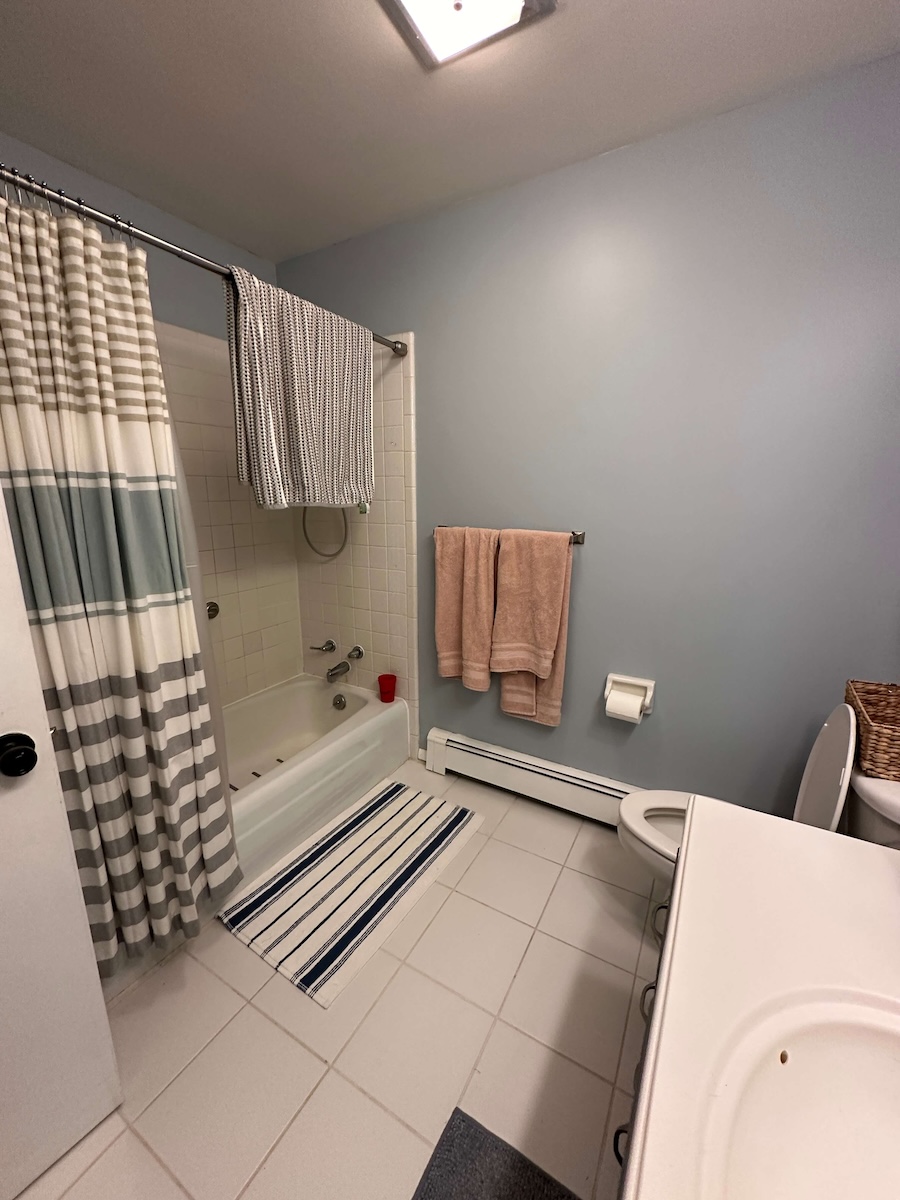
Over 7 years ago, I did my first DIY project by renovating the bathroom at our lake house. At the time, I loved it, but it has since become outdated. The faux shiplap, hanging shelves, and old-style vanity were feeling stale and ready for a refresh. After sketching out some designs, I quickly had a plan for a full-blown DIY bathroom renovation.

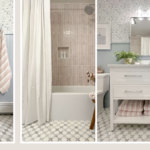
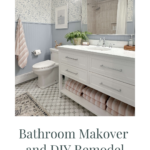
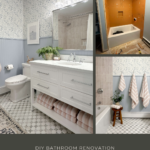
After some intense demolition and 2.5 months of work, I completed our gorgeous DIY full-bathroom renovation. I was able to install a new tub, waterproof and tile the shower, add new flooring, install a new vanity and mirror, install and paint beadboard, hang wallpaper, and style home decor as finishing touches.
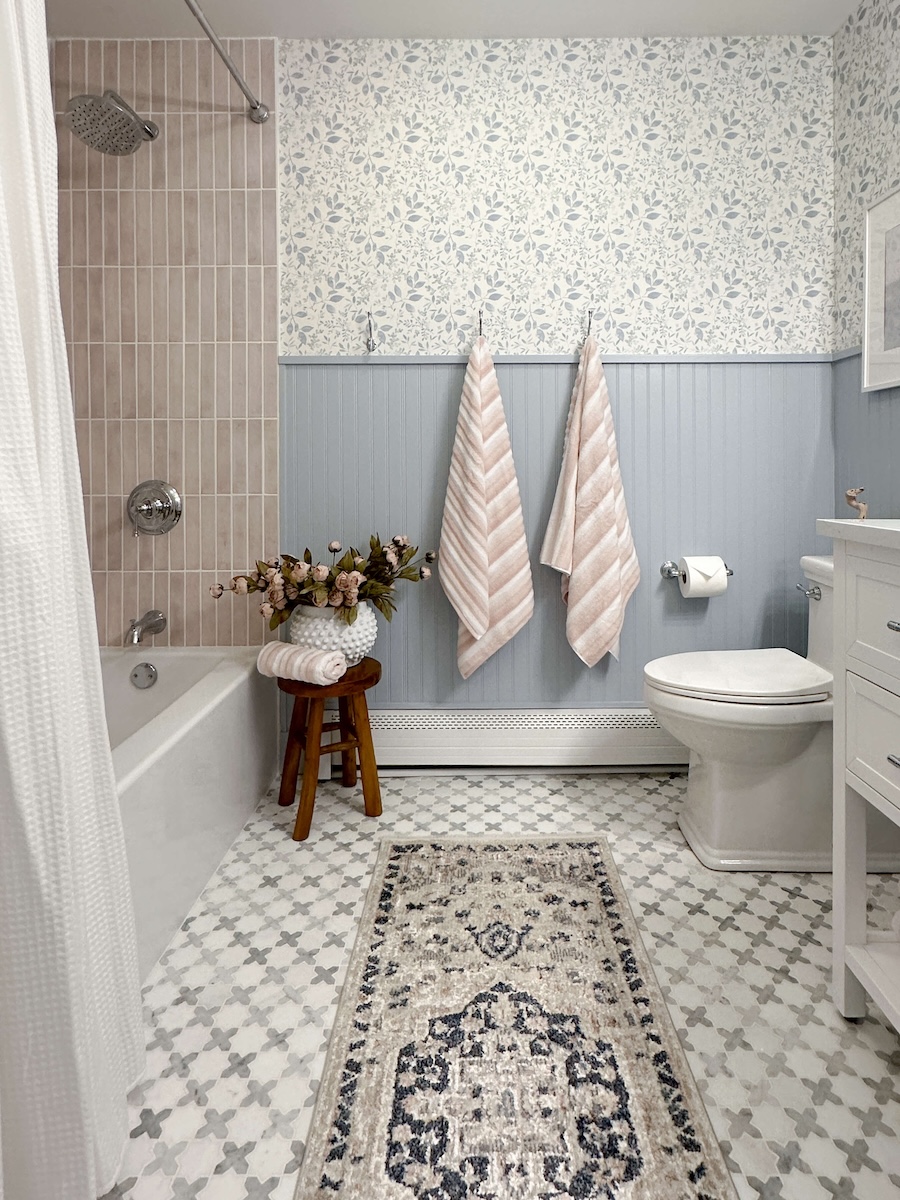
The bathroom turned out beautiful, and I’m so excited to share the entire process of this complete renovation.
Bathroom Demolition
Before I could renovate, I had some serious demolition to complete. And despite what you see on TV, it was not as easy as you might think!
Before starting any renovation, be sure to have everything prepped and ready to go. I also highly recommend having a good shop vac on hand. It’s a must-have to keep your space clean while you are deep in the dirty business of demolition. I really like this shop vac for cleaning up after all the demolition dust and debris. For safety, you’ll want to make sure you’re using eye and respiratory protection. I like to wear these glasses, a respirator, and a mask!
For this bathroom demolition, I wanted to start from scratch with the entire room. To accomplish this, I removed the vanity, toilet, and tub to make way for new ones. I also took out the tile and faux shiplap. Each process took a bit of work, but it was necessary to have a clean slate.
Bathroom Demolition DIY
First up in our bathroom demolition process, was to remove the toilet and vanity.
How to Remove a Toilet
To remove the toilet, turn off the water, flush it a few times to empty the tank, and then disconnect it from the floor. It will usually be removed in two separate pieces. It definitely can be messy, but is not as hard as it might seem!
When removing plumbing fixtures (tub, toilet, vanity), you always want to stuff a rag into the drain holes. This will keep sewer gases from backing up into your house. I used some old pull-ups that I had sitting around at the lake, but in the past, I’ve used towels and rags.
Old Shiplap Removal
Once the toilet and vanity had been removed, it was time to take off the faux shiplap I installed 7 years ago. This was the first DIY project I took on after Cody got me my Brad nailer for Valentine’s Day. Yep, that’s right, my first tool was a Valentine’s Day gift! Unfortunately, as I was new to DIY, I thought I needed to glue AND nail every board to the wall. Since then, I have become a strong advocate for not using construction adhesive (such as liquid nails) unless absolutely necessary!
When you use glue on an accent wall project, it’s permanent. Not because you can’t pull down the shiplap or the board and batten, but because the glue will damage the drywall so badly that you’ll need to replace the drywall if you ever remove it. That is exactly what I found here. So new drywall it was.
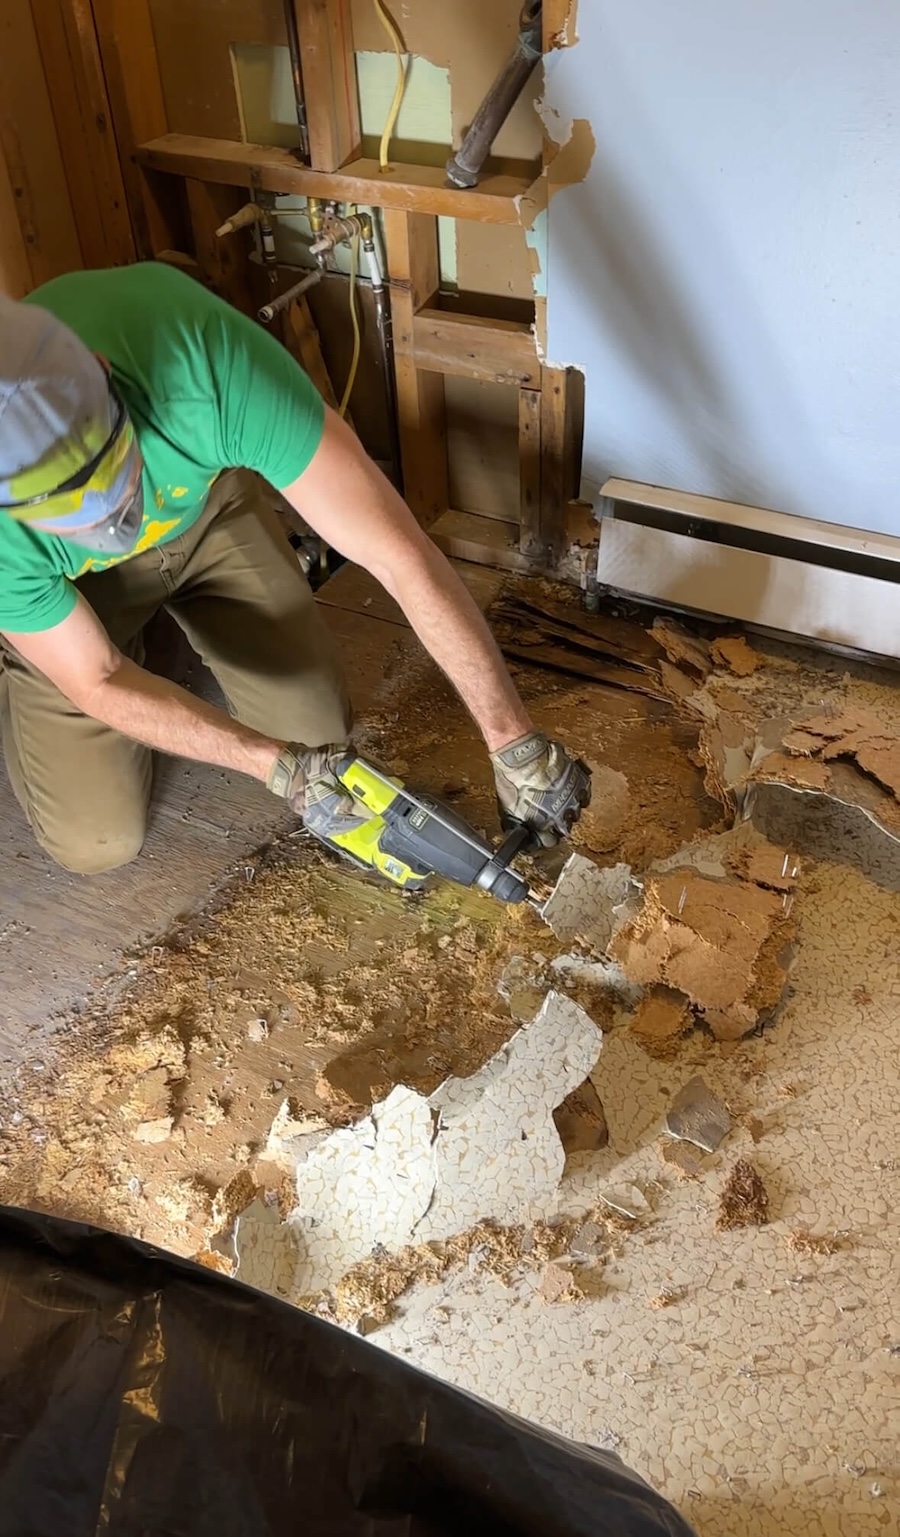
How to Remove Old Tile and Linoleum
Next, I went to remove the old tile, and that’s when I realized that it was laid on top of several layers of linoleum. Cody was able to help me by using a hammer drill to rip up the floor, and because of all the layers of linoleum, we ended up removing the subfloor altogether.
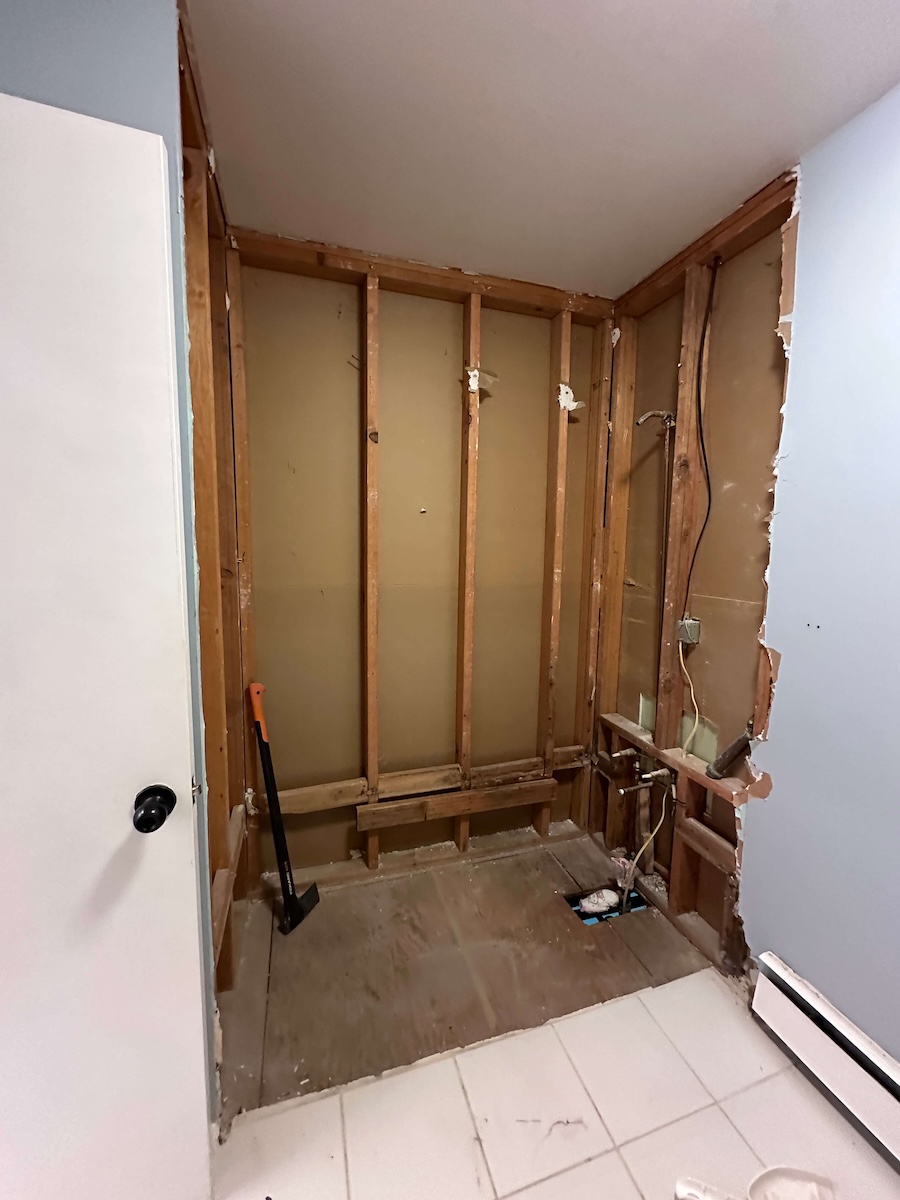
Removing the Cast Iron Tub
Finally, Cody and I began to remove the tub, which turned out, to be a 60-year-old cast iron tub that was almost impossible to remove. After hopelessly trying to break it with a hammer, Cody found an old ax in the garage and was able to break it into manageable pieces. Even then, the pieces were super heavy and VERY sharp! Cast iron tubs are no joke!
Once everything was up and out of the bathroom, I was ready to begin the reconstruction process!
Waterproofing the Shower with Schluter Systems
After a few days of destruction, I had a plumber come to install this beautiful new tub and raise the shower head. Previously, the shower head was barely 6ft high, but in the new shower, I would be tiling to the ceiling, so I opted to raise it to a little over 7ft. After that was completed, I was ready to start waterproofing the shower.
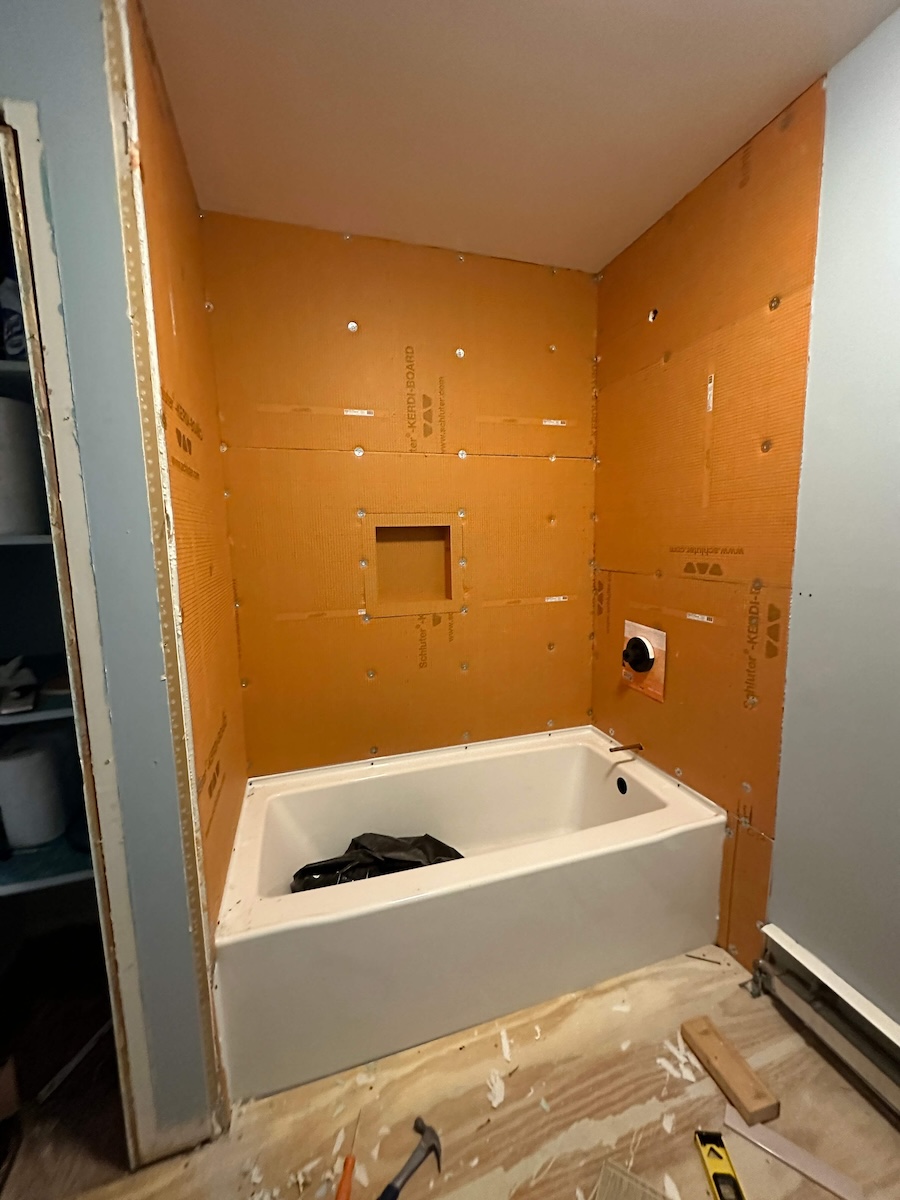
This is probably one of the most stressful parts of this DIY bathroom renovation because if done incorrectly, you’ll end up with water damage which can be extremely expensive. To ensure complete waterproofing in our shower, I decided to use Schluter’s Systems Kerdi Board. Since I was doing this by myself, I appreciated how Schluter’s was super lightweight and easy to cut.
The Kerdi board was more expensive than more traditional options, such as cement board, but since I was often working on this project alone, the ease of use and fact that it was lightweight was worth the cost.
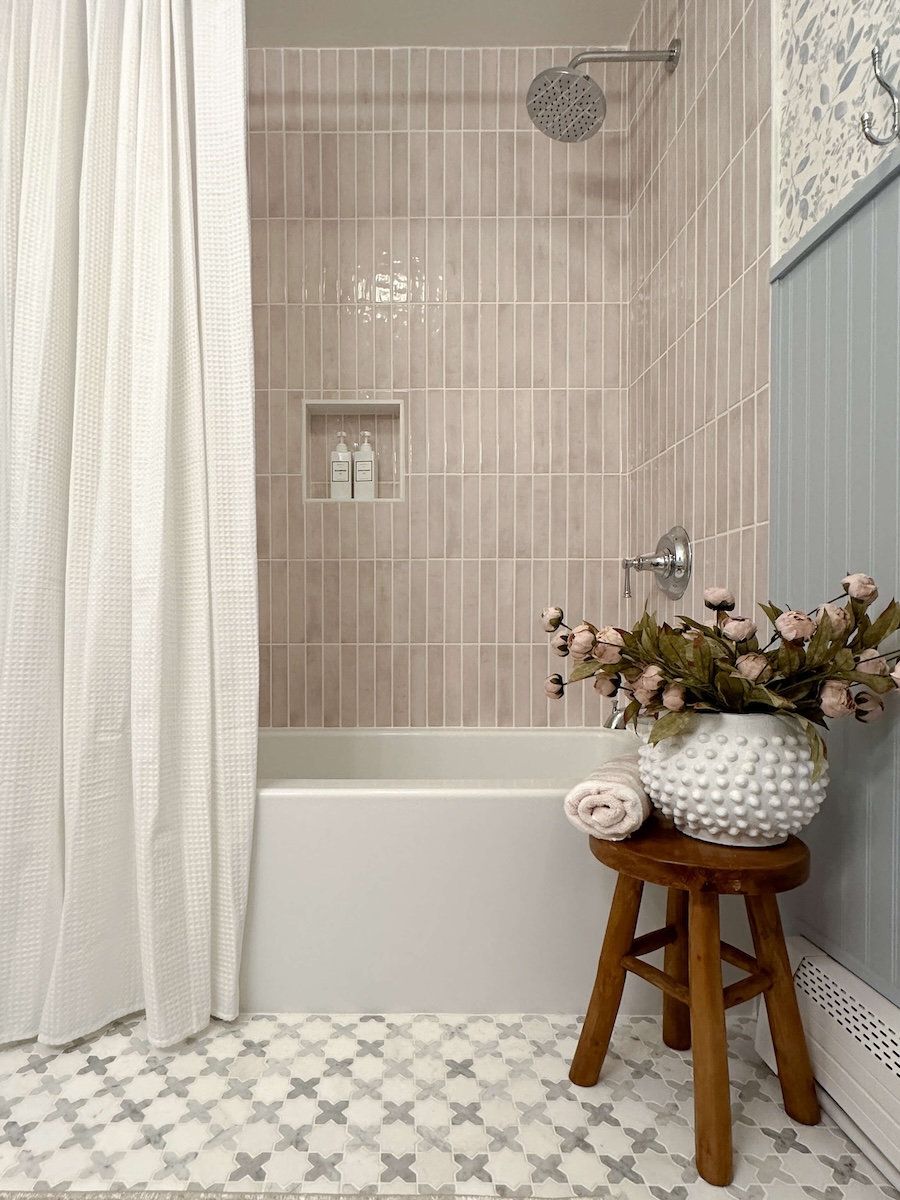
Halfway through the installation, I decided I wanted a shower niche to hold my shampoo and soap. Schluter’s Kerdi shower niche inserts made it super doable. Then, I mixed the Schluter Unmodified Thin Set and used the Kerdi band to waterproof each screw hole and seam. Where the tub met the Kerdi Board, I used silicone to make sure that water would not be able to go through.
Make sure to watch this Kerdi Board tutorial on Instagram, that way you don’t miss any parts of the waterproofing process.
Tiling a Shower With Vertical Tiles
One benefit of using the Schluter System for this shower is that I was able to immediately start tiling. There is no wait/dry time after applying the Kerdi Band. After I finished waterproofing the shower, I was able to start tiling. For a more in-depth look into how I tiled this shower, you’re going to want to watch this reel of my step-by-step tiling process.
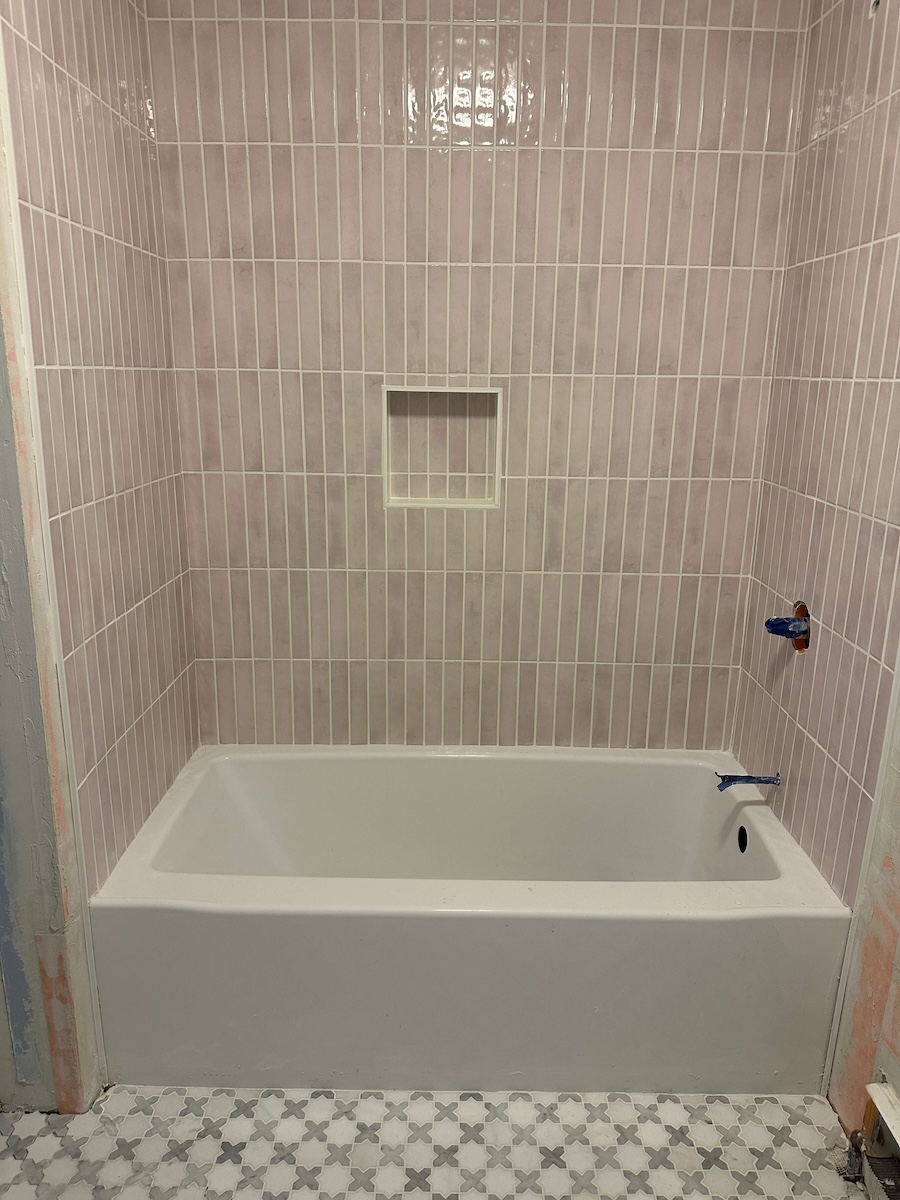
To tile the shower, I used this Stella tile in blush from MSI, and I used these Schluter edge pieces so that my tile had a nice smooth edge. In my shower niche, I used marble pieces from Lowe’s to give it an elevated look. Then, I used unsanded grout in the color avalanche to finish it off.
If you’ve never tiled a shower before, you’ll definitely want to watch my shower tiling tutorial! After the shower was complete, it was time to lay the floor tile!
Laying Tile for a Bathroom Renovation
Next up in our bathroom renovation adventure was laying the tile floor. But before I could tile the floor we had to add a subfloor, which added to the cost of our renovation but was necessary to provide a stable base for our tile. If you’re ripping out floors, just remember you don’t always know what you’ll discover underneath them!
Once the subfloor was installed, I began the tiling process. I used Schluter-DITRA directly over the plywood. It’s super easy to cut with a razor blade or scissors, and one roll was enough for the entire bathroom renovation. You can put the thin-set directly on the plywood with a trowel, then lay the Schluter-DITRA down.
After the subfloor was installed, I was finally able to start laying the floor tile! I chose these beautiful light gray and white marble mosaic floor tiles. Before tiling, you always want to do a dry fit of your tiles. This will allow you to make adjustments and avoid sliver cuts, color variations, etc.
For all the tiles that were next to a wall, I cut the tile to ensure it had a straight edge that would lay flush against the wall. Then, I applied a thin set to the Ditra using a ¼’ notched trowel. Then, lay your mosaic sheet.
When it comes to cutting tile, I prefer to use this tile saw. Tile saws are easy to use and safe! They do not actually have a blade. The tile is cut using a blade that grinds the tile, so you can not cut yourself the way you can with a table saw.
Installing Beadboard and Wallpaper
Once the tiling was complete, I was ready to install a new beadboard and wallpaper.
I used 4×8 beadboard panels purchased at Lowe’s for the bottom half of the bathroom walls, and I installed them using my Ryobi 18g Brad nailer. I used a small trim piece to cap the beadboard, giving it a clean, traditional finish. For paint, I went with Sherwin Williams’s color of the year, Upward. It was a perfect match for the wallpaper I chose!
I decided to try out pre-pasted wallpaper on the top half of the wall this time around (versus the peel-and-stick kind), and honestly, I think I’ll be team peel-and-stick from here on out!
With pre-pasted wallpaper, you have to soak the paper for 10-20 seconds to activate the paste. This makes the paper very hard to cut, even with the sharpest razor blade, which led to some tearing and other issues. I absolutely LOVE the print, so it was definitely worth it, but in the future, if I can avoid pre-pasted, I will!
The result ended up being worth the pain!
Installing the wallpaper and beadboard were both quick, beginner-friendly projects that anyone could do to elevate their bathroom space. If you’re trying to makeover your bathroom on a budget, this would be a great starter project. For more budget-friendly bathroom renovation ideas, check out this beginner-friendly bathroom reno I did for under $450!
Adding New Bathroom Fixtures
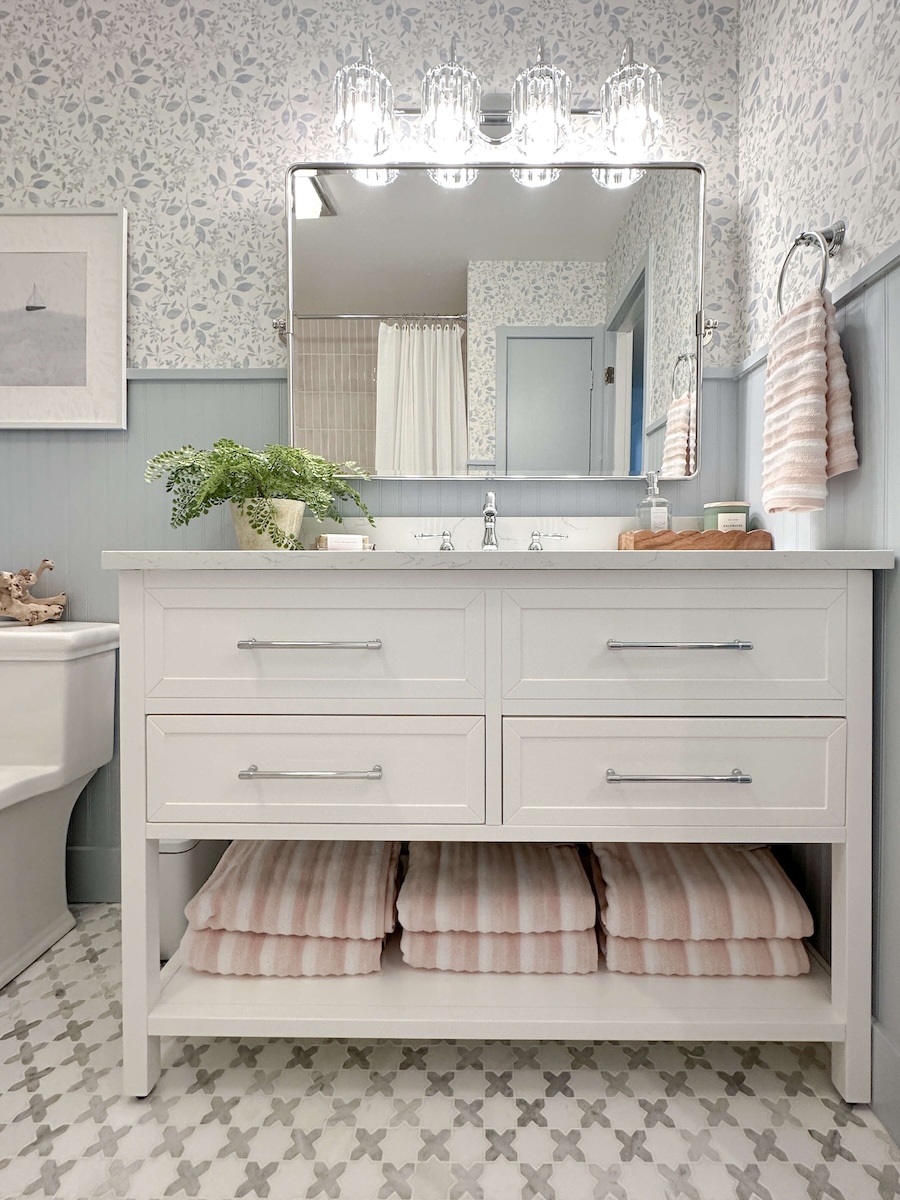
After the walls were done, we installed a new toilet, vanity, and faucet. Next, we added this showerhead and these shower tub fittings from Signature HW. The plumber who installed the tub and moved the shower head returned to connect our fittings.
Finishing Touches to Our Bathroom Renovation
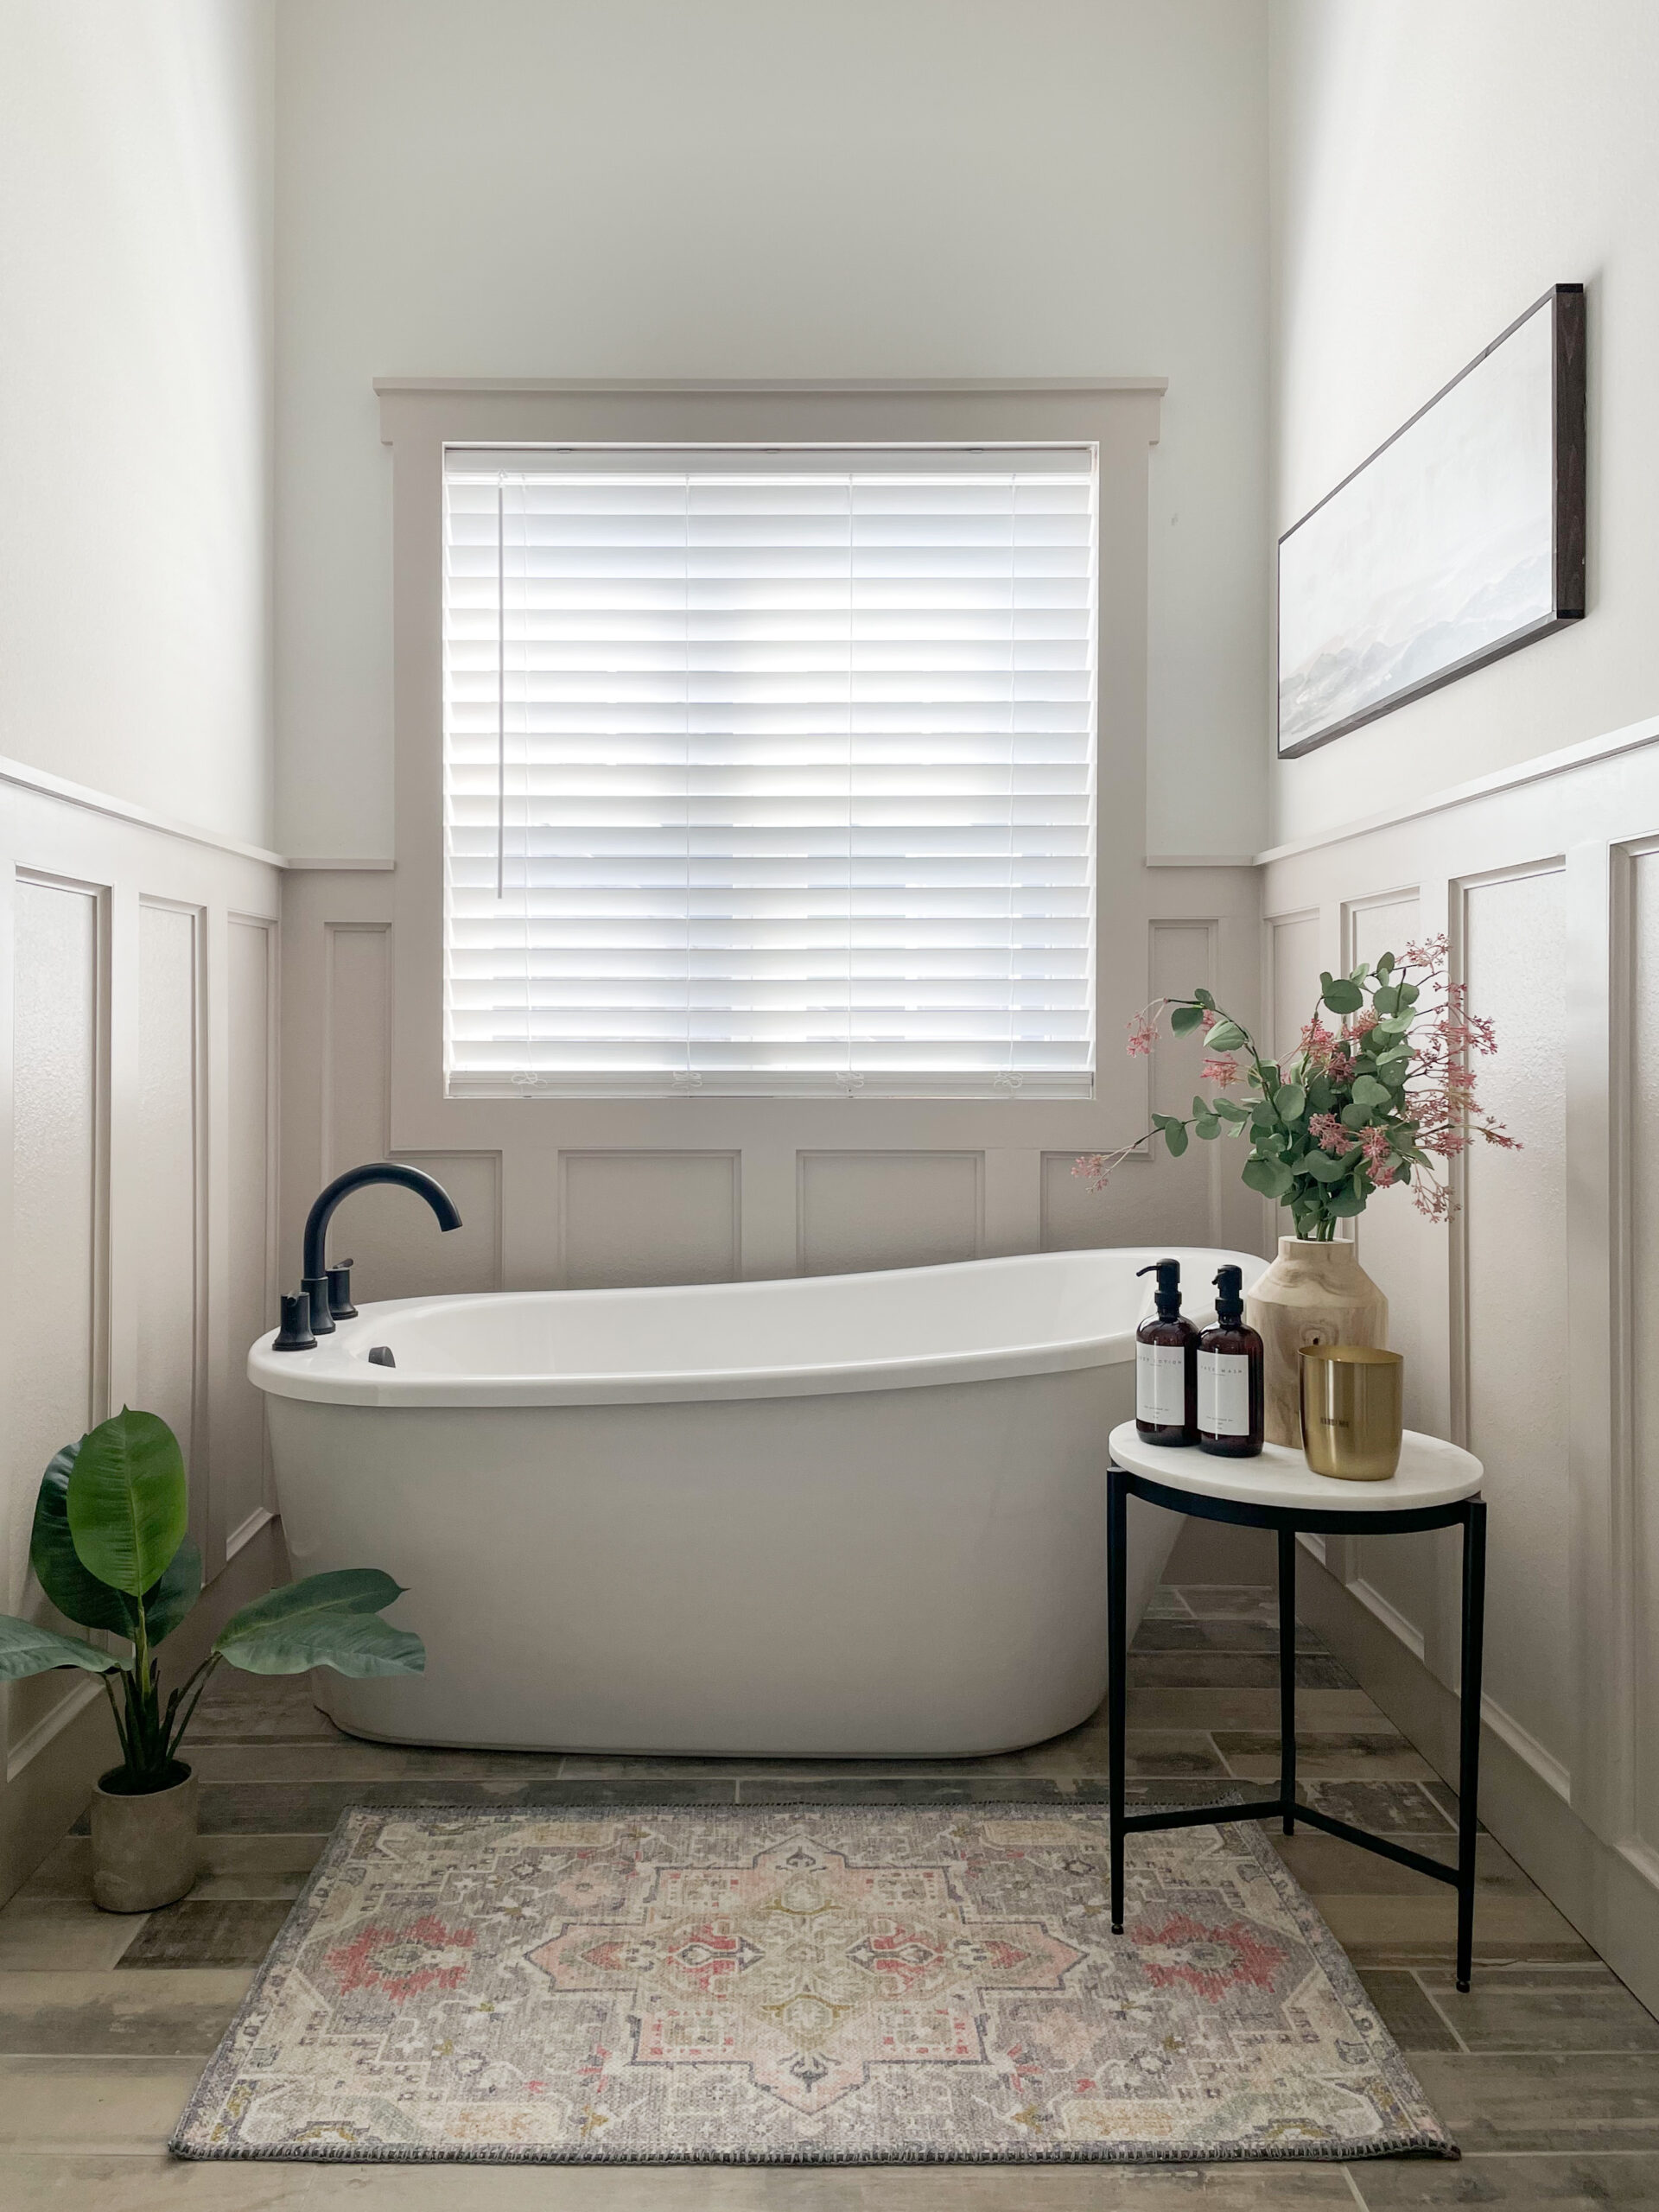
After 2 ½ months and with our guests arriving soon, I was excited to have my bathroom usable again! A few decor pieces and fresh towels were all we needed to complete this space.
I chose a white waffle shower curtain to add some texture to the space. I used this hand-held steamer to get all of the wrinkles and creases out. I also found this amazing soap holder that drains, so it doesn’t leave soap scum all over my brand-new bathtub (I loathe slimy soap scum).
I also hung this printable art from Etsy over the toilet and a new light fixture!
I also wanted to install a mirror, and I loved this mirror that has the Pottery Barn look but for a more affordable price! This bathroom renovation came together beautifully and looked exactly like my initial designs. And now I have the perfect bathroom for my family and friends to enjoy at the lake house all summer long!
DIY Bathroom Renovation at the Lake House
After 2 ½ months, this DIY bathroom renovation is finally complete! And even though the demo threw us a few curveballs, I’m calling this reno a complete success. It was the last room on this level of the lake house that hadn’t been redone. And now I’m thinking that maybe I like this light style more than I like the moody style that I’ve been doing at my main home for the last few years. Maybe.
If you loved this lakehouse bathroom renovation, and you don’t want to miss any more of my upcoming DIY projects, be sure to follow me on Instagram! That way you’ll catch all my favorite DIY projects and decor tips to make your house feel more like a home.
Also, if you’re ready to start some DIY projects but don’t know where to start, read up on my beginner-friendly DIY projects and beginner tools that you’ll love!

Products Needed to Renovate a Bathroom
Now that you know the step-by-step process to complete this bathroom reno, all you need to replicate it are the supplies! Here’s what I recommend using in your bathroom renovation:
Tools:
Products:
- Beadboard
- Beautiful Blue Wallpaper
- Blue Paint
- Silicone
- Kerdi bands
- Kerdi Board
- Kerdi Shower Niche Inserts
- Schluter Ditra Systems
- Schluter Thin Set
- Stella Blush Tile from MSI
- Unsanded Grout in the color Avalanche
- Vera Anne Tiles from MSI
Decor & Fixtures:
- Blush Towels
- Light Fixture
- Mirror
- Picture Print and Frame
- Shower Curtain
- Soap Dish
- Toilet
- Vanity
- Bathtub
Cleaning Products:
This is a pretty extensive list, but many of these are must-haves for anyone who’s just beginning their own DIY projects. If you’ve been doing DIY for a while now, then you probably have most of these tools at home!
Good luck with your own amazing bathroom renovation. Make sure to tag me @lakeandlumber when it’s done!