Jump to Supply List
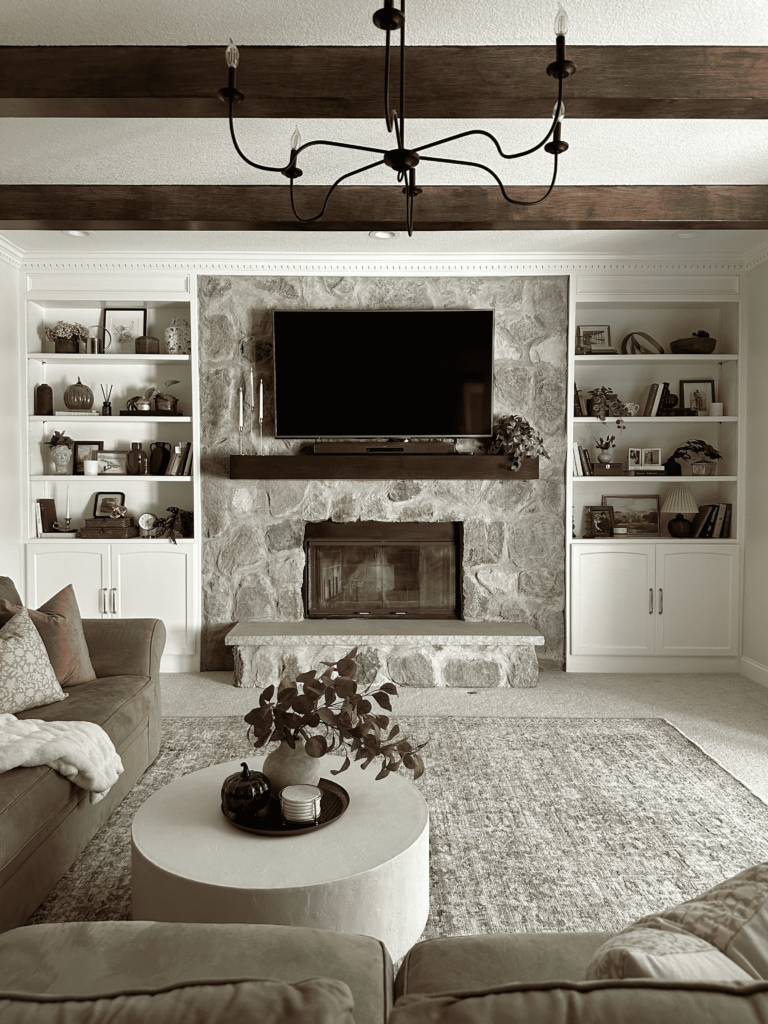
Last winter, I decided to construct and install a DIY fireplace mantel. A gorgeous wooden fireplace mantel adds a warm feel to a room, and this mantel really helped me complete my living room makeover.
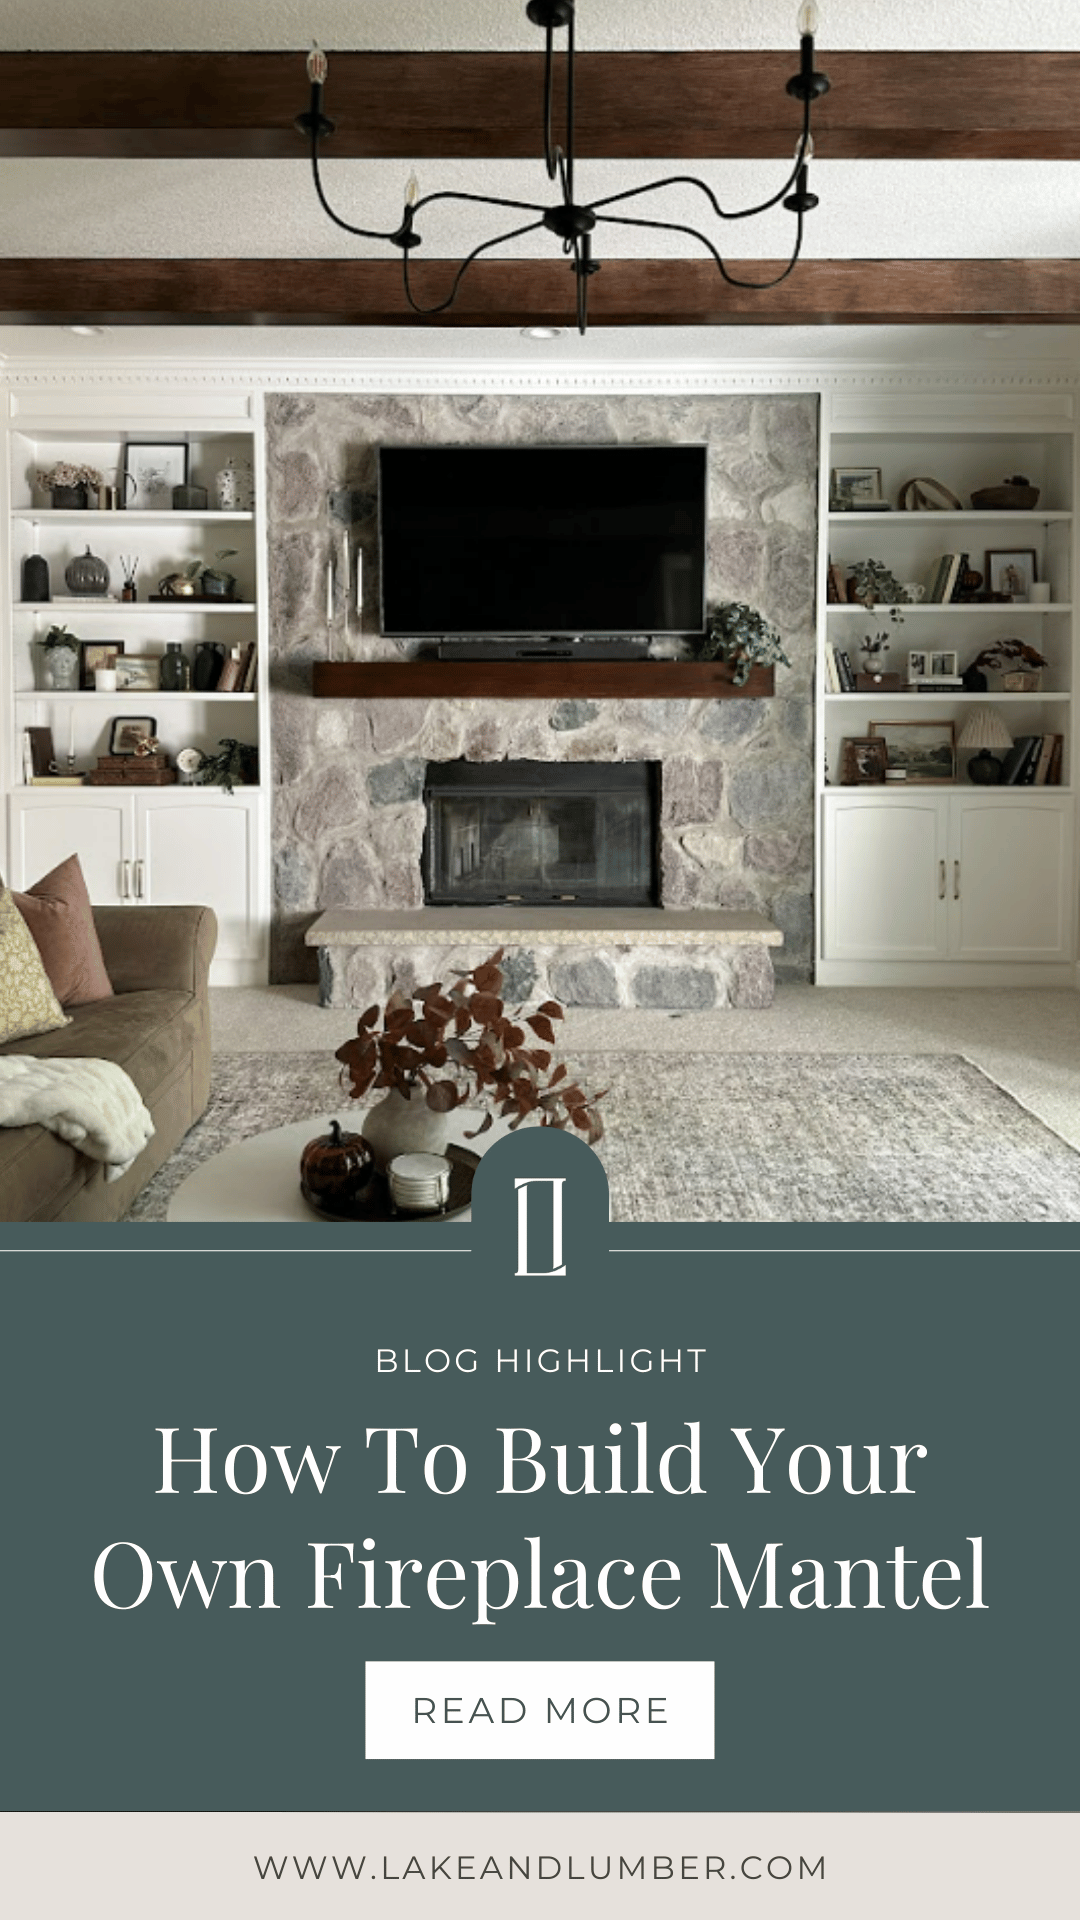
DIY Fireplace Mantel
This project started with a piece of neglected plywood that I had sitting in my garage, and I knew it had potential! Like any DIY project, the hardest part was getting started. But after a delayed start and a few unexpected life events, I remembered that picking up a saw can be surprisingly therapeutic.

How to Build a Fireplace Mantel
This DIY fireplace mantel was a fairly easy project to build from start to finish, and the end result was absolutely perfect.
Are you feeling ready to transform your fireplace by building your own mantel? Let’s break down each step on how to create a beautiful and functional DIY fireplace mantel!
1. Measure and Select Wood
Start by measuring your fireplace to determine what size of mantel would look best in your space. Since there is no standard fireplace size, I can’t give you an exact length here. However, the standard recommendation is to have a mantel 3-4 inches longer on each side of the fireplace box.
Also when measuring, consider the depth and thickness of your fireplace mantel. For example, the measurements for my fireplace mantel were 79″ long, 6″ tall, and 9″ deep.
To make this “floating” mantel style, you’ll need to construct a box (with one side missing). To make this box, cut the wood into 5 pieces:
- 2 pieces of equal length and width. The width here will be the depth of your mantel, so make sure it is wide enough to set your desired decor on!
- 1 piece of equal length as the first two but with a different width (depending on desired height)
- 2 pieces to be the end caps. If you’re a visual learner, look at the picture below to help!
Now that you know how much wood you’ll need to make this DIY fireplace mantel, head to Home Depot or Lowe’s to pick out the wood. All you need is a sheet of ½” plywood and a 2×4. If you need help selecting your wood, be sure to check out my post all about choosing project wood. If you have already tackled a custom DIY closet build you may have the perfect amount of plywood lying around already!
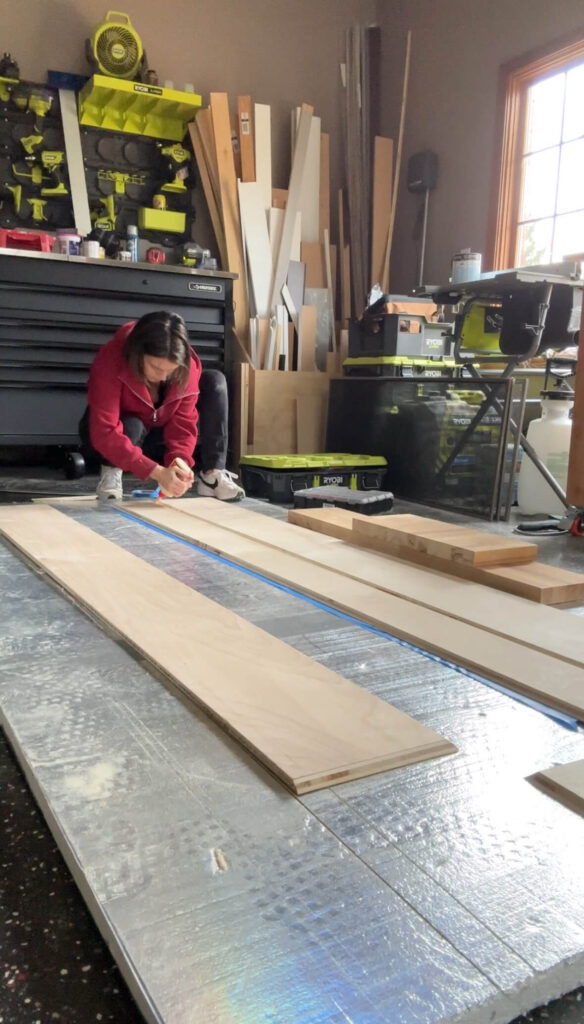
2. Cut the Wood
Once you have your saw and plywood, it’s time to cut the 5 pieces that will make up the mantel. I freehanded my cuts, but that was super tricky. I’d highly recommend using a Kreg Rip-Cut, but you could also use a Ryobi miter saw instead.
To make sure these pieces go together seamlessly, cut the pieces of wood at a 45-degree angle. Make sure to take your time and measure correctly to ensure that your cuts will line up nicely together when assembling. These 45-degree cuts can be hard, so just be patient with yourself!
3. Assemble the Mantel
Next, assemble the pieces using wood glue, painter’s tape, and a Ryobi 18 gauge nail gun. Lay the wood pieces flat on the ground and arrange them so they’re next to the pieces they will connect with. Then, add painter’s tape to the outside of the pieces on the seams where the pieces will connect. That way when you’re gluing the two pieces together, the tape helps to keep everything aligned.
After applying wood glue to all of the edges and assembling the pieces, place nails along the seams to ensure a strong fireplace mantel. Then, remove the tape.

4. Fix Any Cosmetic Issues
After you’ve removed the tape, you might notice some gaps or imperfections. Don’t panic! The first trick to correct small gaps on the edges is to turn a screwdriver on its side and run it down the seam with light to medium pressure. This will quickly fill most gaps! If you still have a gap, you can use stainable wood filler to correct it. Stainable wood filler is an easy solution to filling in those unwanted gaps. After applying wood filler, let it dry and then sand the area smooth.
Remember, most DIY projects look worse before they get better, so trust the process!
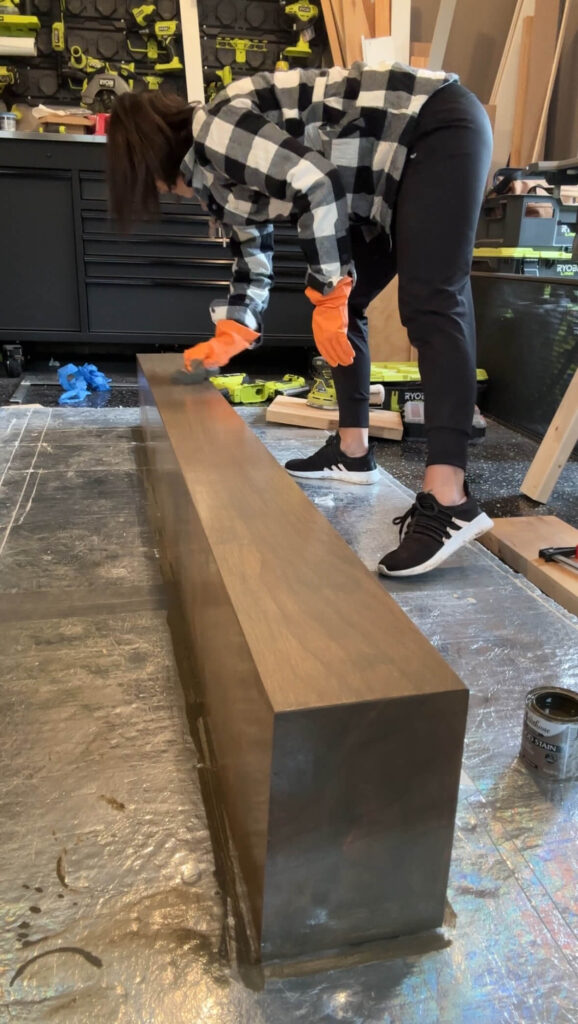
5. Stain the Mantel
Now it’s time to give your mantel some character. Start by applying a pre-stain to ensure an even finish. I used this pre-stain from Minwax with a basic black foam brush, which made the process simple. Wipe off the pre-stain after about 5-10 minutes, and then you’re ready to stain!
For the stain, I initially used Minwax Classic Grey Wood Stain followed by a coat of Minwax Early American Wood Stain and then another coat of Minwax Dark Walnut to achieve the perfect color. It took a bit of trial and error, but I finally ended up with the color and tone I was going for. To apply the stain, I used these staining pads and white shop rags–so much better than paper towels!
Also, don’t forget to protect your hands with disposable nitrile gloves before doing any staining projects!
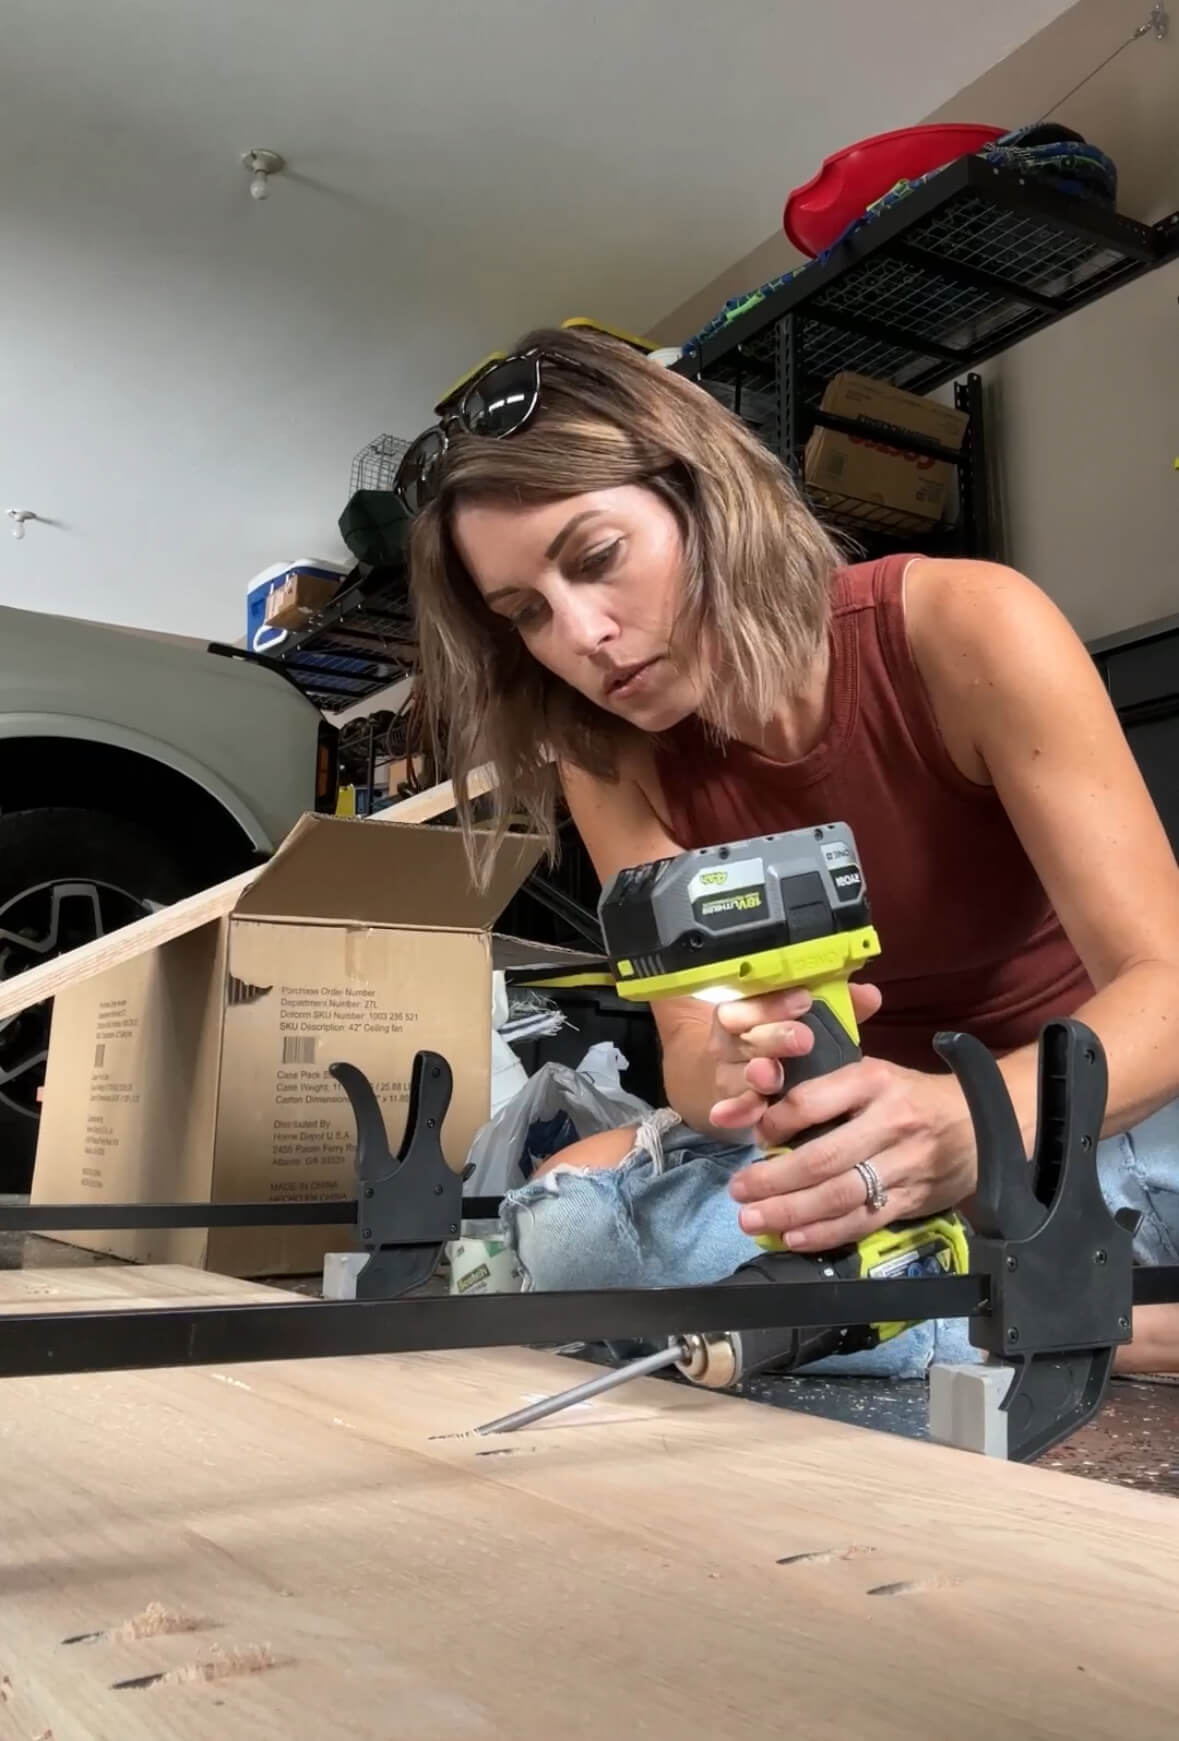
6. Build the Frame
While your mantel dries, you can start building the frame!
To construct the frame, cut a 2×4 a few inches shorter than your mantel length so it will fit snugly inside the length of your mantel. This is the flat piece that will be attached to your fireplace. Next, cut 4 more pieces of 2×4 that you will attach perpendicular to the long 2×4. The length of these shorter pieces should be the depth of your mantel minus 3 ½”. Attach these to your long 2×4, evenly spaced, using 4” screws and wood glue. When you’re done, it’ll look like the picture below.
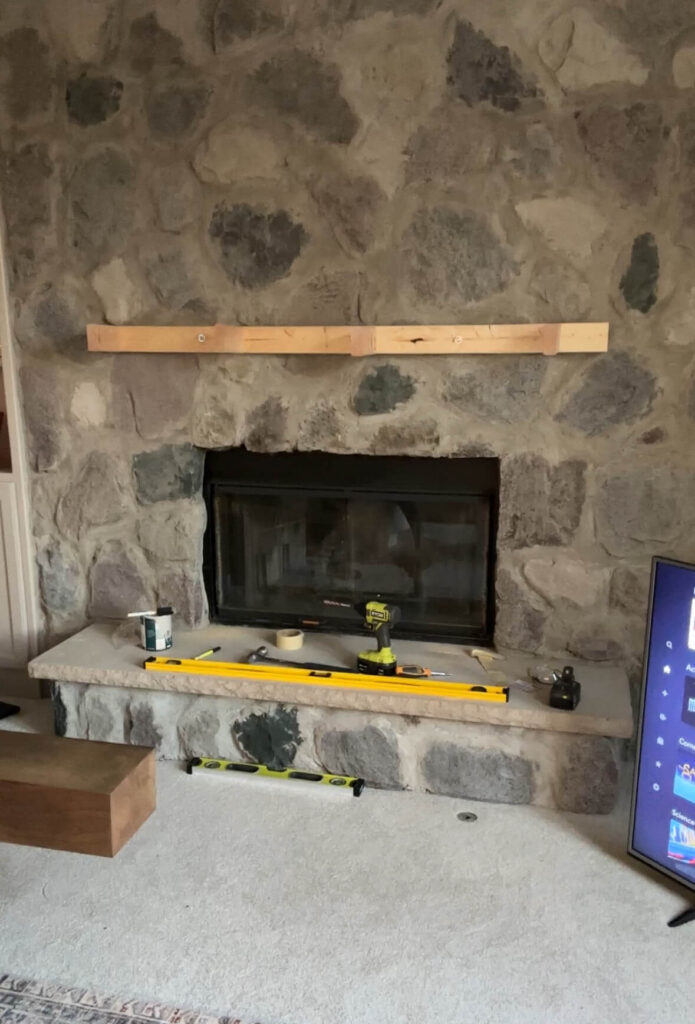
Quick tip: Always keep a stash of extra screws from old projects. I was able to use screws from previous projects when building this frame!
Before installing, make sure your mantel slides directly over the frame. Then, secure the 2x4s to the fireplace with heavy-duty bolts and wedge anchors.
7. Install the Mantel
With the frame in place, it’s time to install the mantel. If you have a stone fireplace like me, drill into the mortar (not the stone!) using a concrete drill bit. Then, slide the mantel over the frame, center it, and use 4 screws to attach it securely to the frame.
And there you have it—your mantel is up and looking fabulous!
Products Needed for a DIY Fireplace Mantel
Ready to get started with this fun project? Grab all the materials below!
- Concrete drill bit
- Foam paint brush
- Kreg Rip-Cut
- Nitrile gloves
- Measuring tape
- Minwax Classic Grey Stain
- Minwax Early American and Dark Walnut Stain
- Minwax Pre-Stain
- Painter’s tape
- Ryobi miter saw
- Ryobi 18-gauge nail gun
- Ryobi drill
- Sheet of plywood
- Staining pads
- Stainable wood filler
- Wedge anchors
- White shop rags
- Wood glue
Building a Fireplace Mantel
Building a fireplace mantel seemed impossible at first, and it took me a while to hype myself up into doing it. But once I started, I realized it was so much easier than I thought. Truly, the hardest part of any project is starting!
With the right tools and patience, you can achieve a professional-looking DIY fireplace mantel. Most DIY projects look worse before they look better, so embrace the process and enjoy the transformation.
If you’re ready to start your next DIY project, check out these easy, how-to beginner tutorials:
And of course, make sure to follow me on Instagram and Facebook for all my latest projects!