
Jump to Supply List
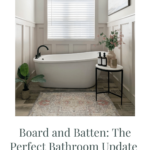
If you’ve been wanting a major upgrade to your bathroom, I can’t recommend trying your hand at board and batten enough. It adds depth, dimension, and warmth to your space, and it’s fully customizable. My DIY board and batten bathroom is still one of my favorite projects, and it’s a great one for beginner DIYers!
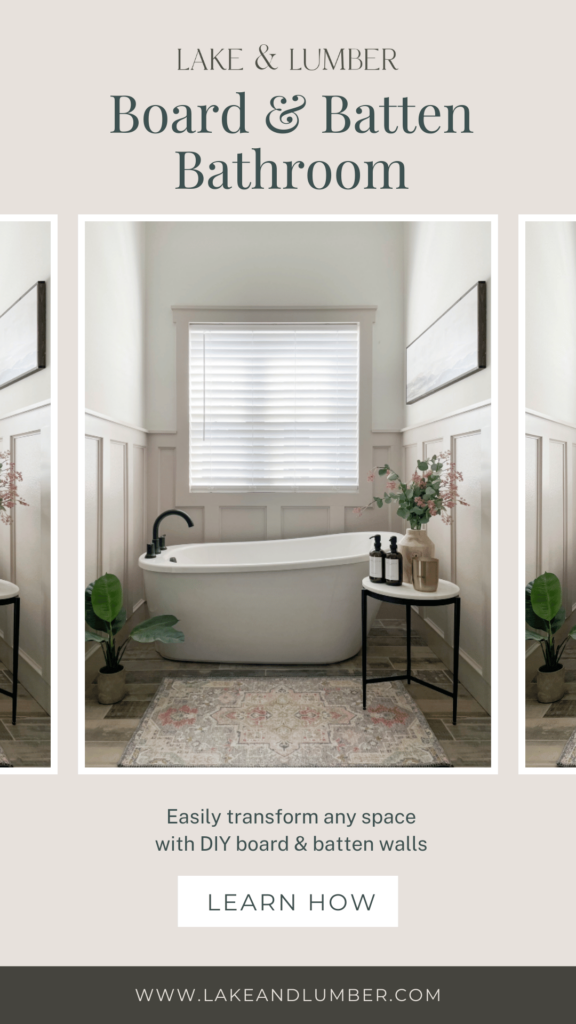
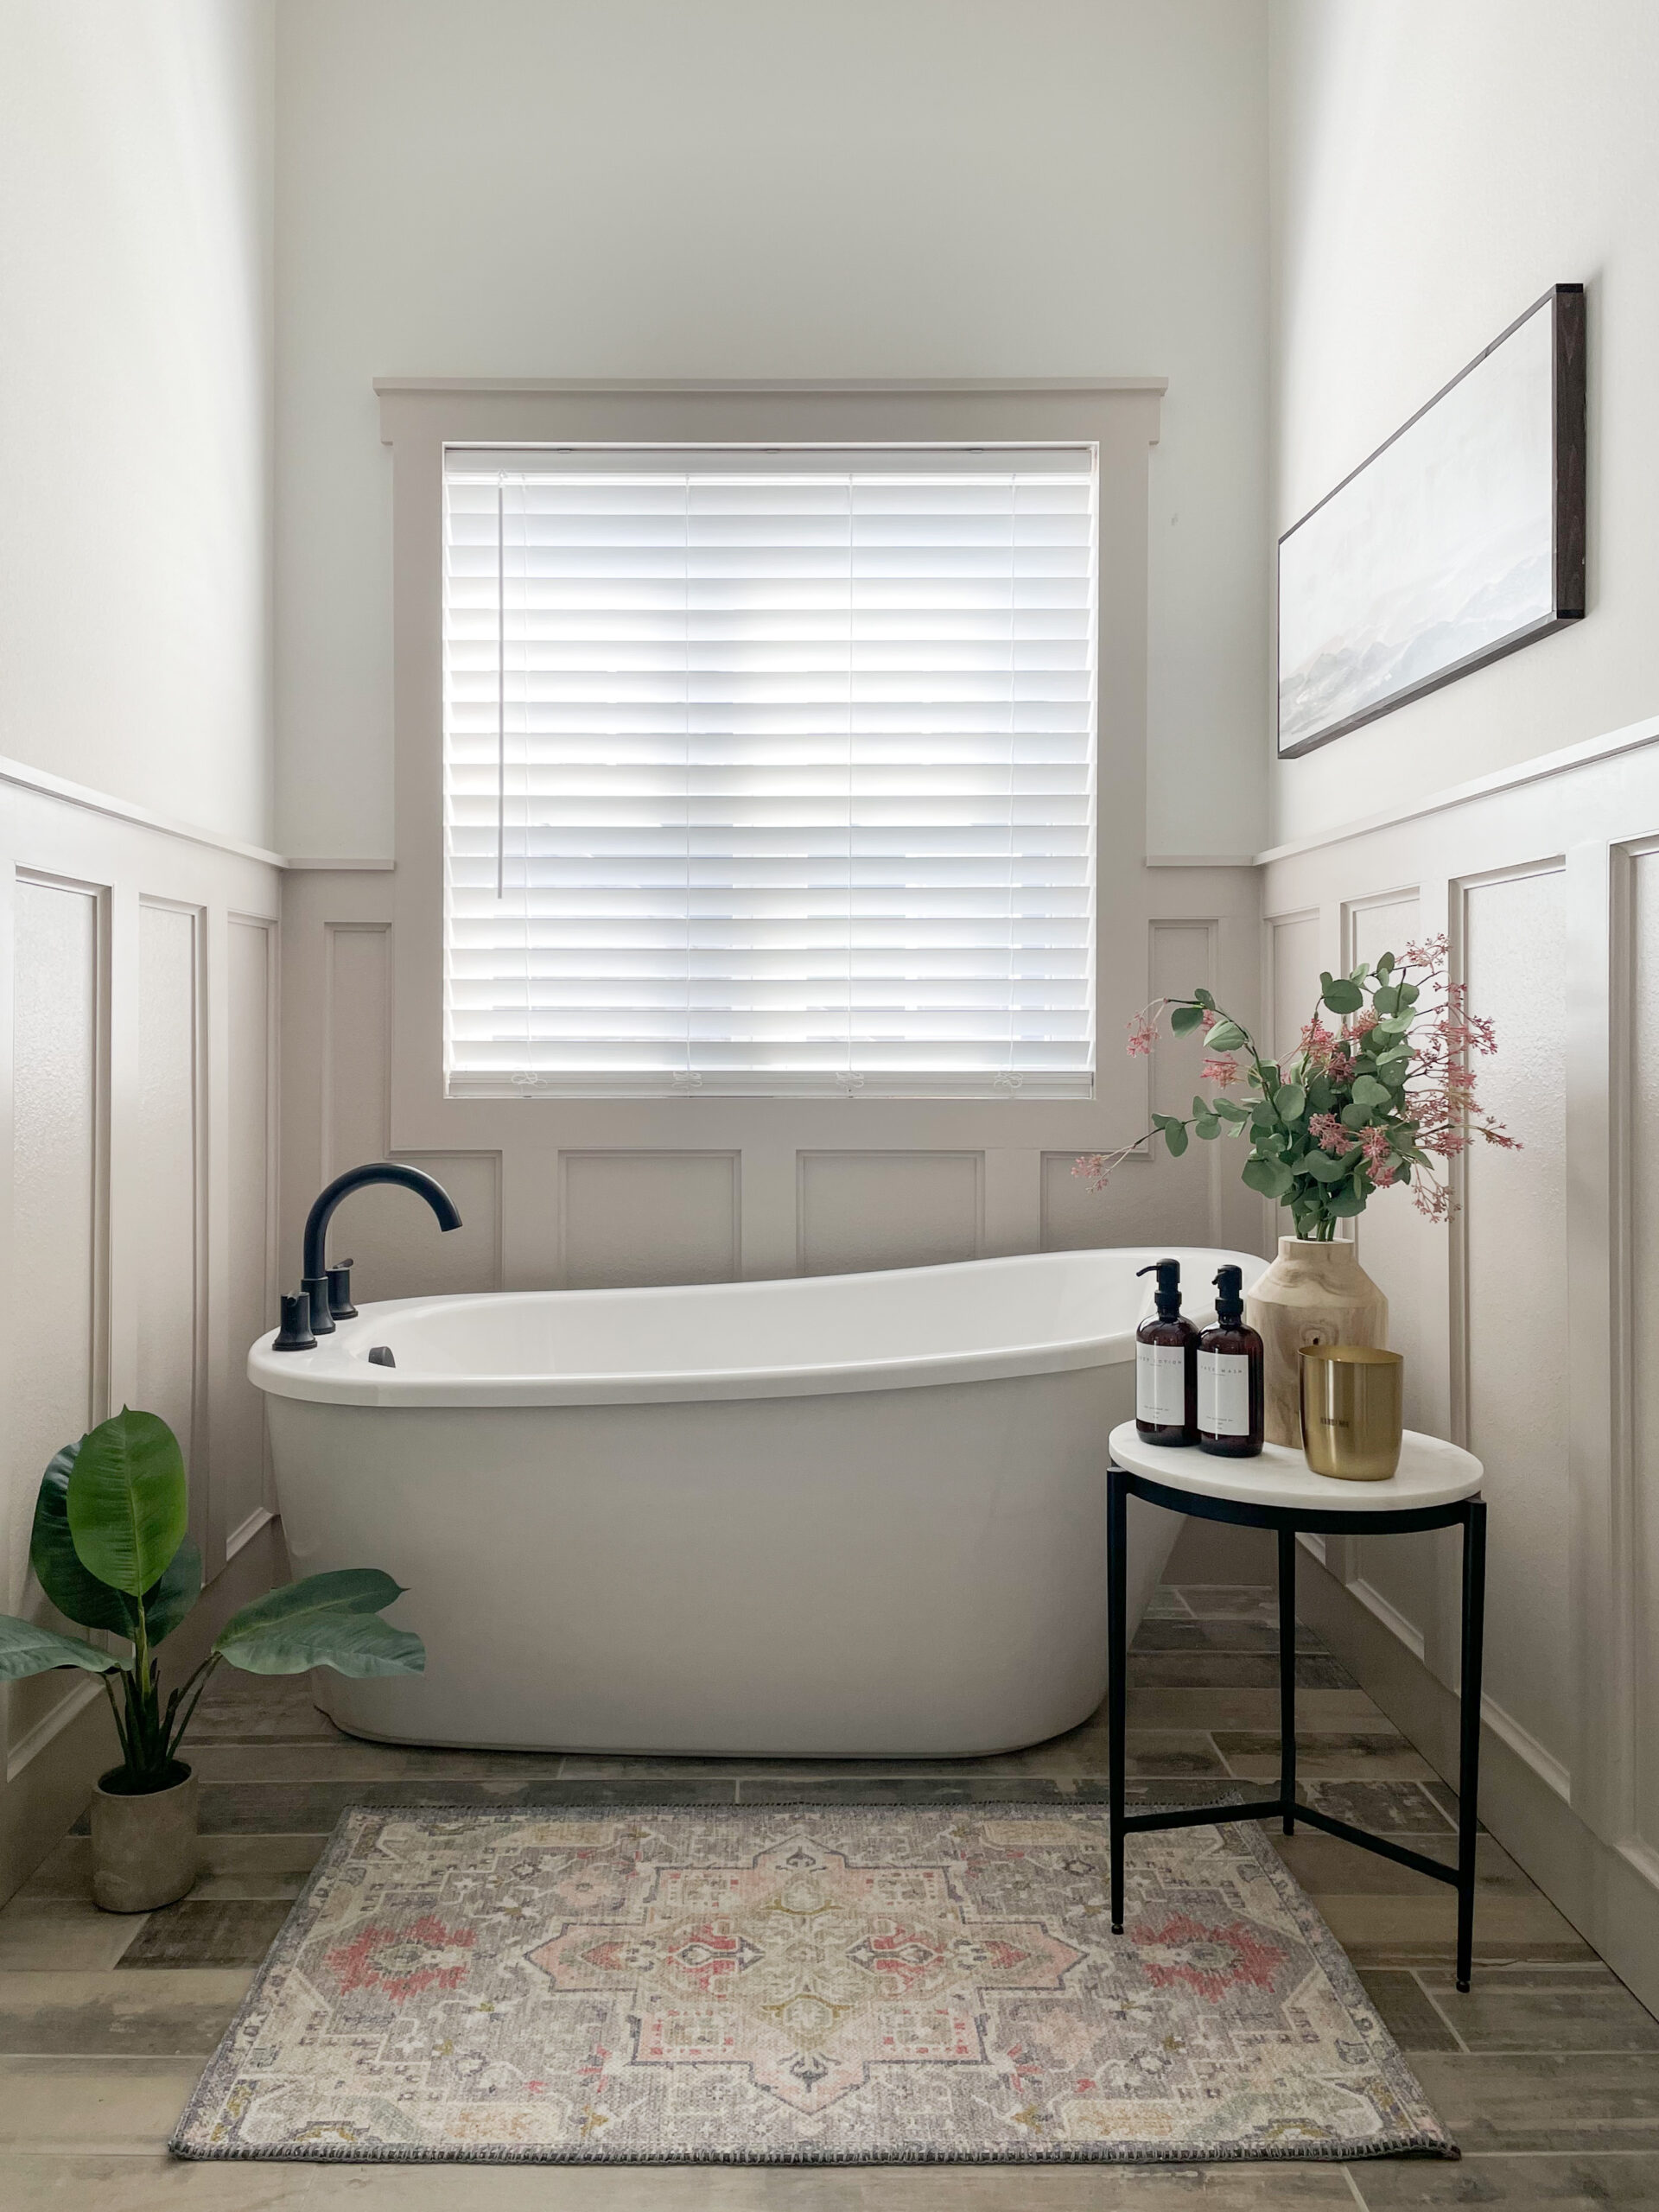
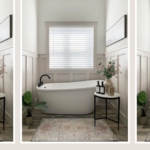
Board and Batten Bathroom Walls
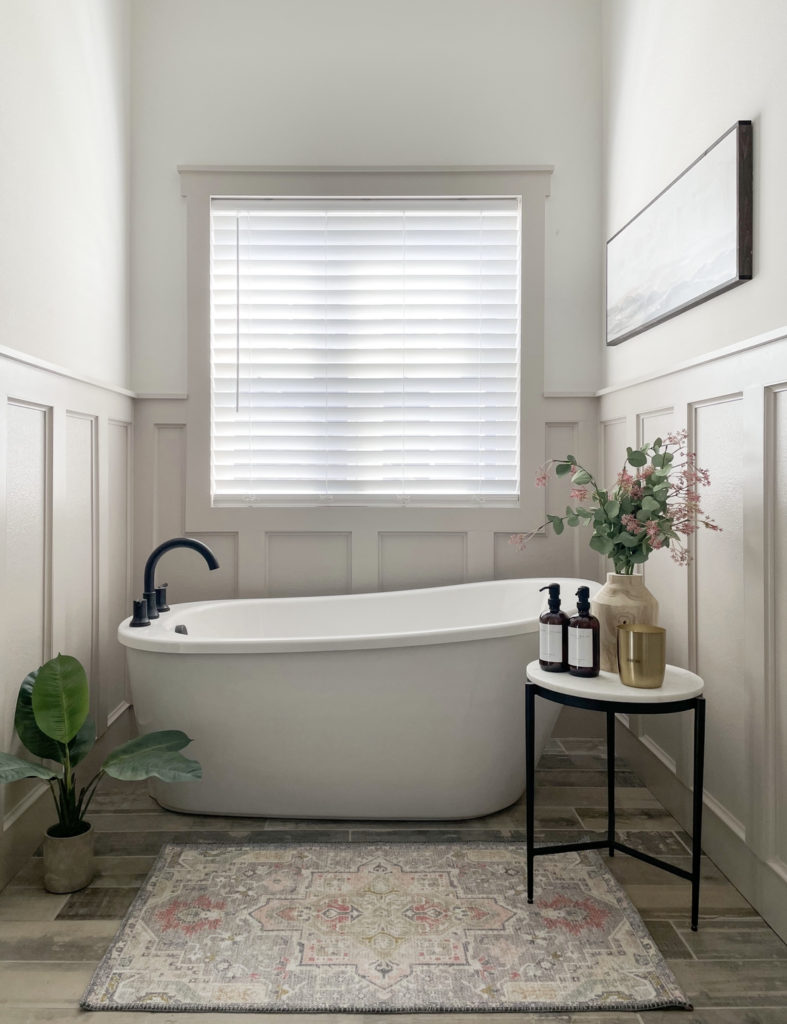
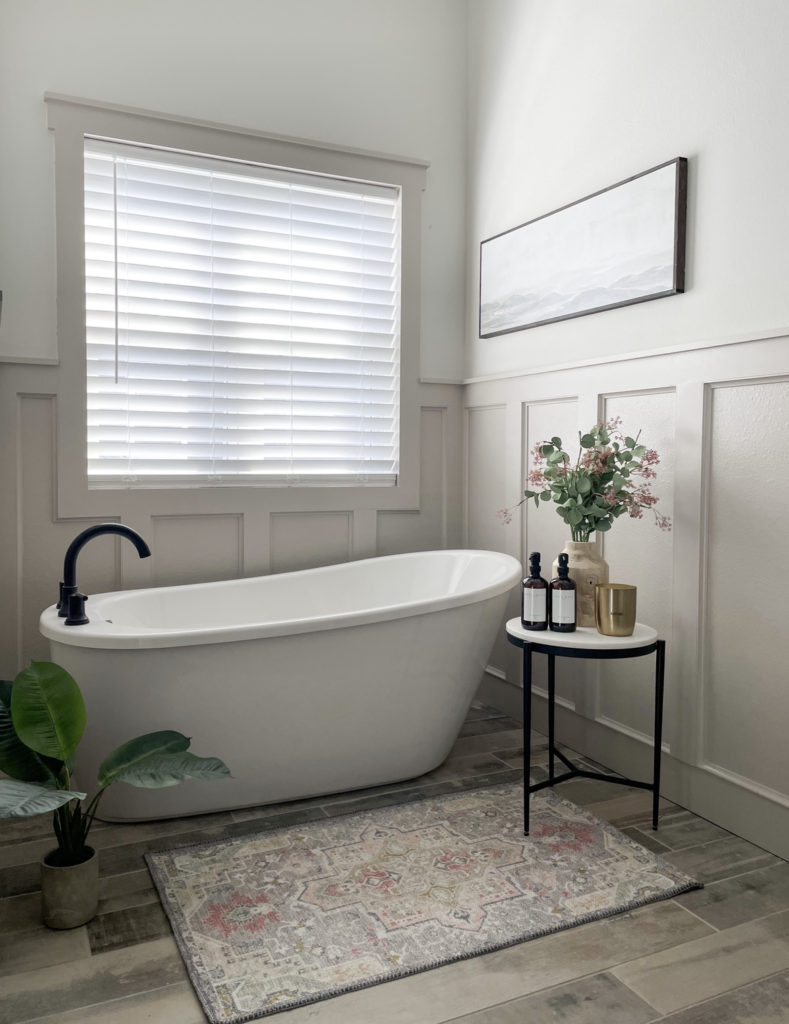
Our master bathroom has this little “alcove” where the stand-alone tub sits and it has always seemed “unfinished” to me. I remember when we were running through the plans for the house, there was an option to extend the floor tile up behind the tub, but not only was it pricey, it wasn’t going to give me the modern traditional vibe I was hoping for. If there is one thing I have learned during the building of two houses it is this: don’t pay for something you won’t love just because the builder doesn’t offer what you DO love!
So I waited. A year and a half later, I finally had a vision for the space and it included a classic board and batten with a rich color that would give the space a relaxing feel.
When I stumbled upon the paint color Elephant’s Breath by Farrow & Ball, I knew that I was heading in the right direction! It paired well with my existing wall color, City Loft (SW), and complemented the wood look tile on the floor. I would paint the board and batten AND all of the trim this warm, saturated color while leaving the rest of the walls this creamy off-white.

My bathroom “alcove” when we moved in.
Wood for Board and Batten Bathroom
Because this is a bathroom and there is often moisture, I opted to use select pine boards for the board and batten and window trim. Under normal (less wet) circumstances, I use primed MDF boards which are less costly, however, they are very susceptible to moisture and are a poor choice for this project.
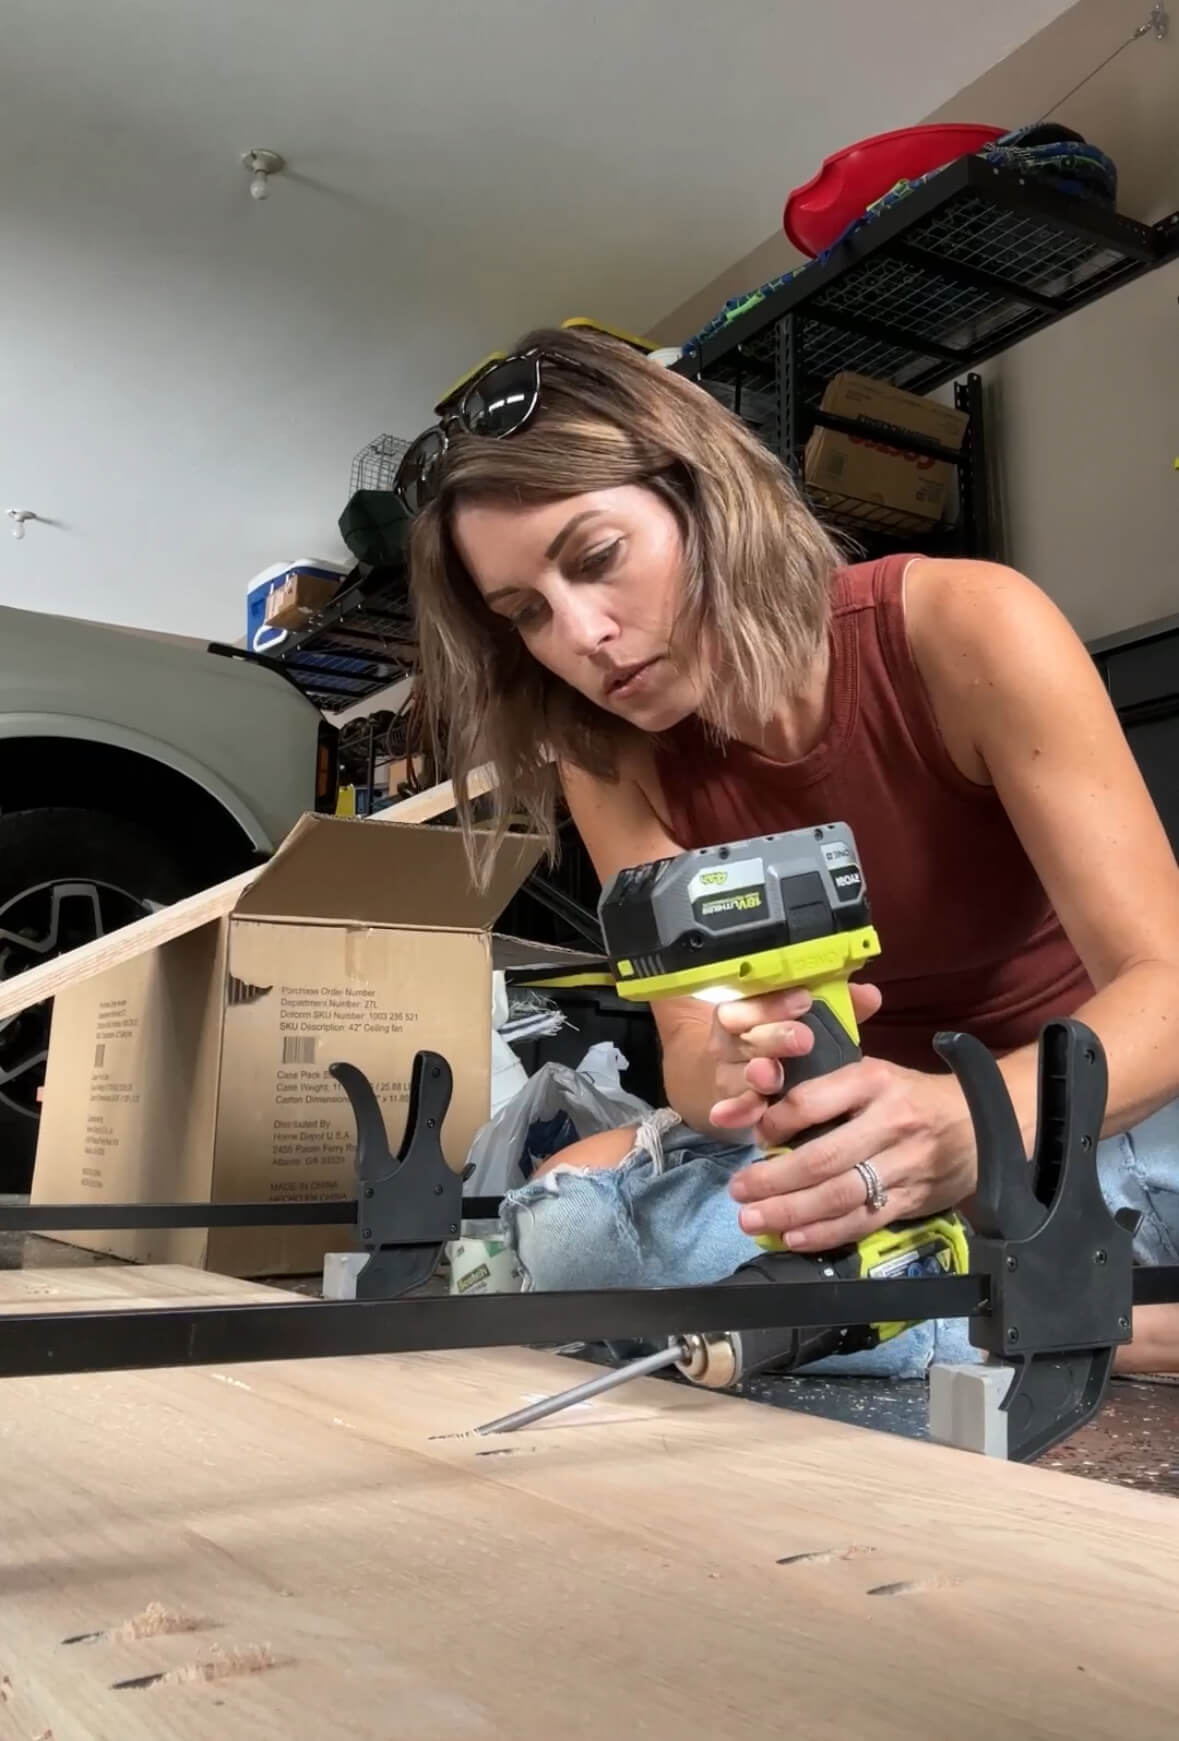
I purchased 1×4 boards for the vertical and horizontal portions of the B&B/window trim and chose a 1×2 piece as a cap on both. I also decided to add a decorative trim piece inside of each “box” for a more classic style. This trim is PVC and can be cut using these miter sheers.
If you’re new to DIY and need some help selecting the right wood for your project, be sure to check out my blog post about How to Choose the Best Project Wood for Your DIY.
How to Install Board and Batten in the Bathroom
Once you have your wood selected, you’re ready to get started on this project! Here’s how to install board and batten in the bathroom.
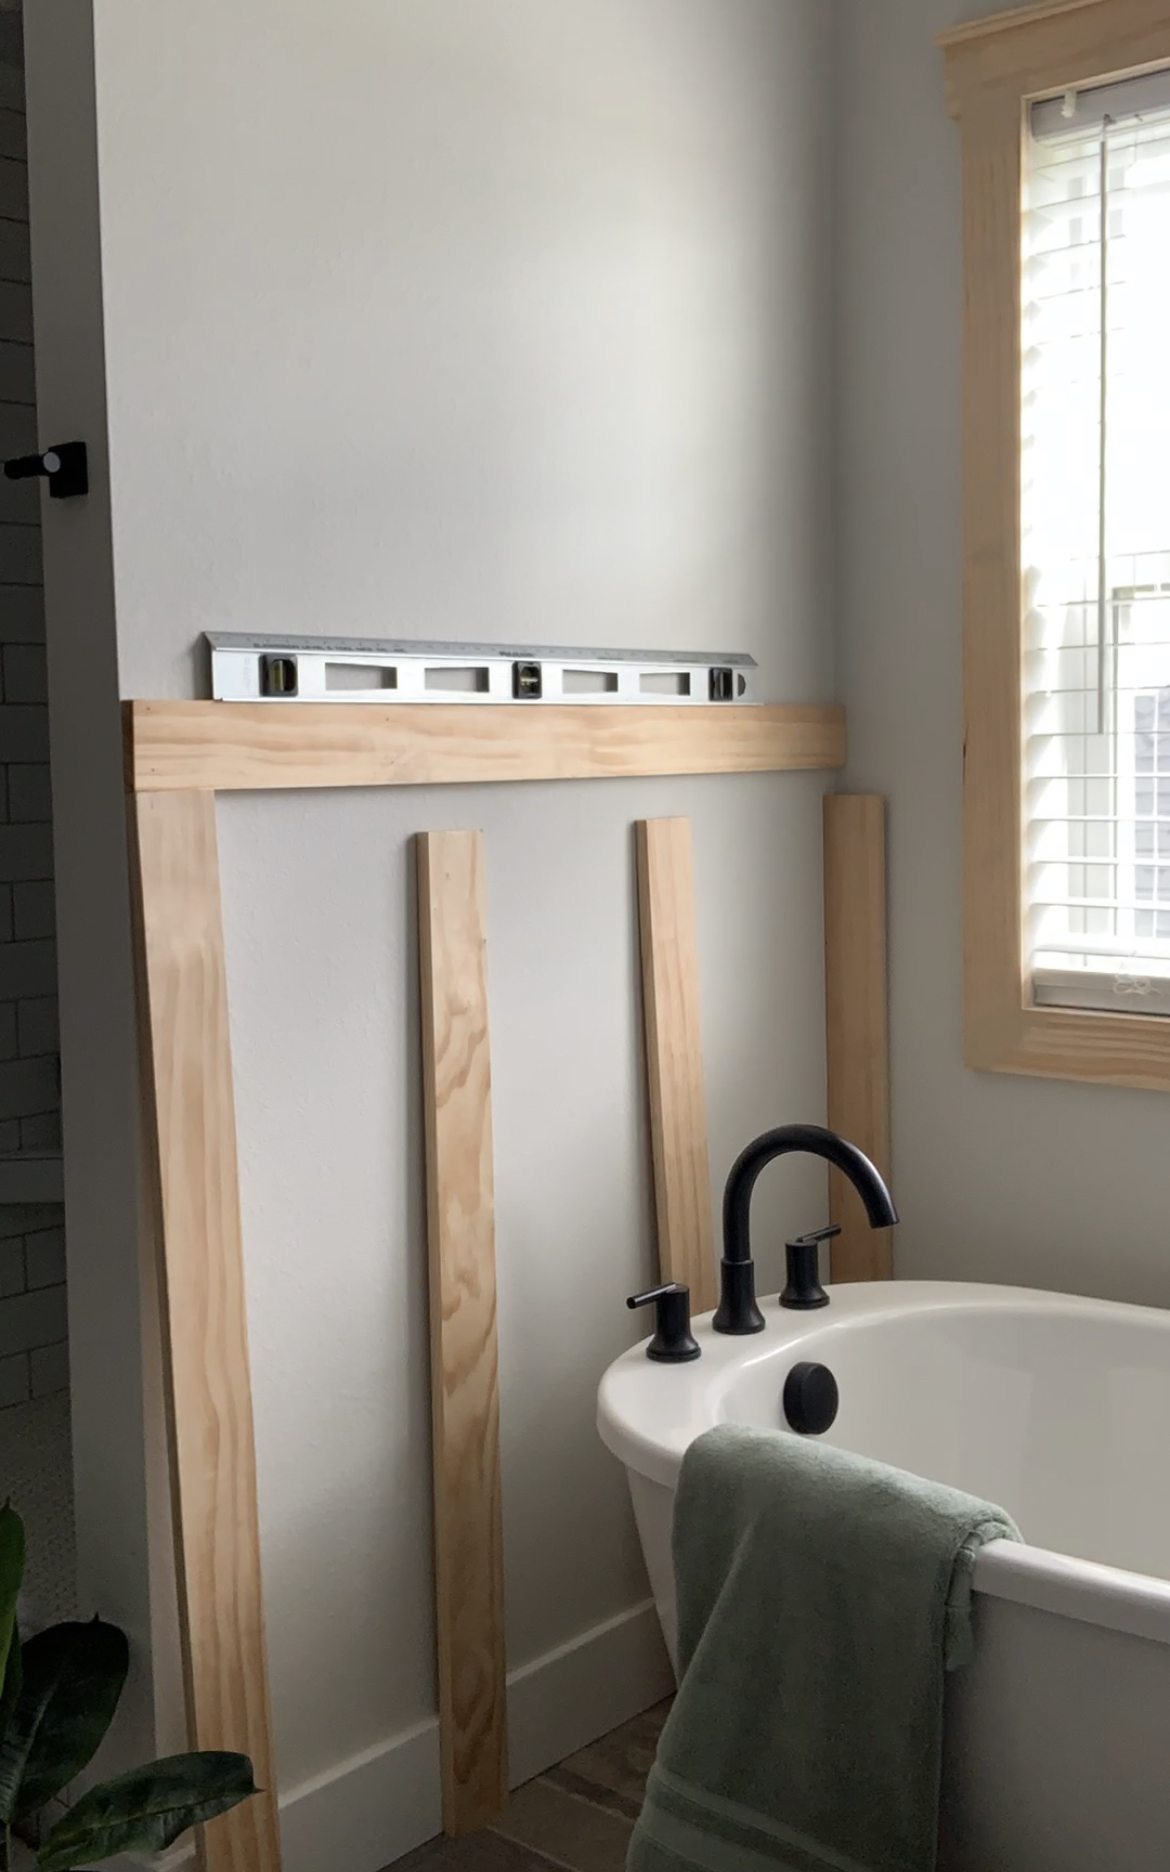
1. Determine Spacing
I always get asked how I determine the spacing for my board and batten projects and the honest answer is…I just eyeball it!
Start by laying out your boards and see what appeals to your eye. Once you have a general idea of how many boards you want for each wall, measure things out and get as close to even spacing as you can. You will rarely be able to have exact spacing, but this type of trim work is very forgiving, and small differences (an inch and a half or less) will not be noticed.
2. Cut the Wood
Since we are using select pine 1x4s for this project, there are very few cuts involved! Cut each board to size. I had 6″ baseboards and decided to cut my boards to 4ft (which allowed me to get two battens from each 8ft board). When you are adding the top rail, you will want to make angled cuts for each corner, and for that reason, I highly suggest a miter saw for this project. When cutting your inside trim pieces, you can use a pair of miter sheers.
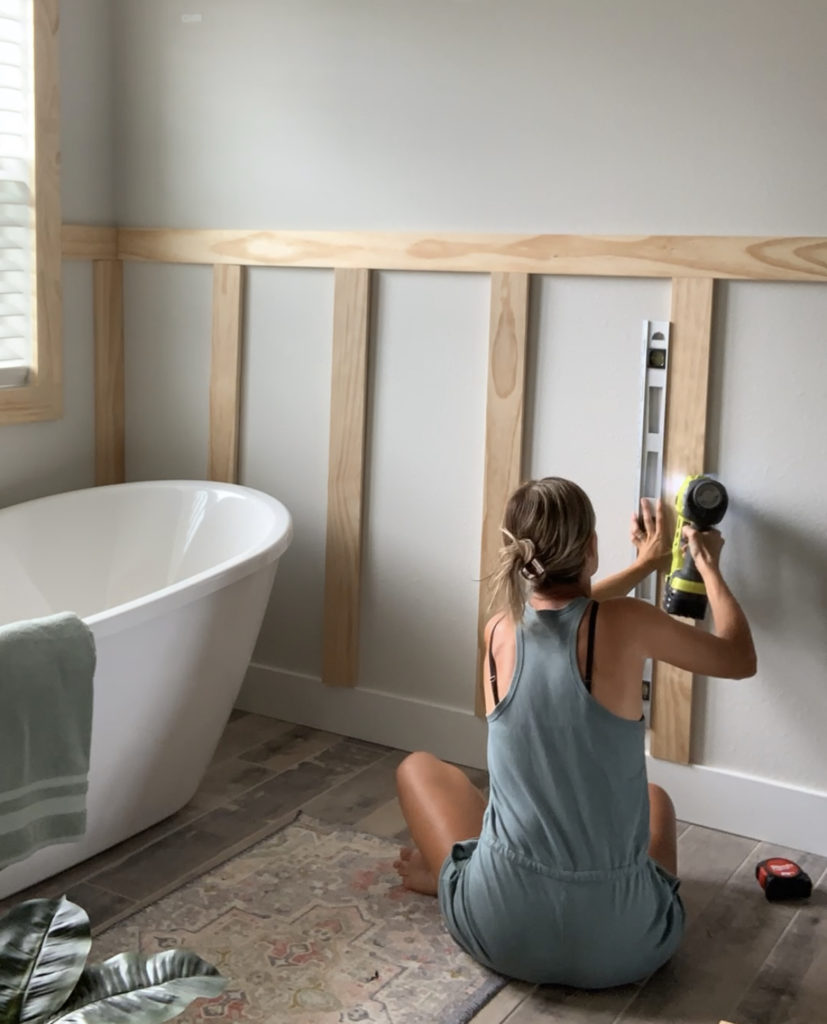
2. Install the Board and Batten
Attach your boards to the wall using a nail gun and 1 1/2in brad nails. If you are new to DIY and would like to know what tools to invest in, check out my post for the best tools for DIY beginners.
When installing board and batten in the bathroom, you do not need to hit a stud. Instead, angle your nail gun back and forth (shooting one nail slightly left and the next slightly right) to lock in the boards. Be sure to use a level to keep your boards aligned!
3. Fill the Nail Holes and Joints
Once your boards are attached to the wall, fill your nail holes and your joints with wood filler. Sand until you can’t feel the joint with your eyes closed. Do NOT skip this step!
Trust me when I tell you, if you can feel the joint/bump/etc with your eyes closed, you will see it once it is painted.
4. Caulk the Boards
Once you’ve filled all the nail holes and joints, it’s time to caulk! Caulk around each board where it meets the wall for a smooth and finished look.
5. Paint the Bathroom Board and Batten
Once the caulk has dried you are ready to paint! First up, use painter’s tape to tape off your board and batten and ensure crisp, clean lines. I also recommend putting down a drop cloth to prevent spills and paint drips. This all-purpose canvas drop cloth has worked well for all my painting projects.
Because I used raw wood and not primed MDF board on this project, I opted for a primer. If you are working with primed MDF you will be able to skip this step.
Prime the board and batten, and then follow up with the pain of your choice. As mentioned above, I used the paint color Elephant’s Breath by Farrow & Ball. This paint is a contemporary gray that added that warmth to my bathroom that was desperately needed.
After painting, all that’s left is to let the paint dry and add your decor!
Products Needed for a DIY Board and Batten Bathroom
Here’s a whole list of the products that you’ll need to complete this DIY board and batten bathroom from start to finish.
- All-purpose canvas drop cloth
- Level
- Miter sheers
- Nail gun
- Primed MDF boards
- Paint primer
- Paint (I used Elephant’s Breath by Farrow & Ball)
- Painter’s tape
- Select pine boards
- Wood filler
Board and Batten in Bathroom
Board and batten is the perfect “starter DIY” project, so don’t be afraid to try it! My very first solo DIY project was the board and batten in my home office! It’s an easy DIY that gives you a big bang for your buck.
If you’re ready to try your hand at some different DIY projects, check out a few fun projects below:
This board and batten bathroom project was so much fun and finally transformed my bathroom into that beautiful, completed space I wanted!


How did you handle the baseboards as I’m assuming the wood is not flush up against the baseboard. I have a decorative style base board and not sure how to do this without making it look funny.